
I'm Alex Kearney, a PhD student studying Computer Science at the University of Alberta. I focus on Artificial Intelligence and Epistemology.
I'm Alex Kearney, a PhD student studying Computer Science at the University of Alberta. I focus on Artificial Intelligence and Epistemology.
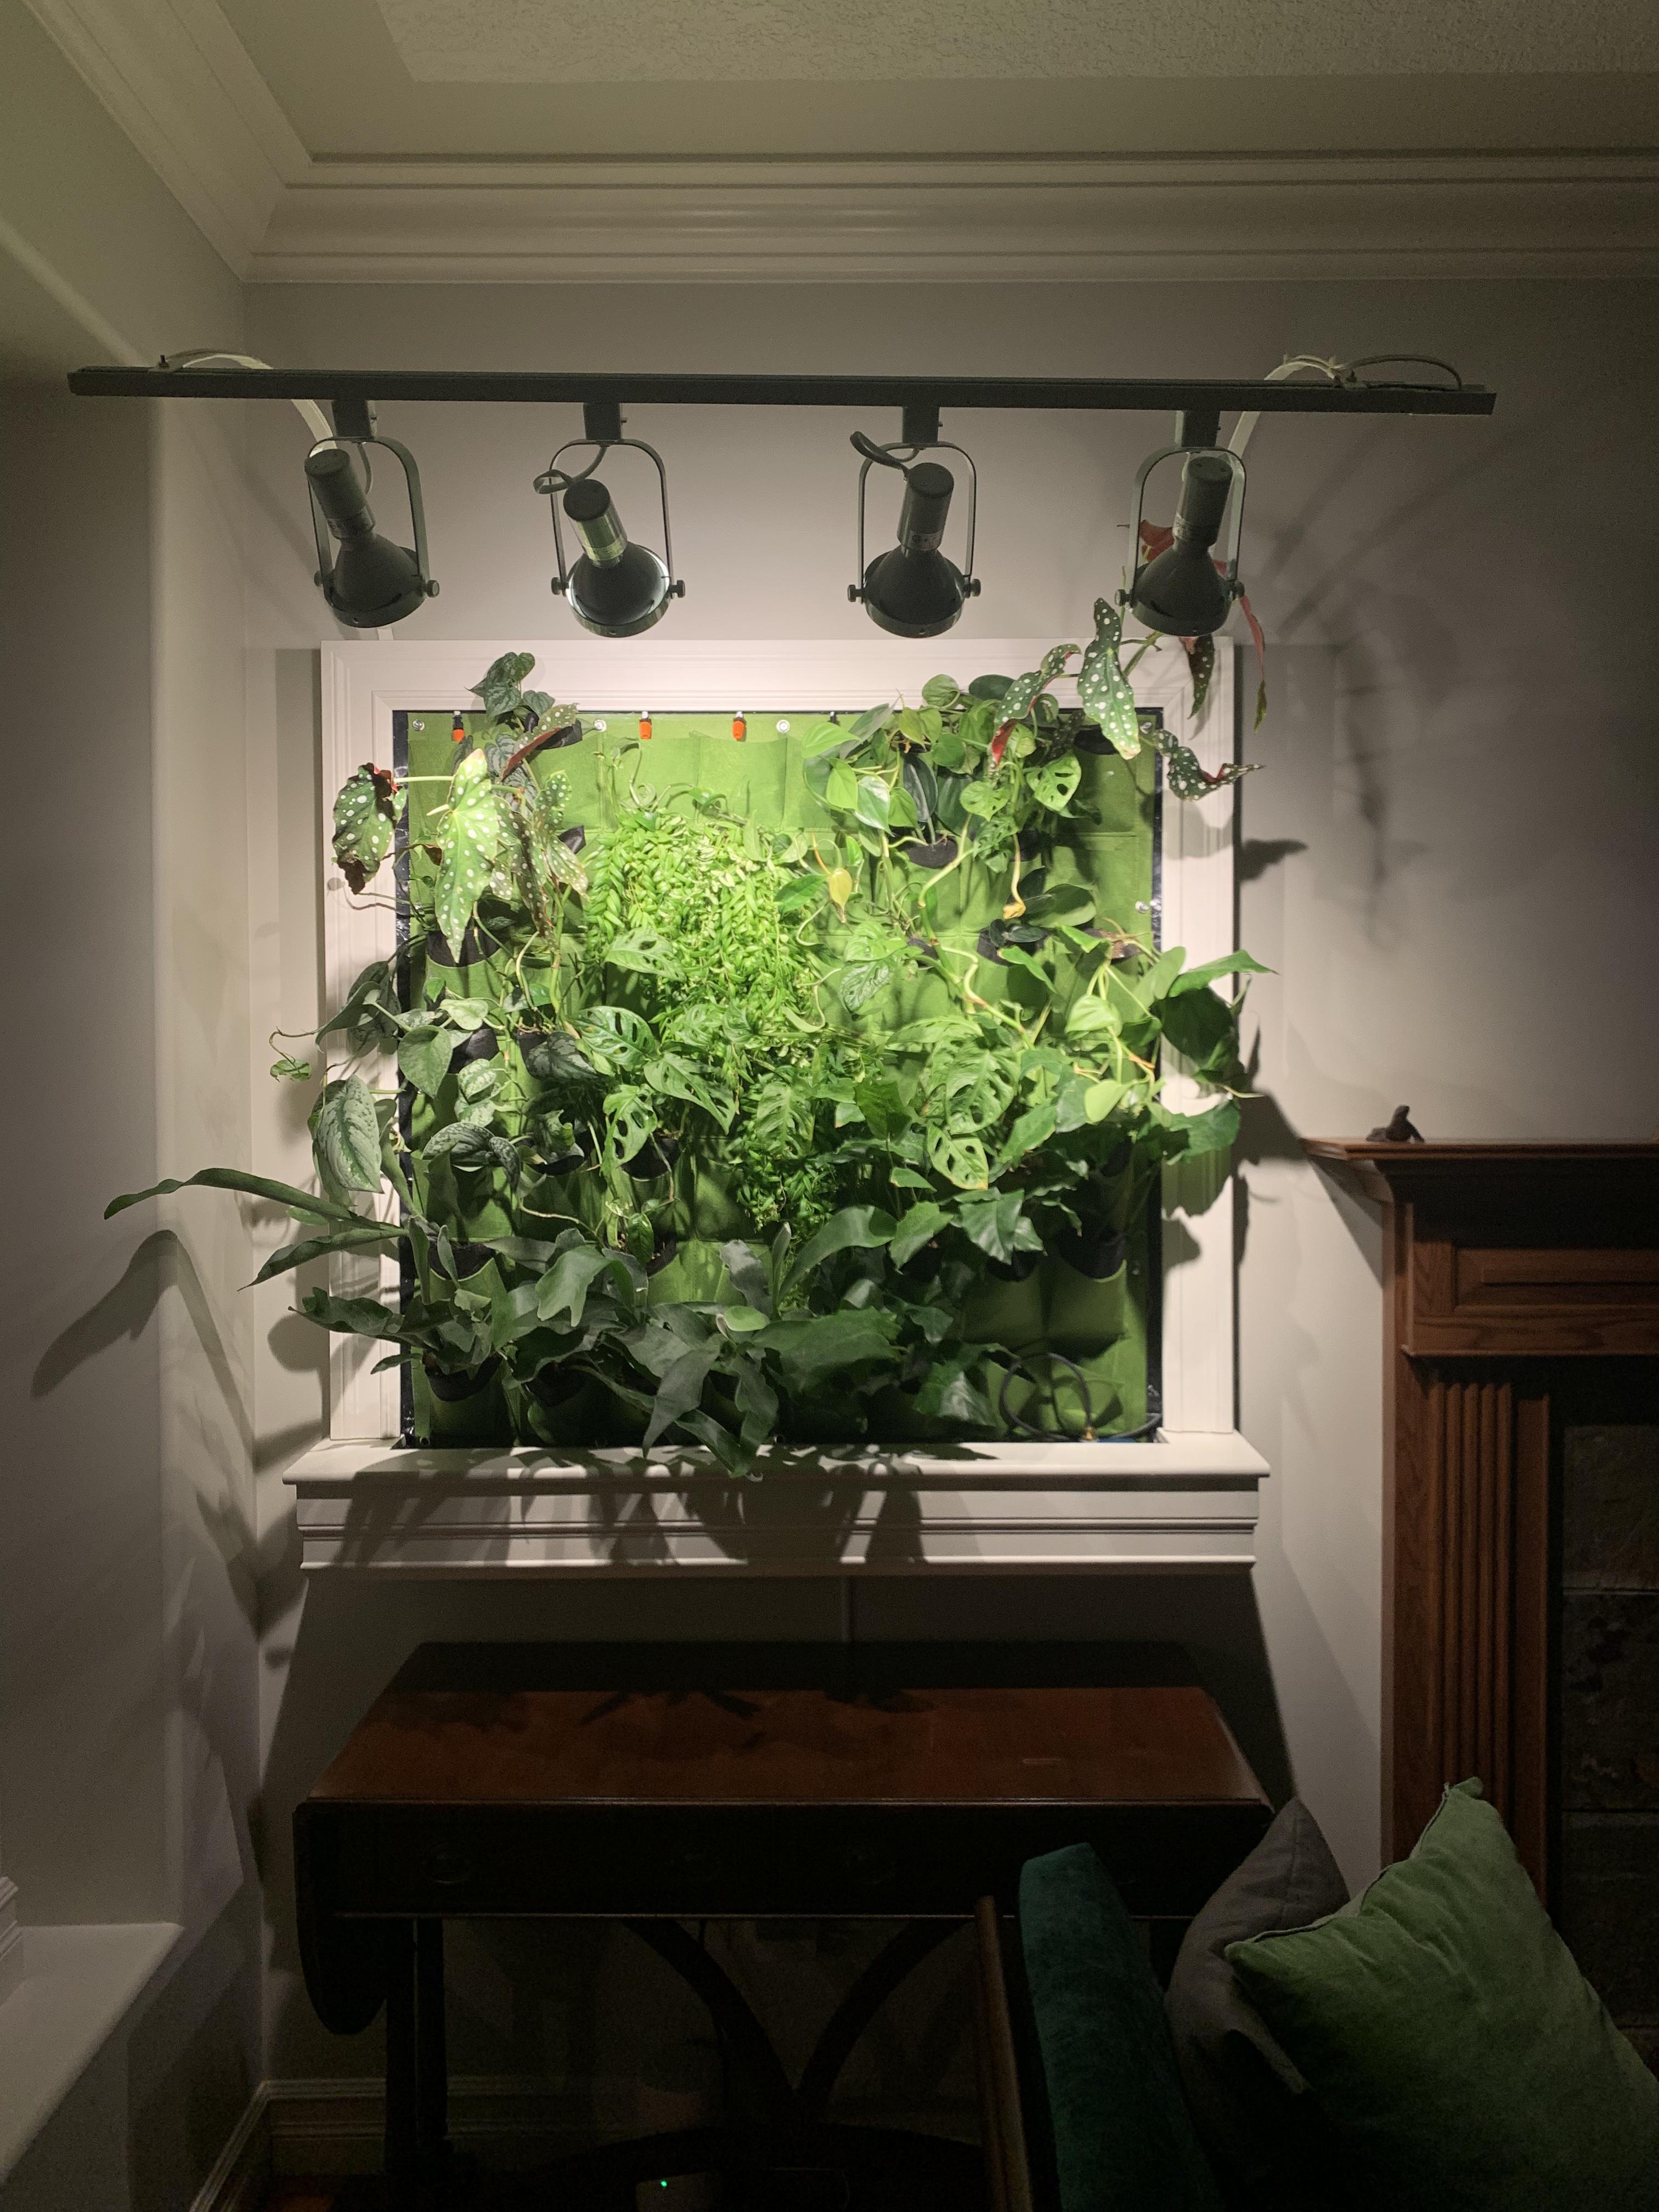
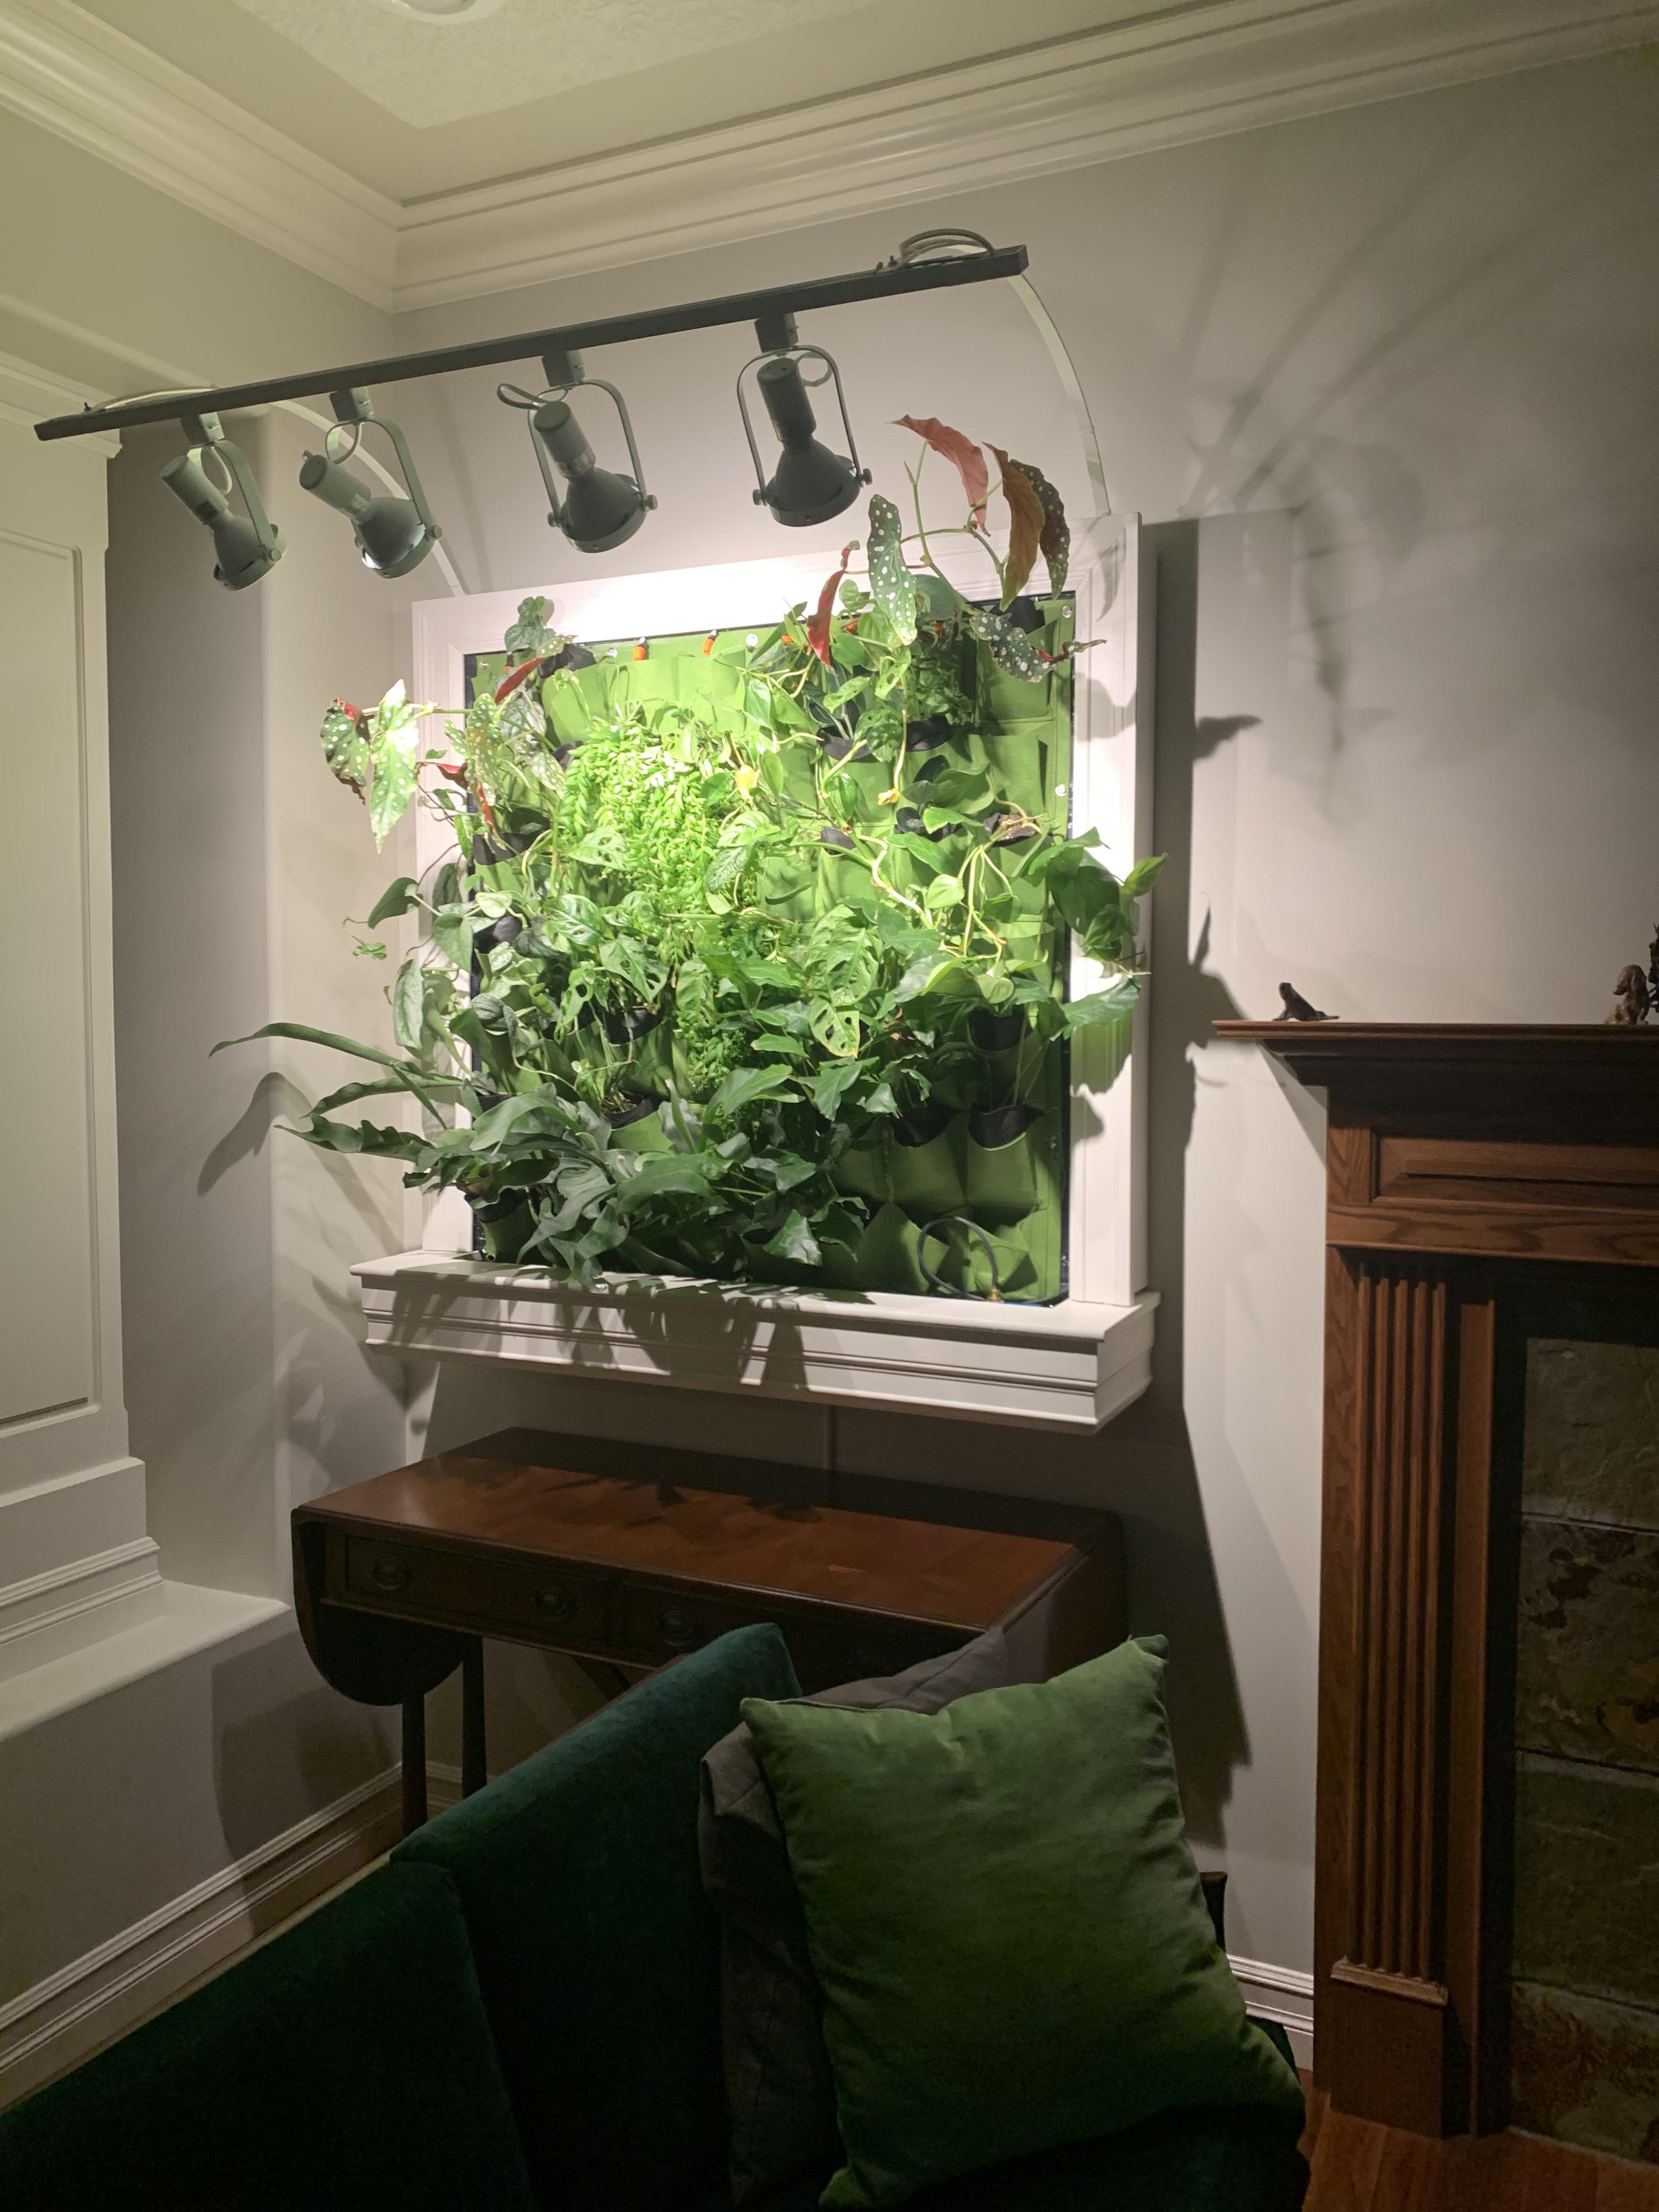
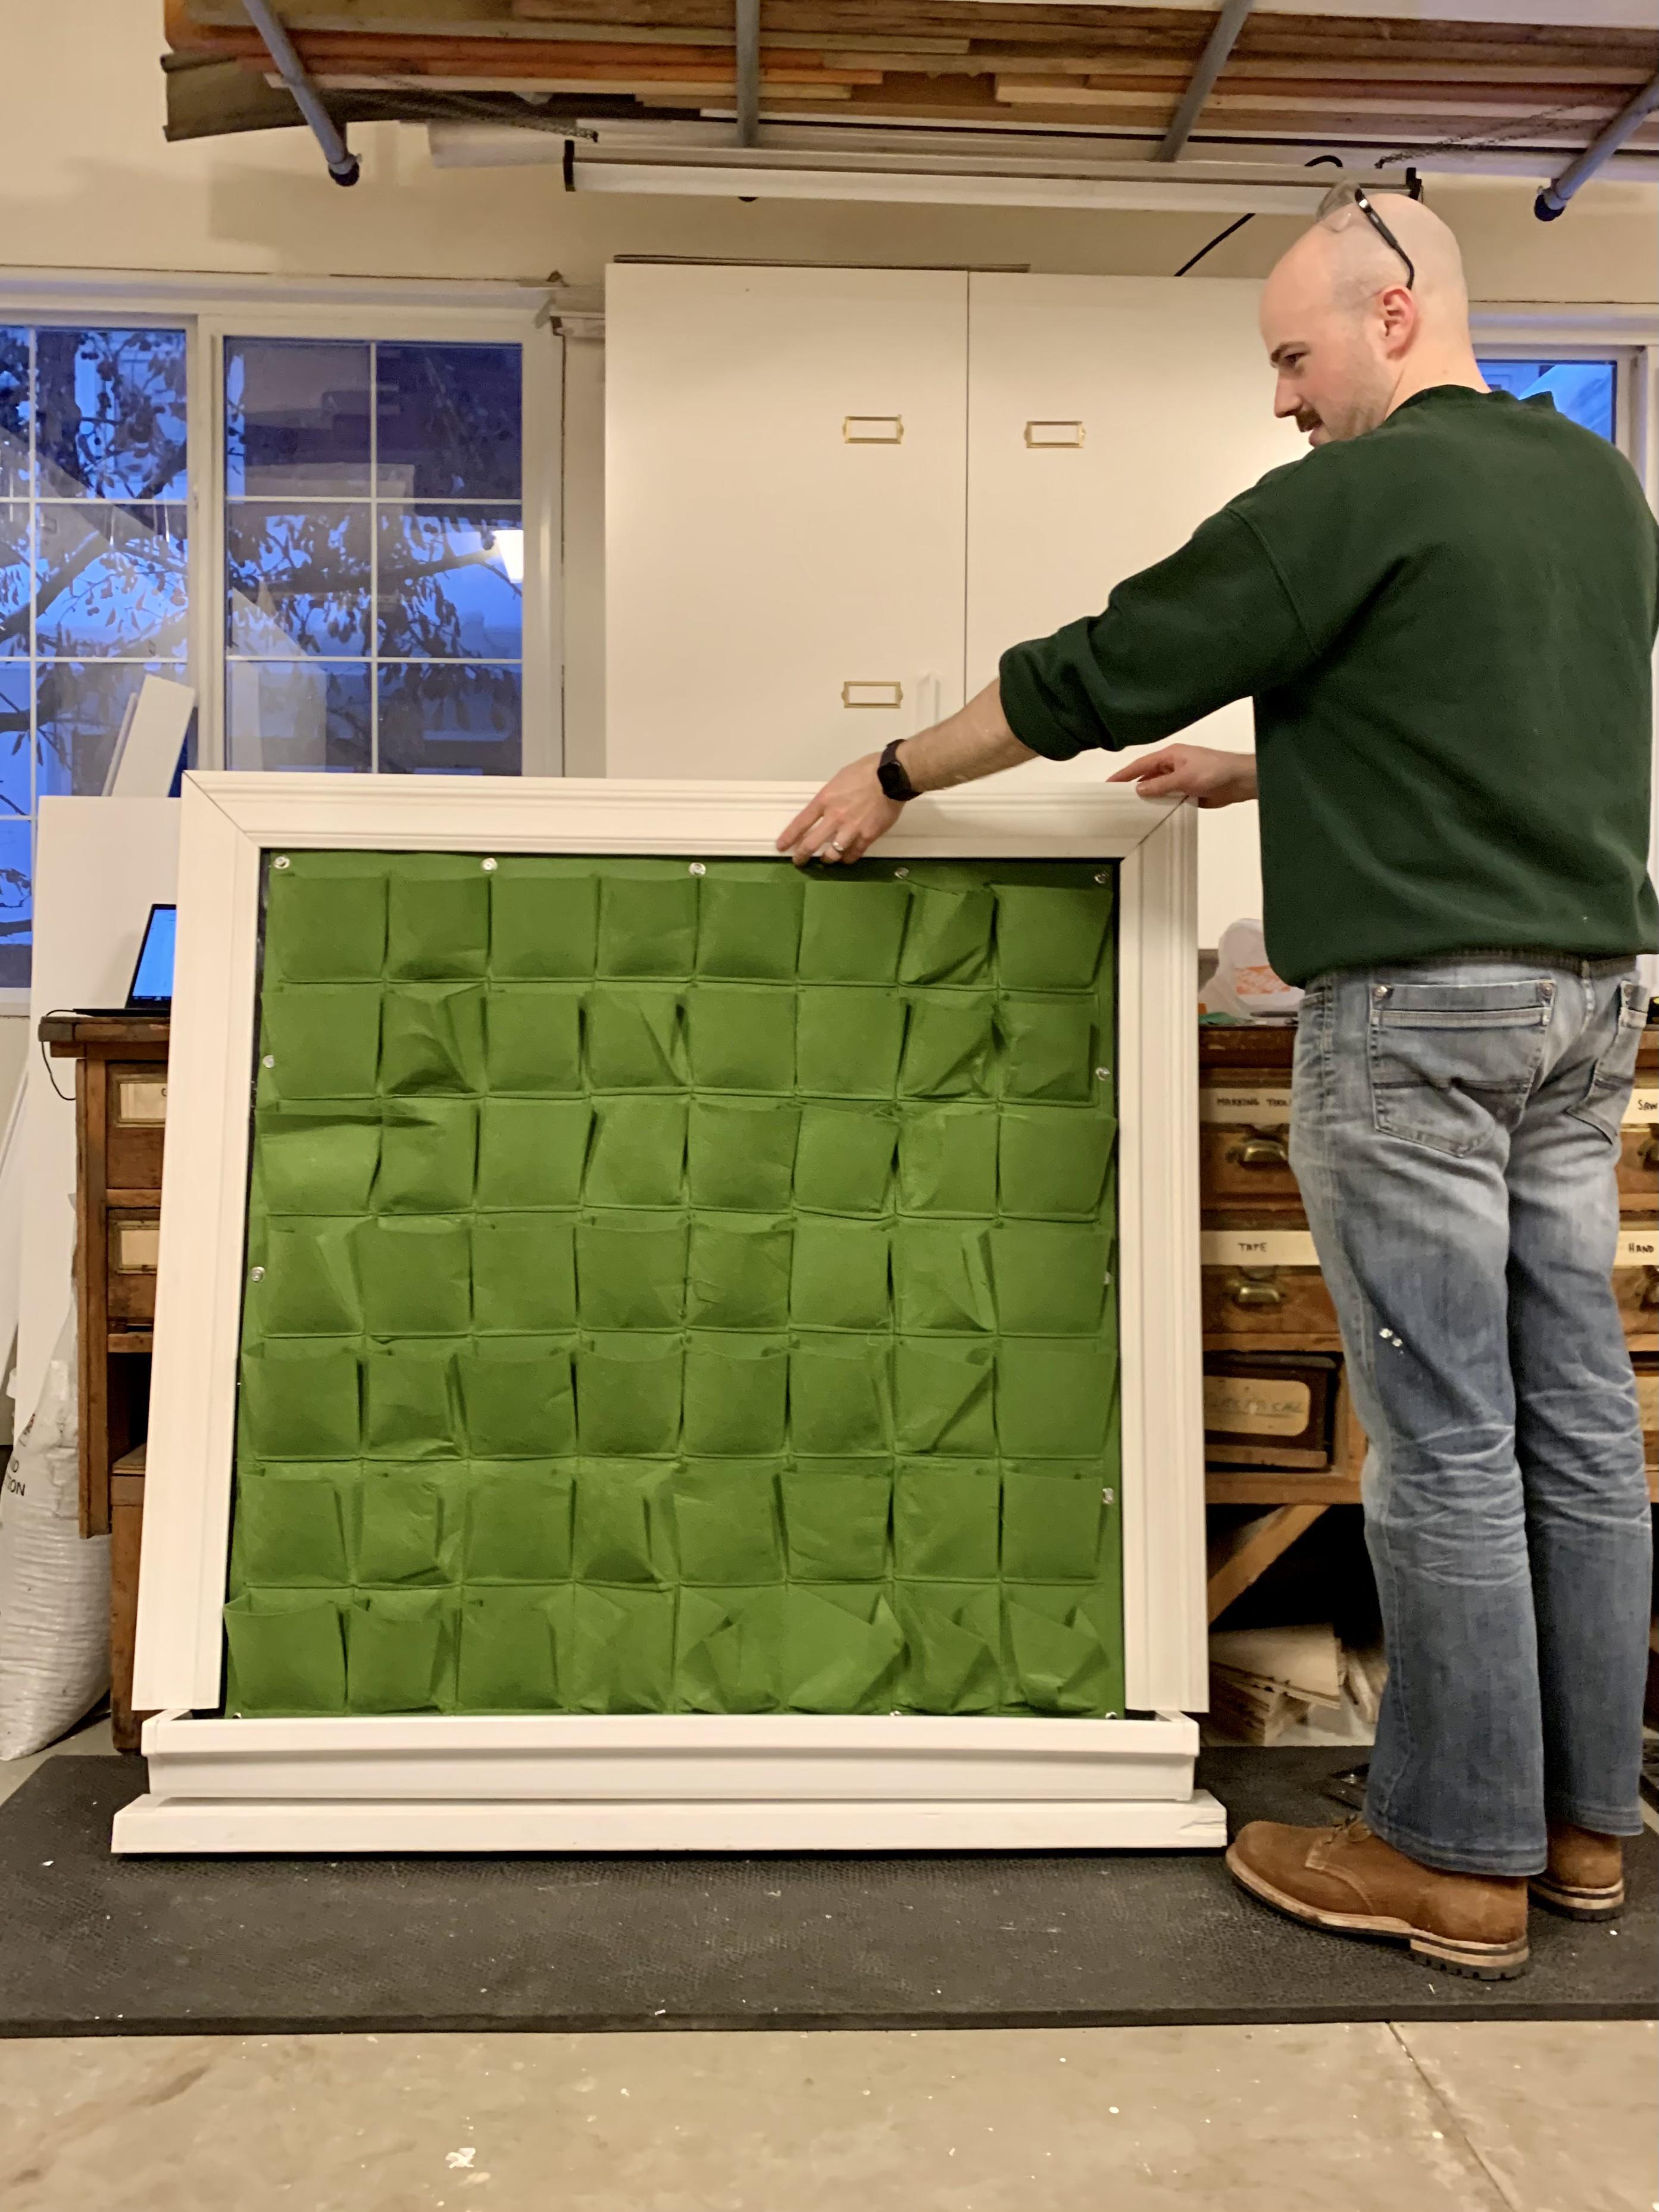
And we're done: we installed the plant wall this weekend! I'm pleased with how the casing makes the wall look like a little window into some distant jungle. The shadows cast by the plants are so dramatic.
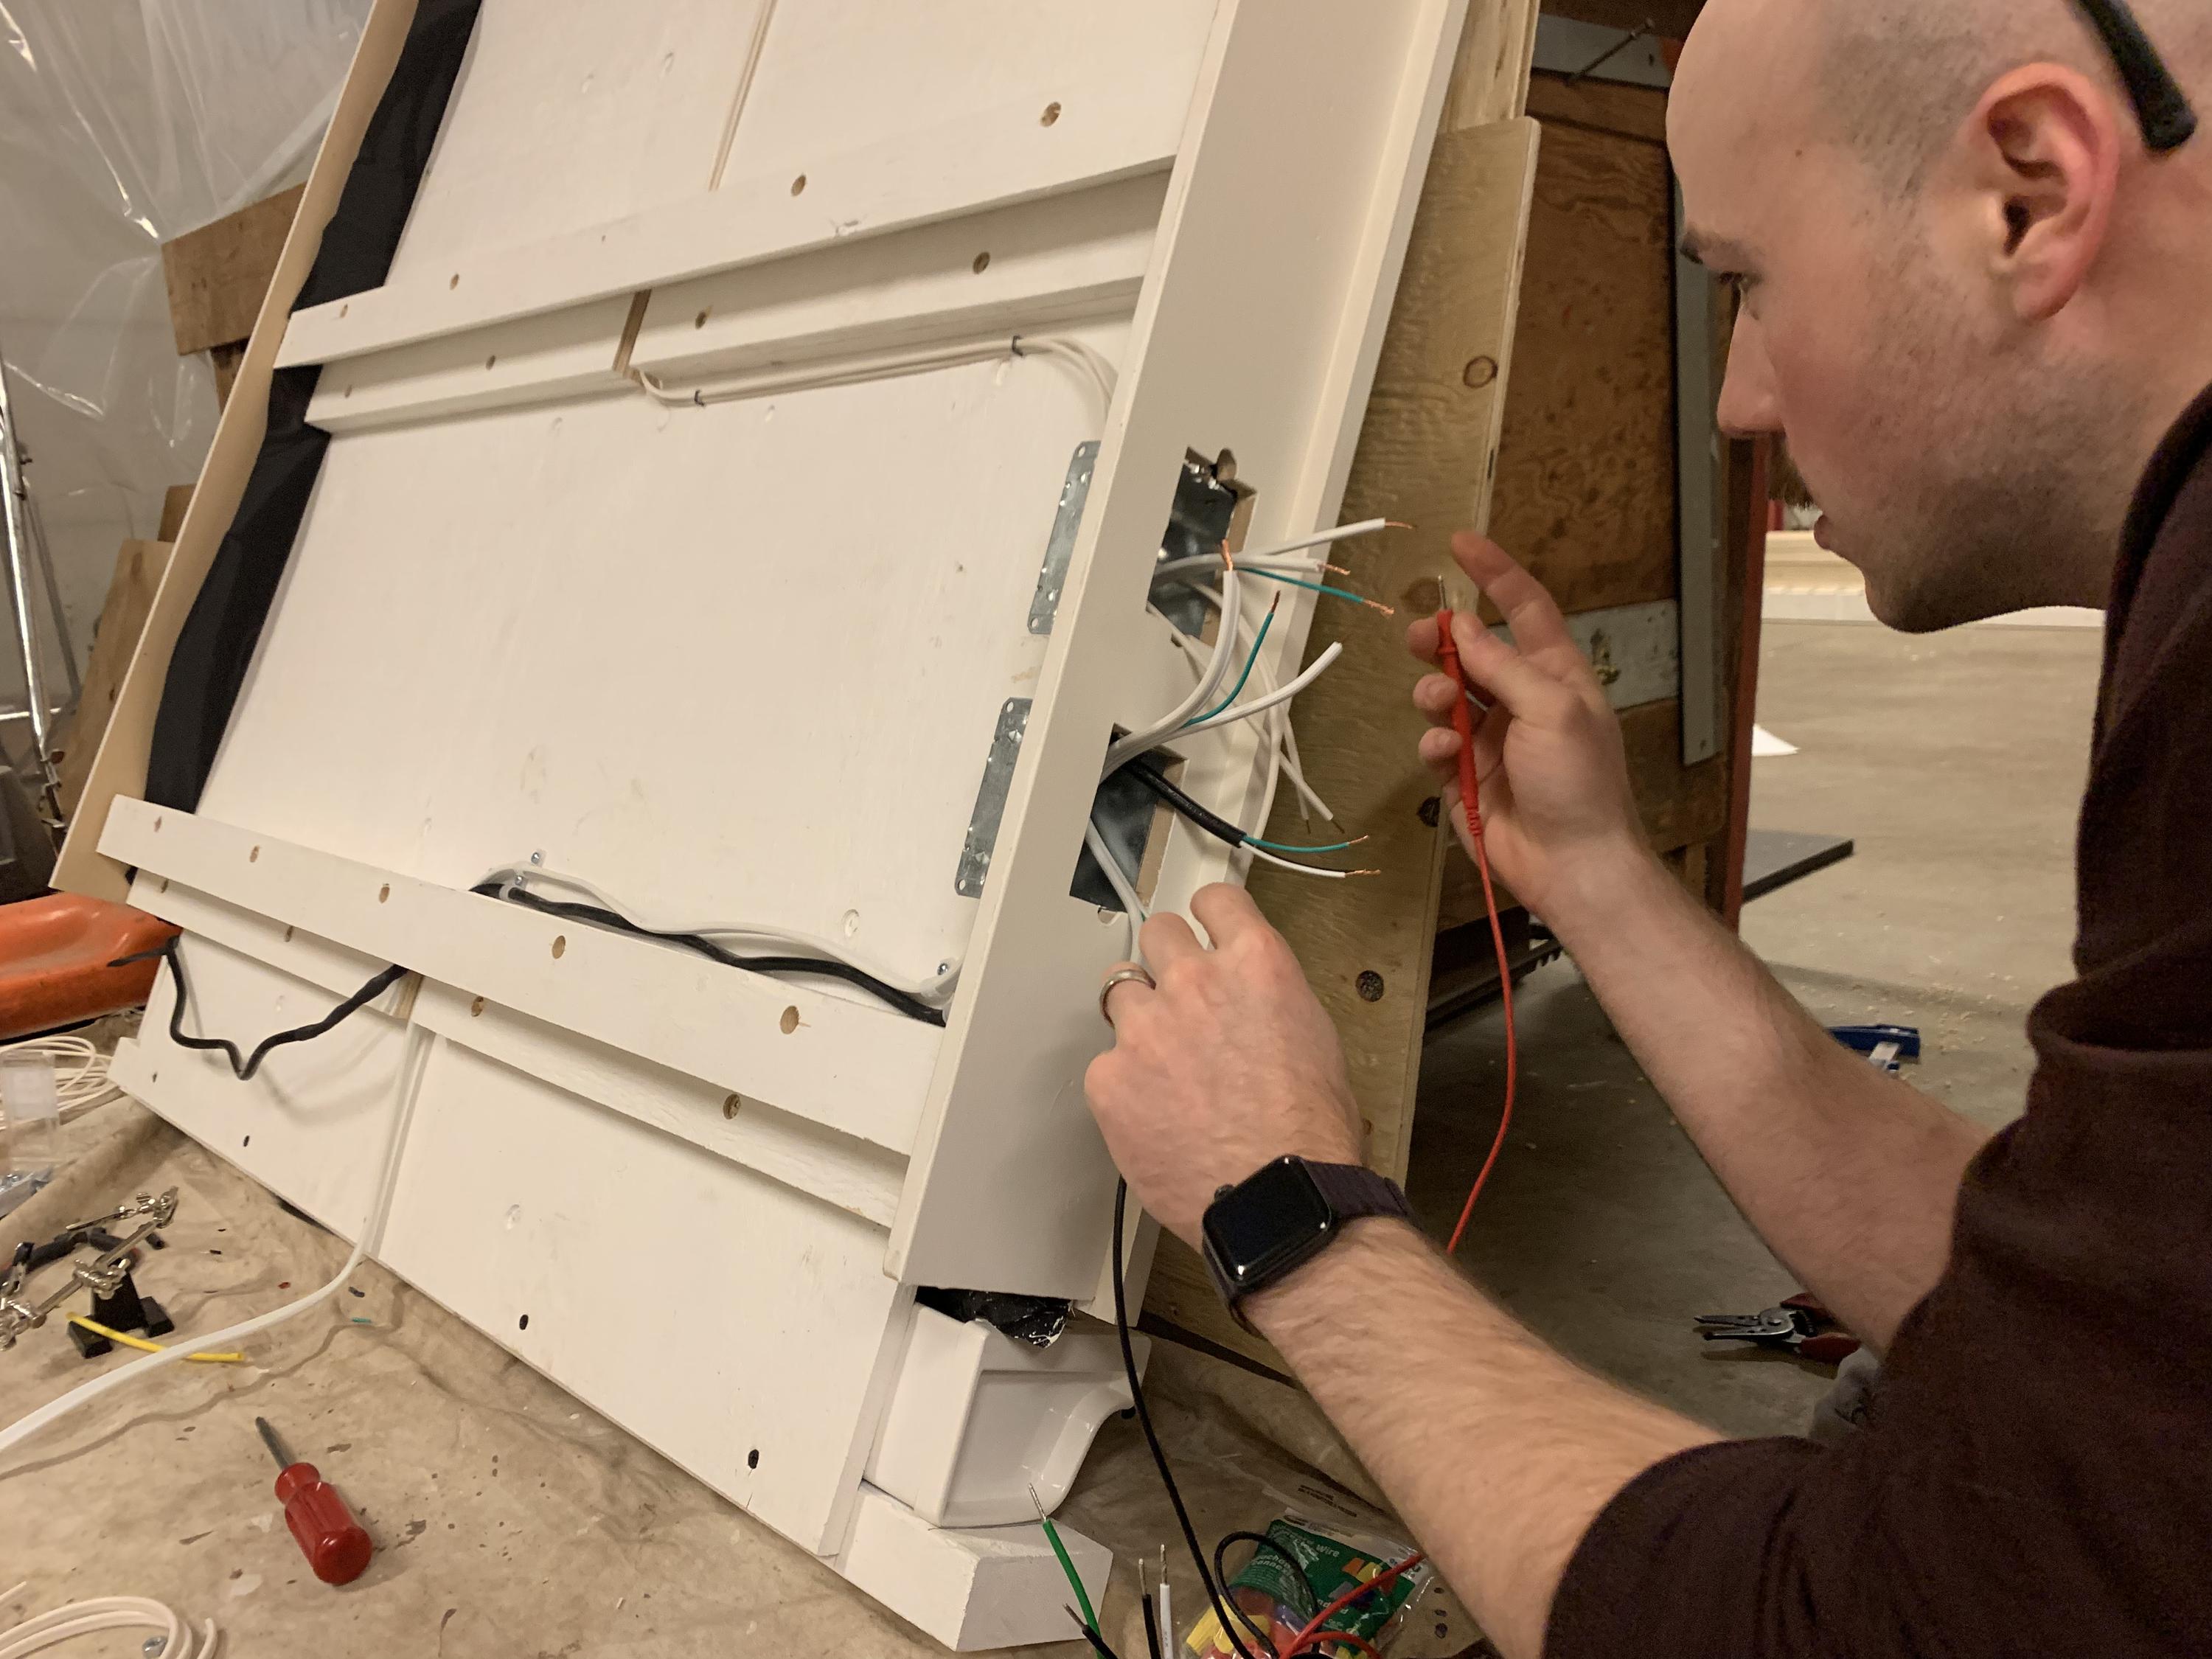
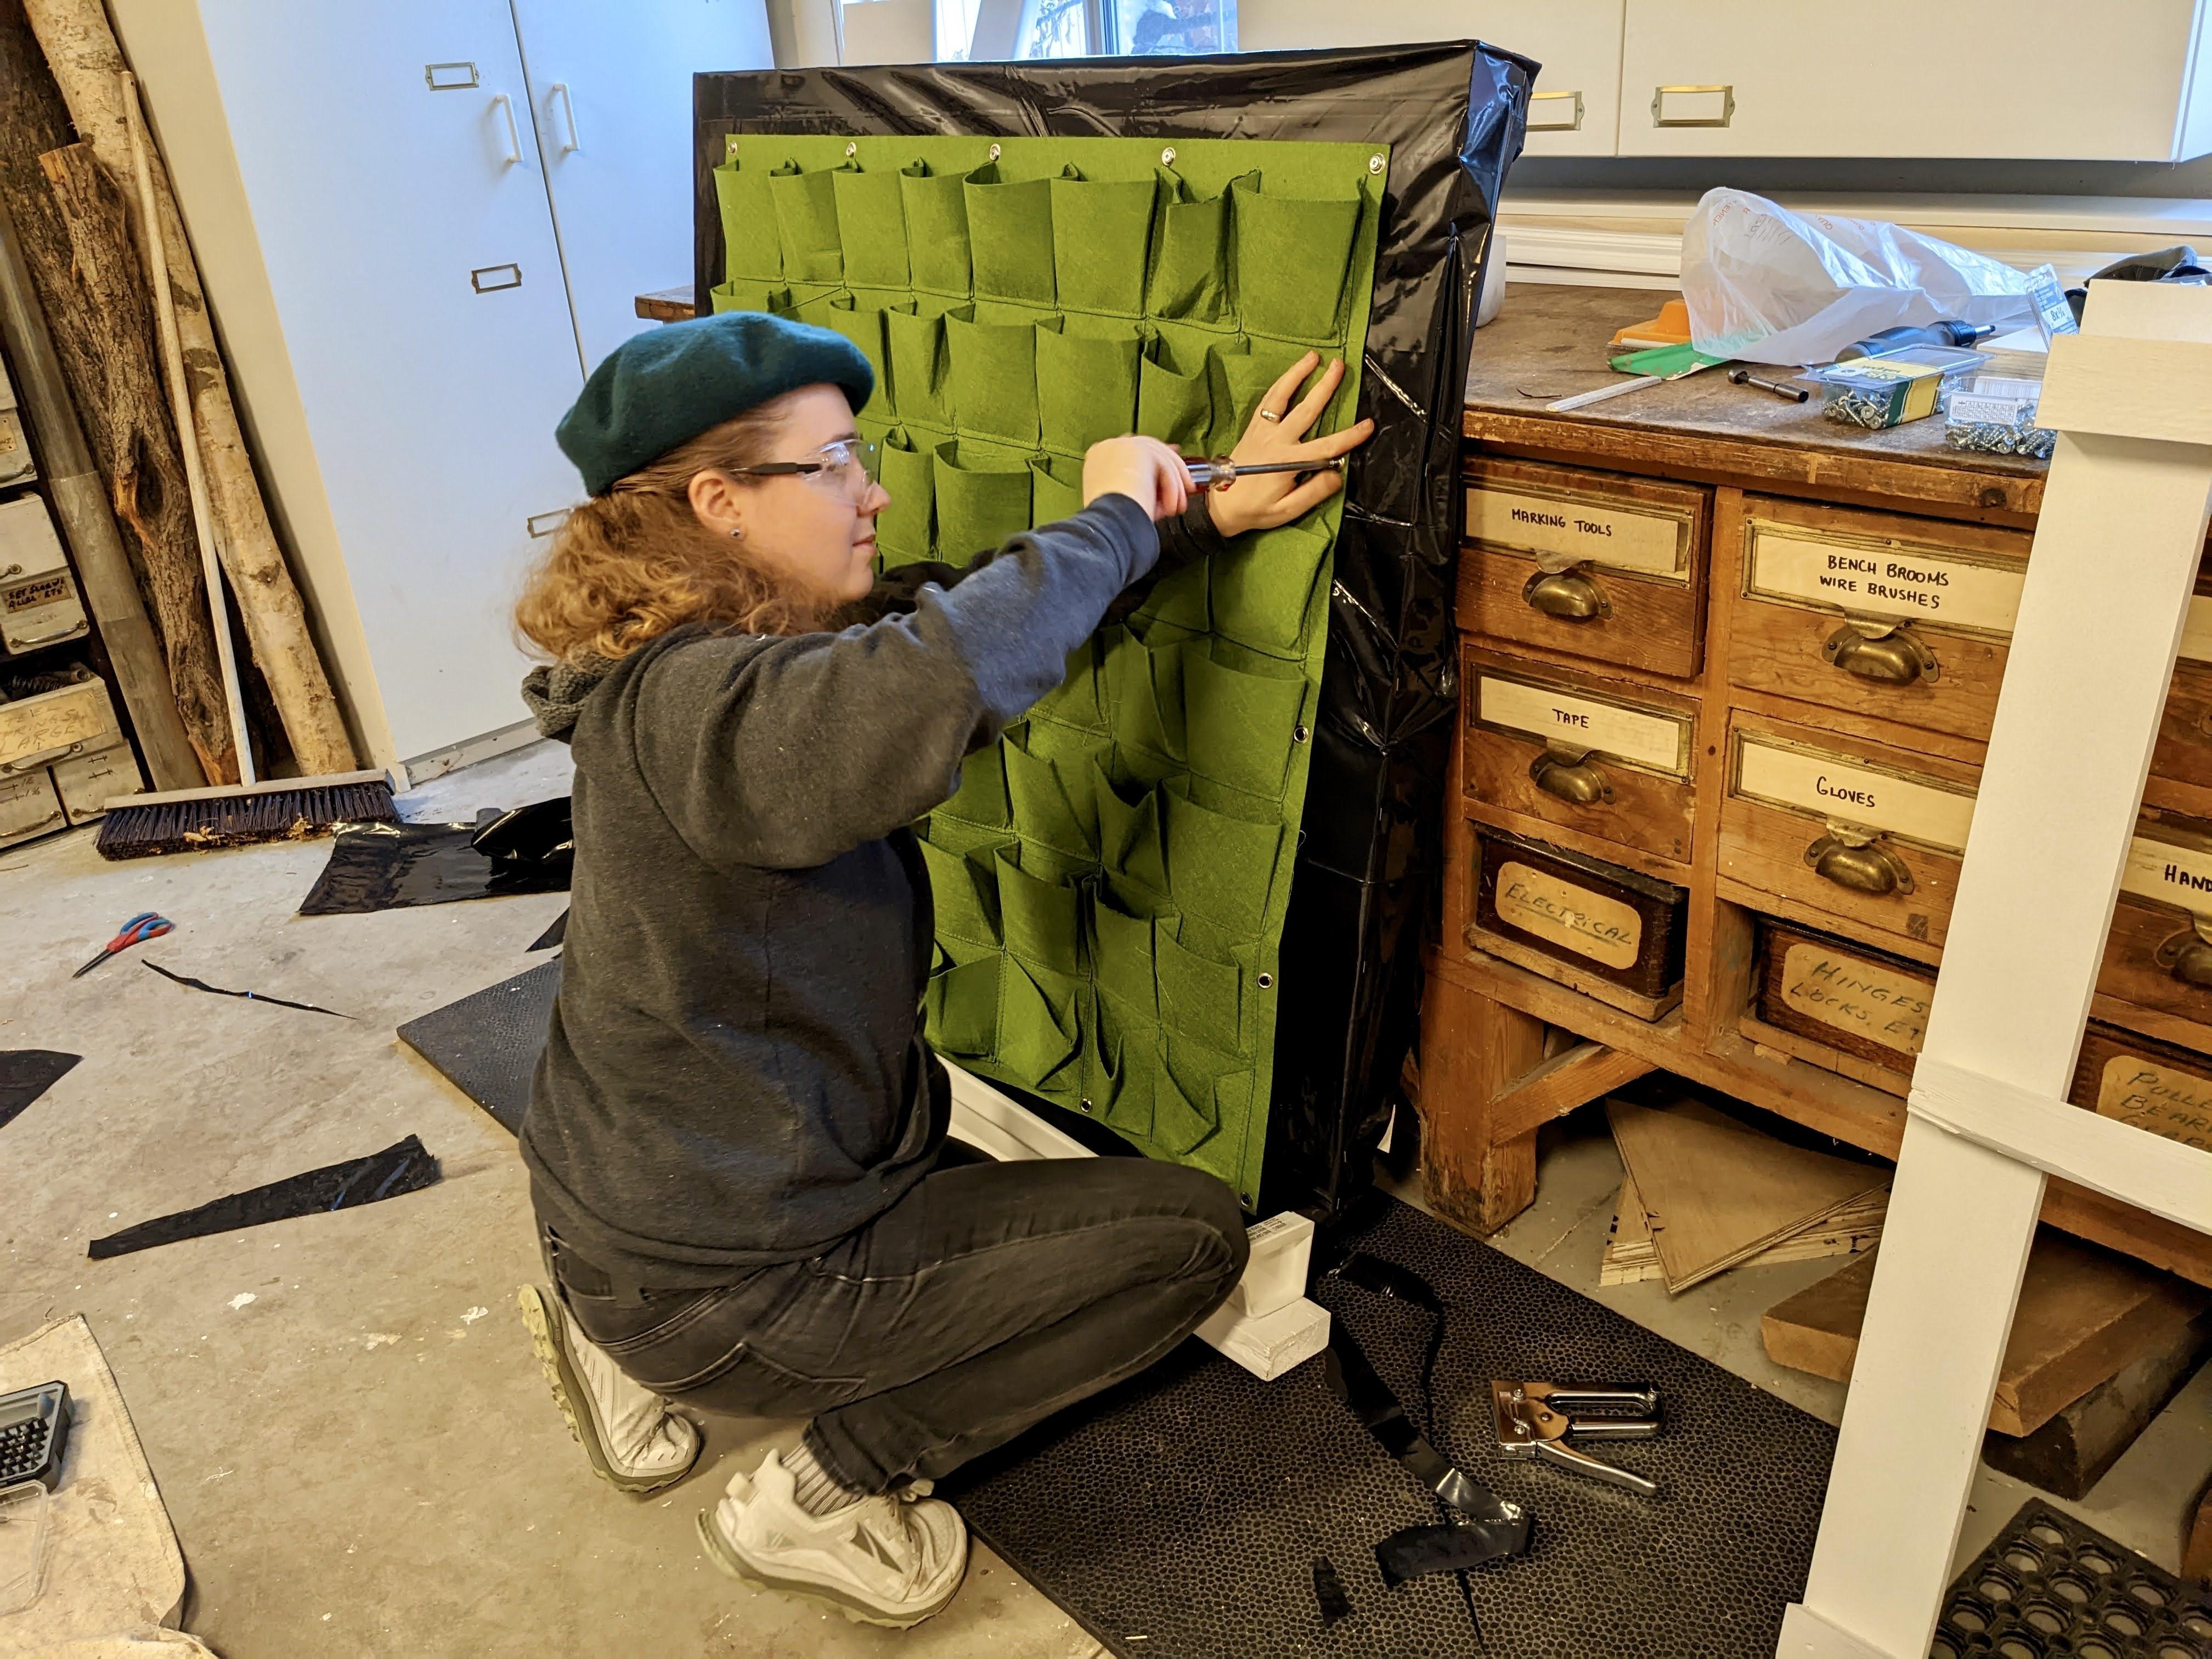
Time for electrical on the plant wall: hooking up timer switches to run grow lights and an irrigation pump.

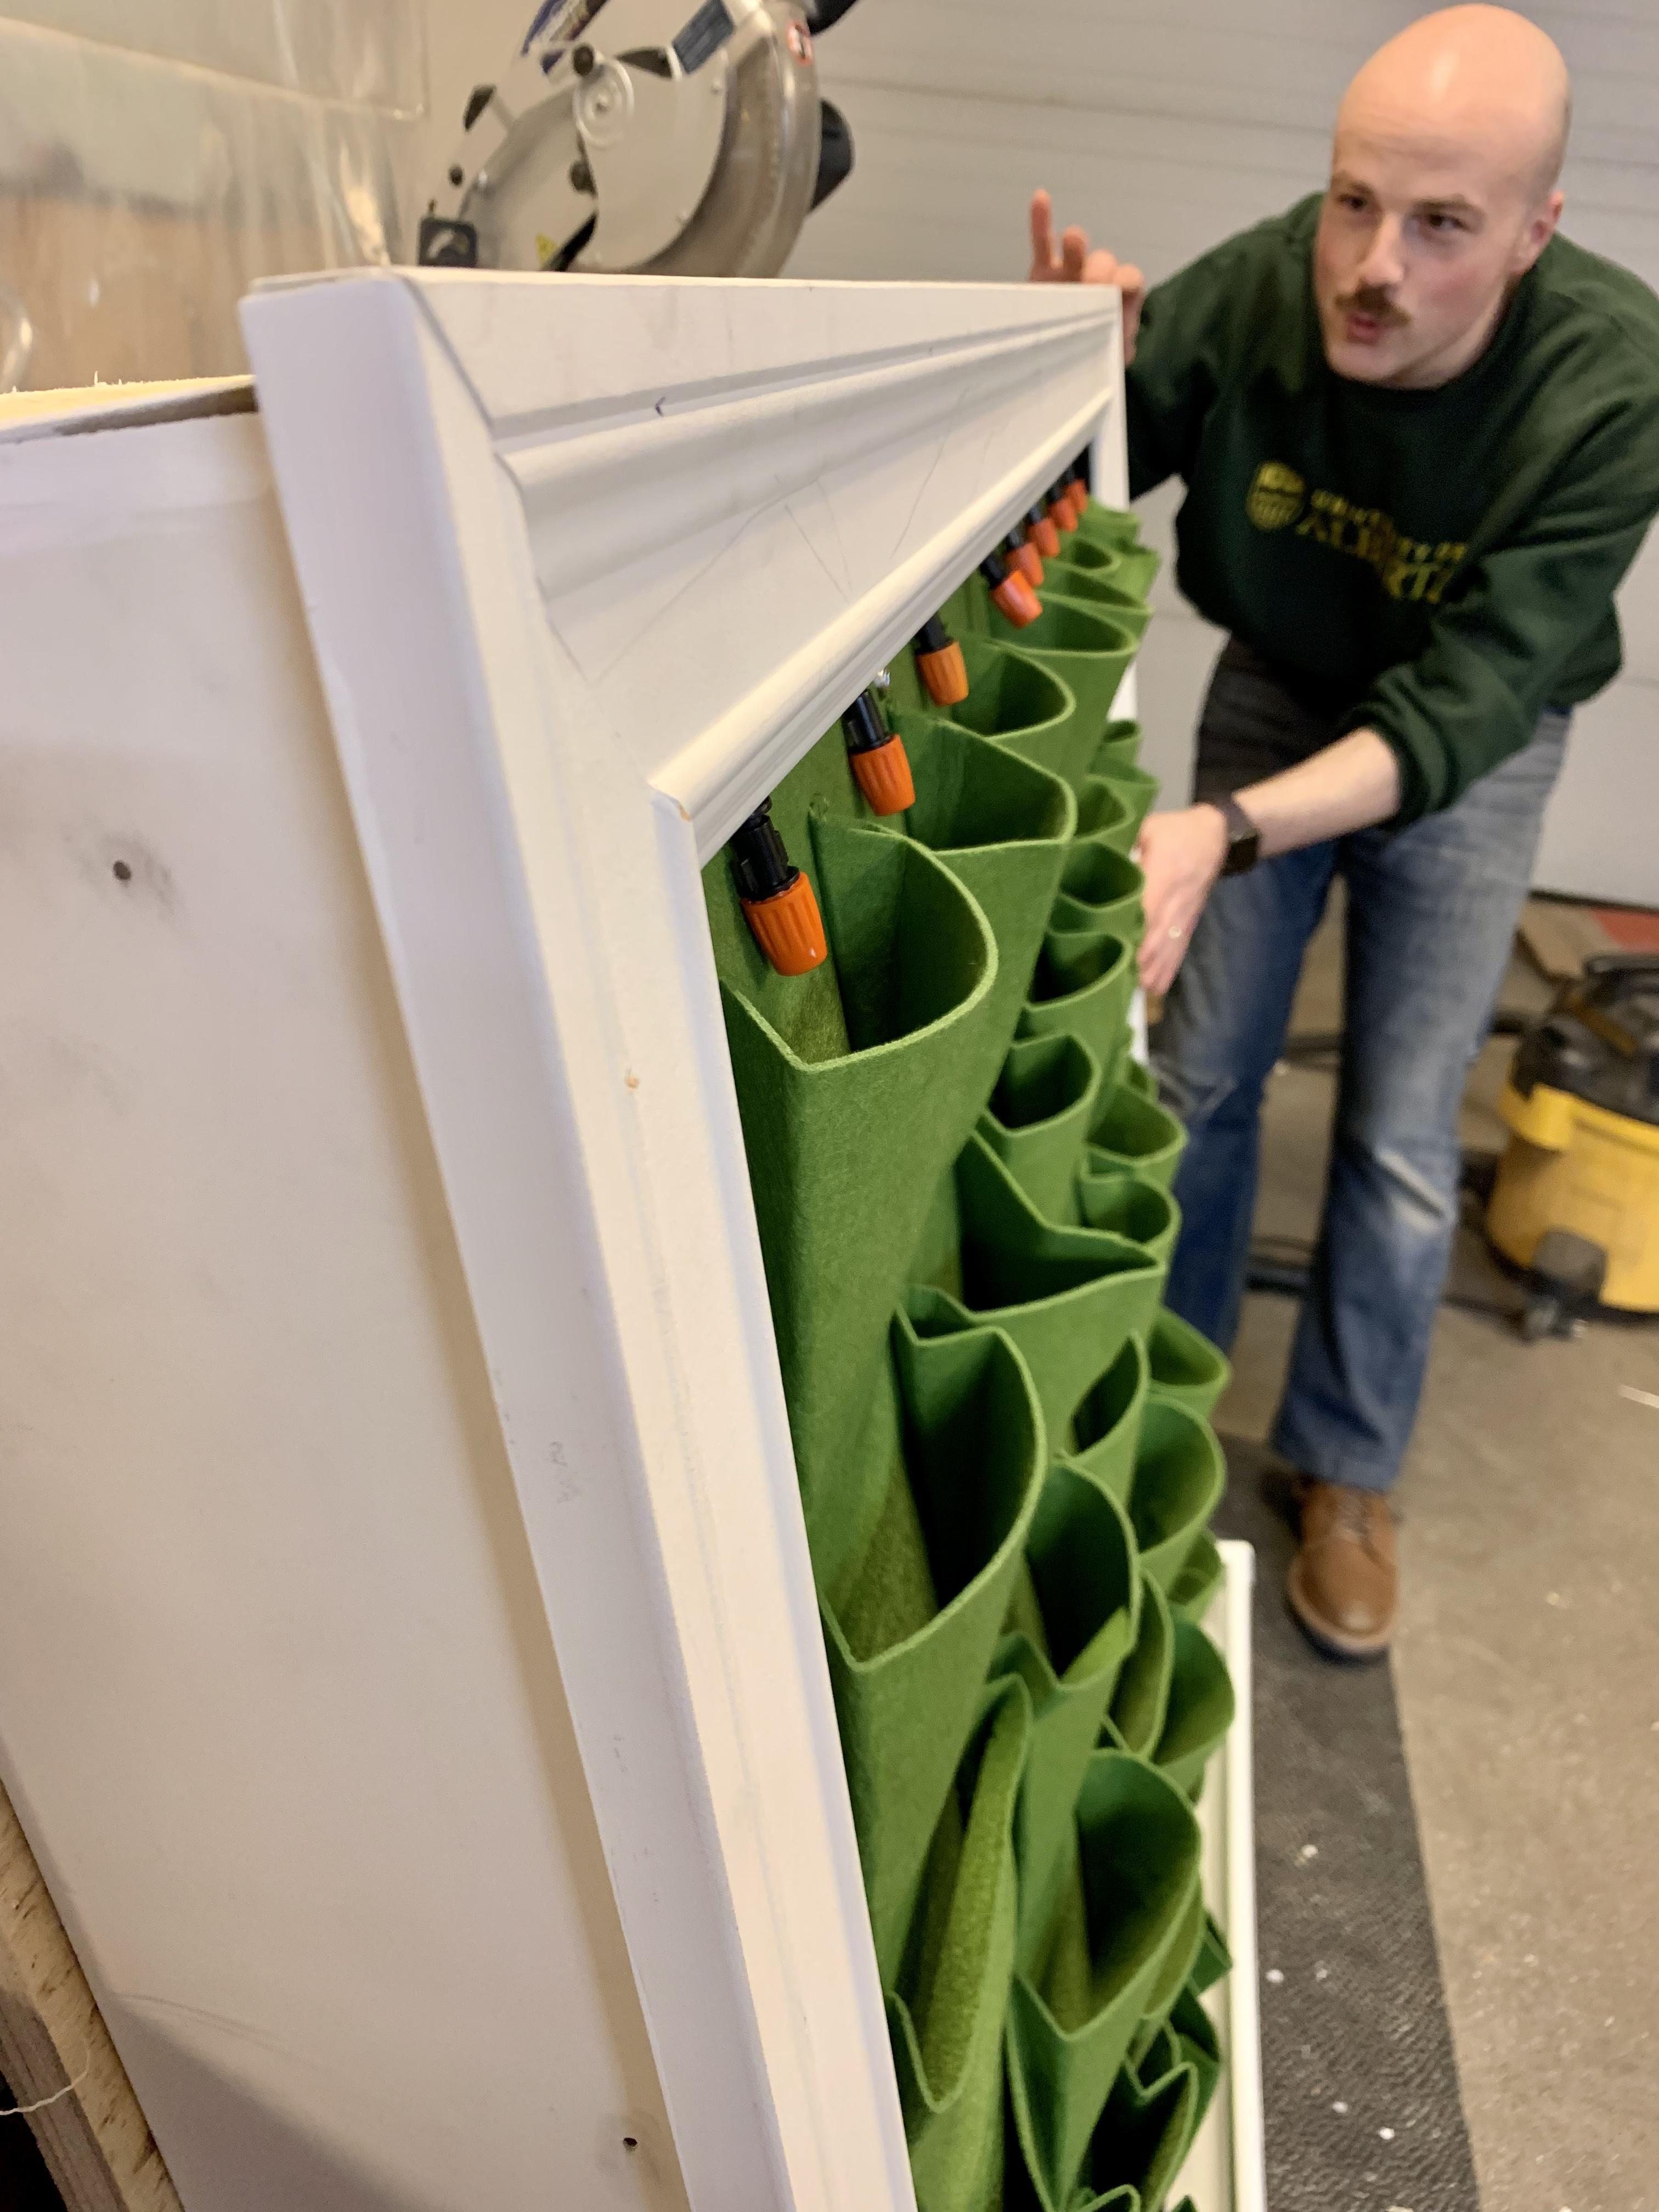
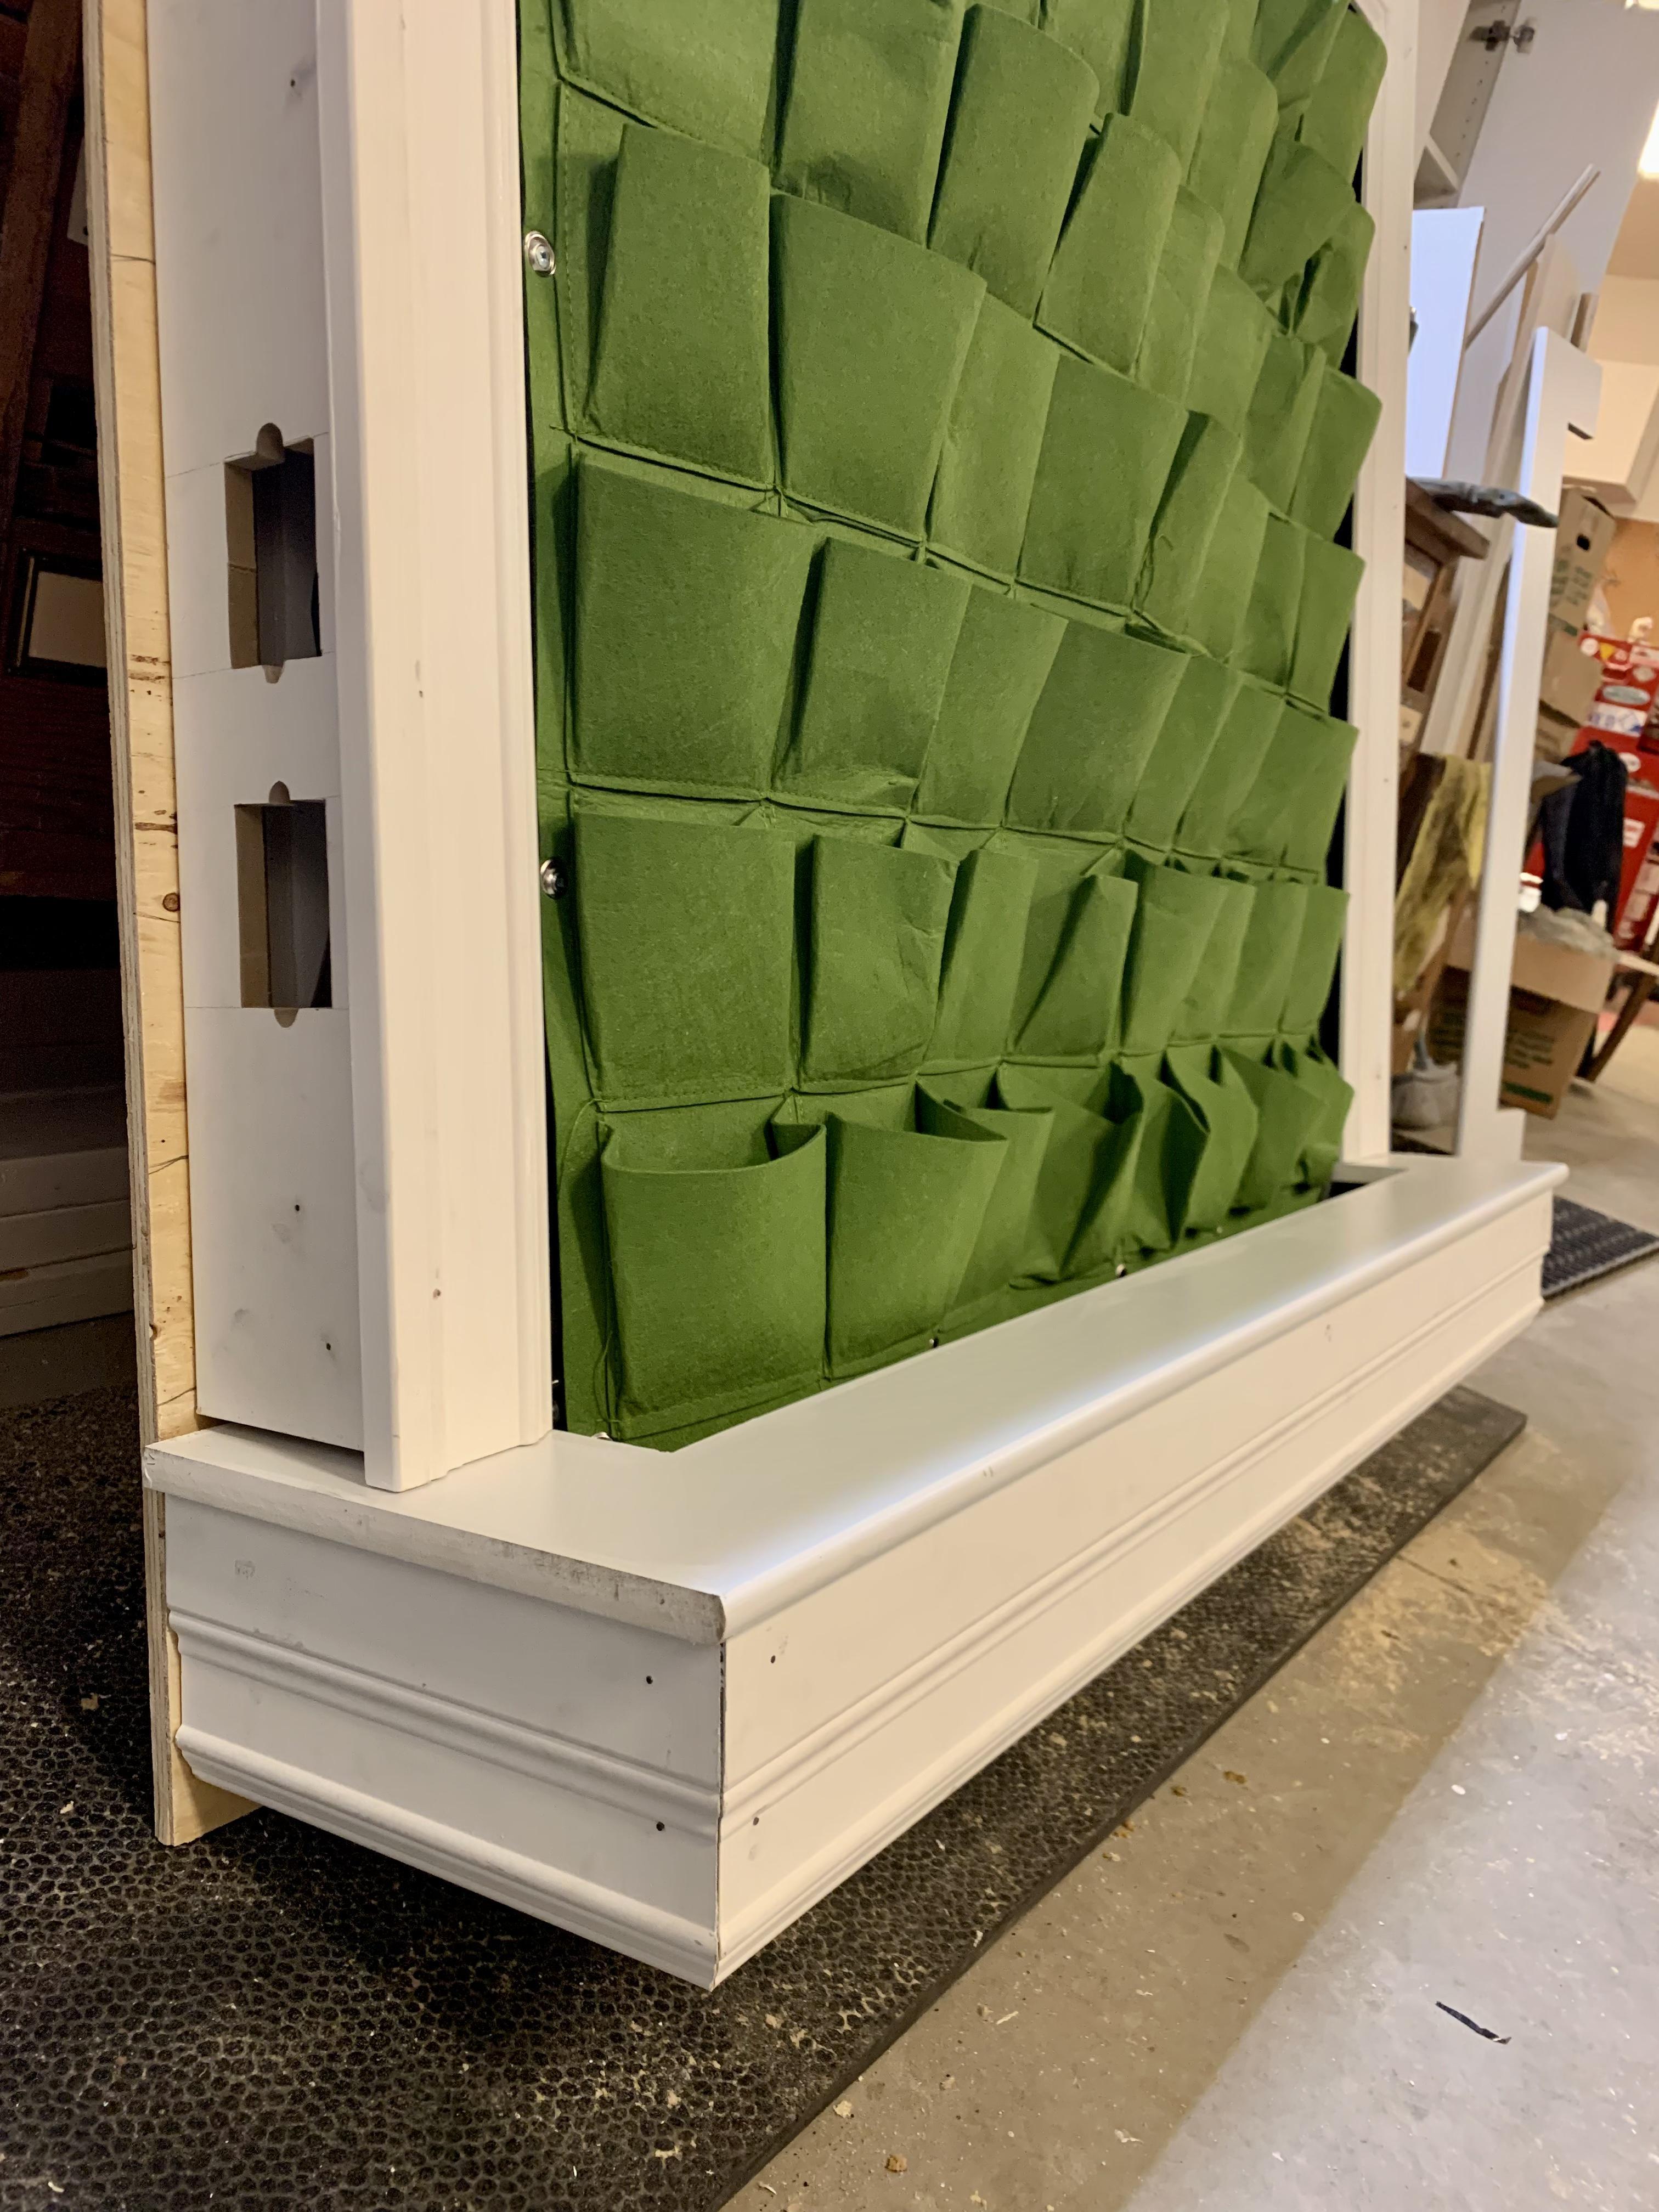
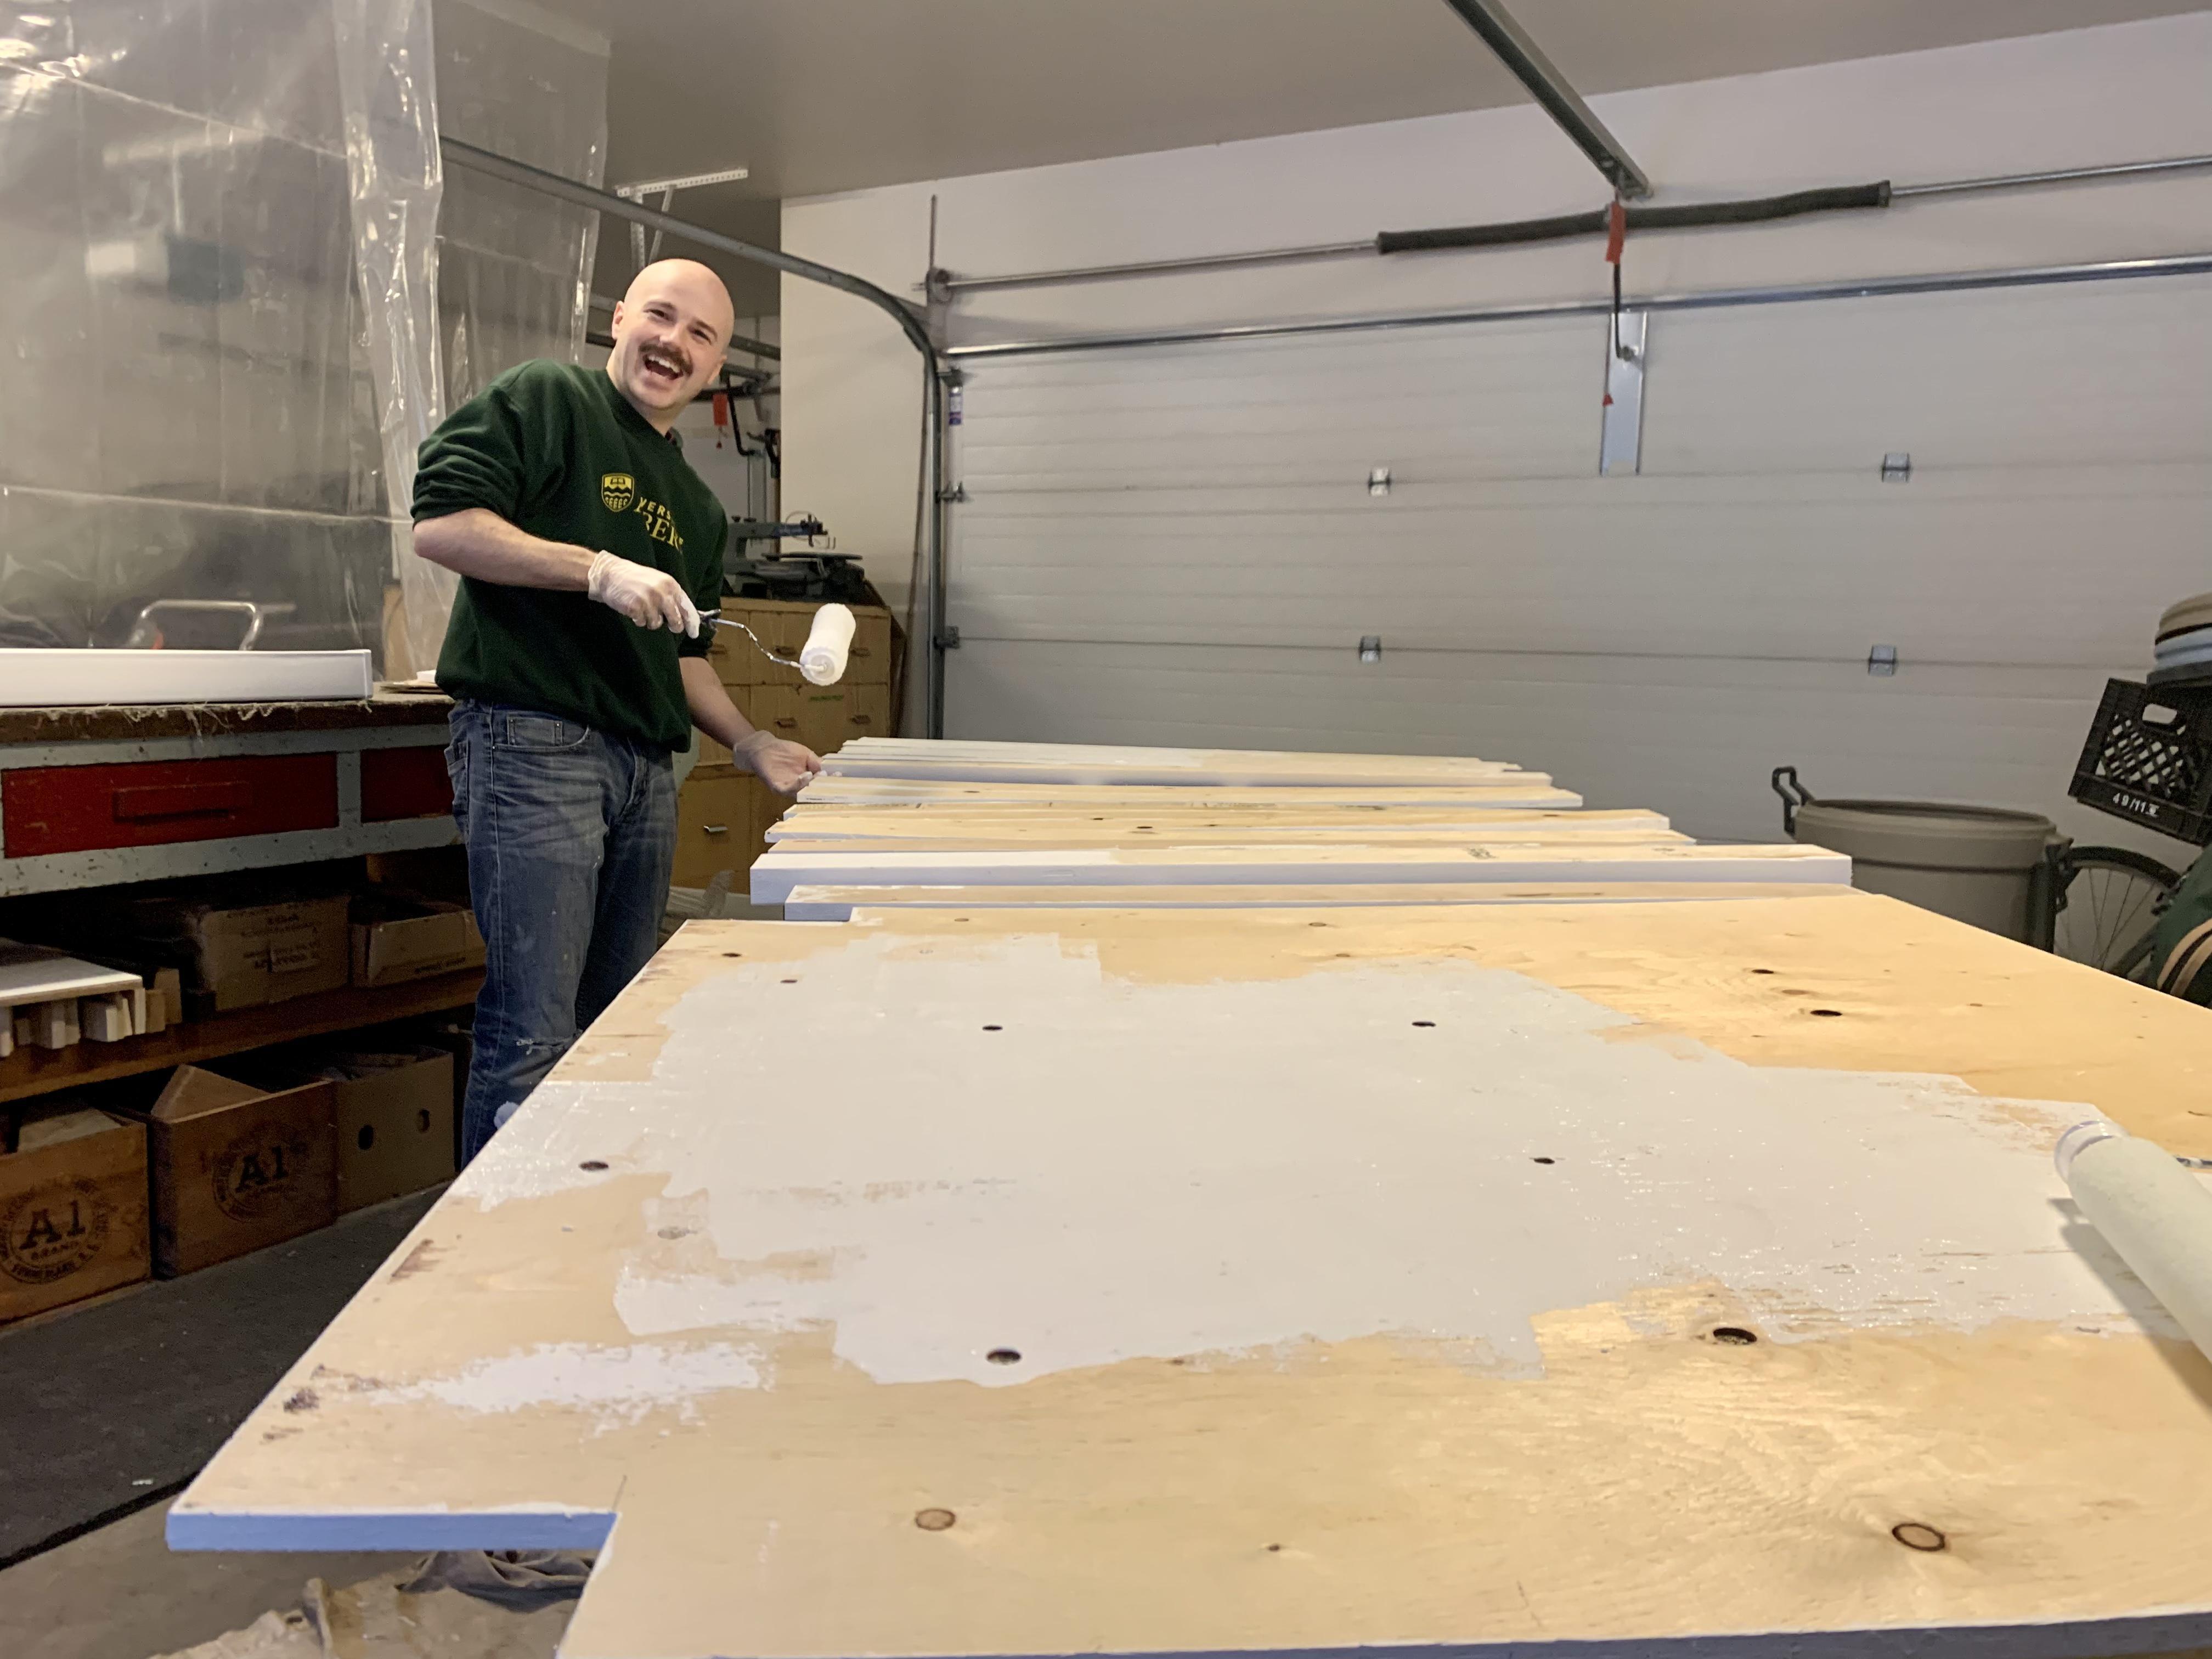
I'm really pleased with how much of the plant wall we were able to complete this weekend. This was my first time doing mitered corners, and they came out so clean. The sill at the base of the wall is removable to access the water... I'm actually surprised that we were able to get the tolerances right so that you can slide the base cover off.
What remains:
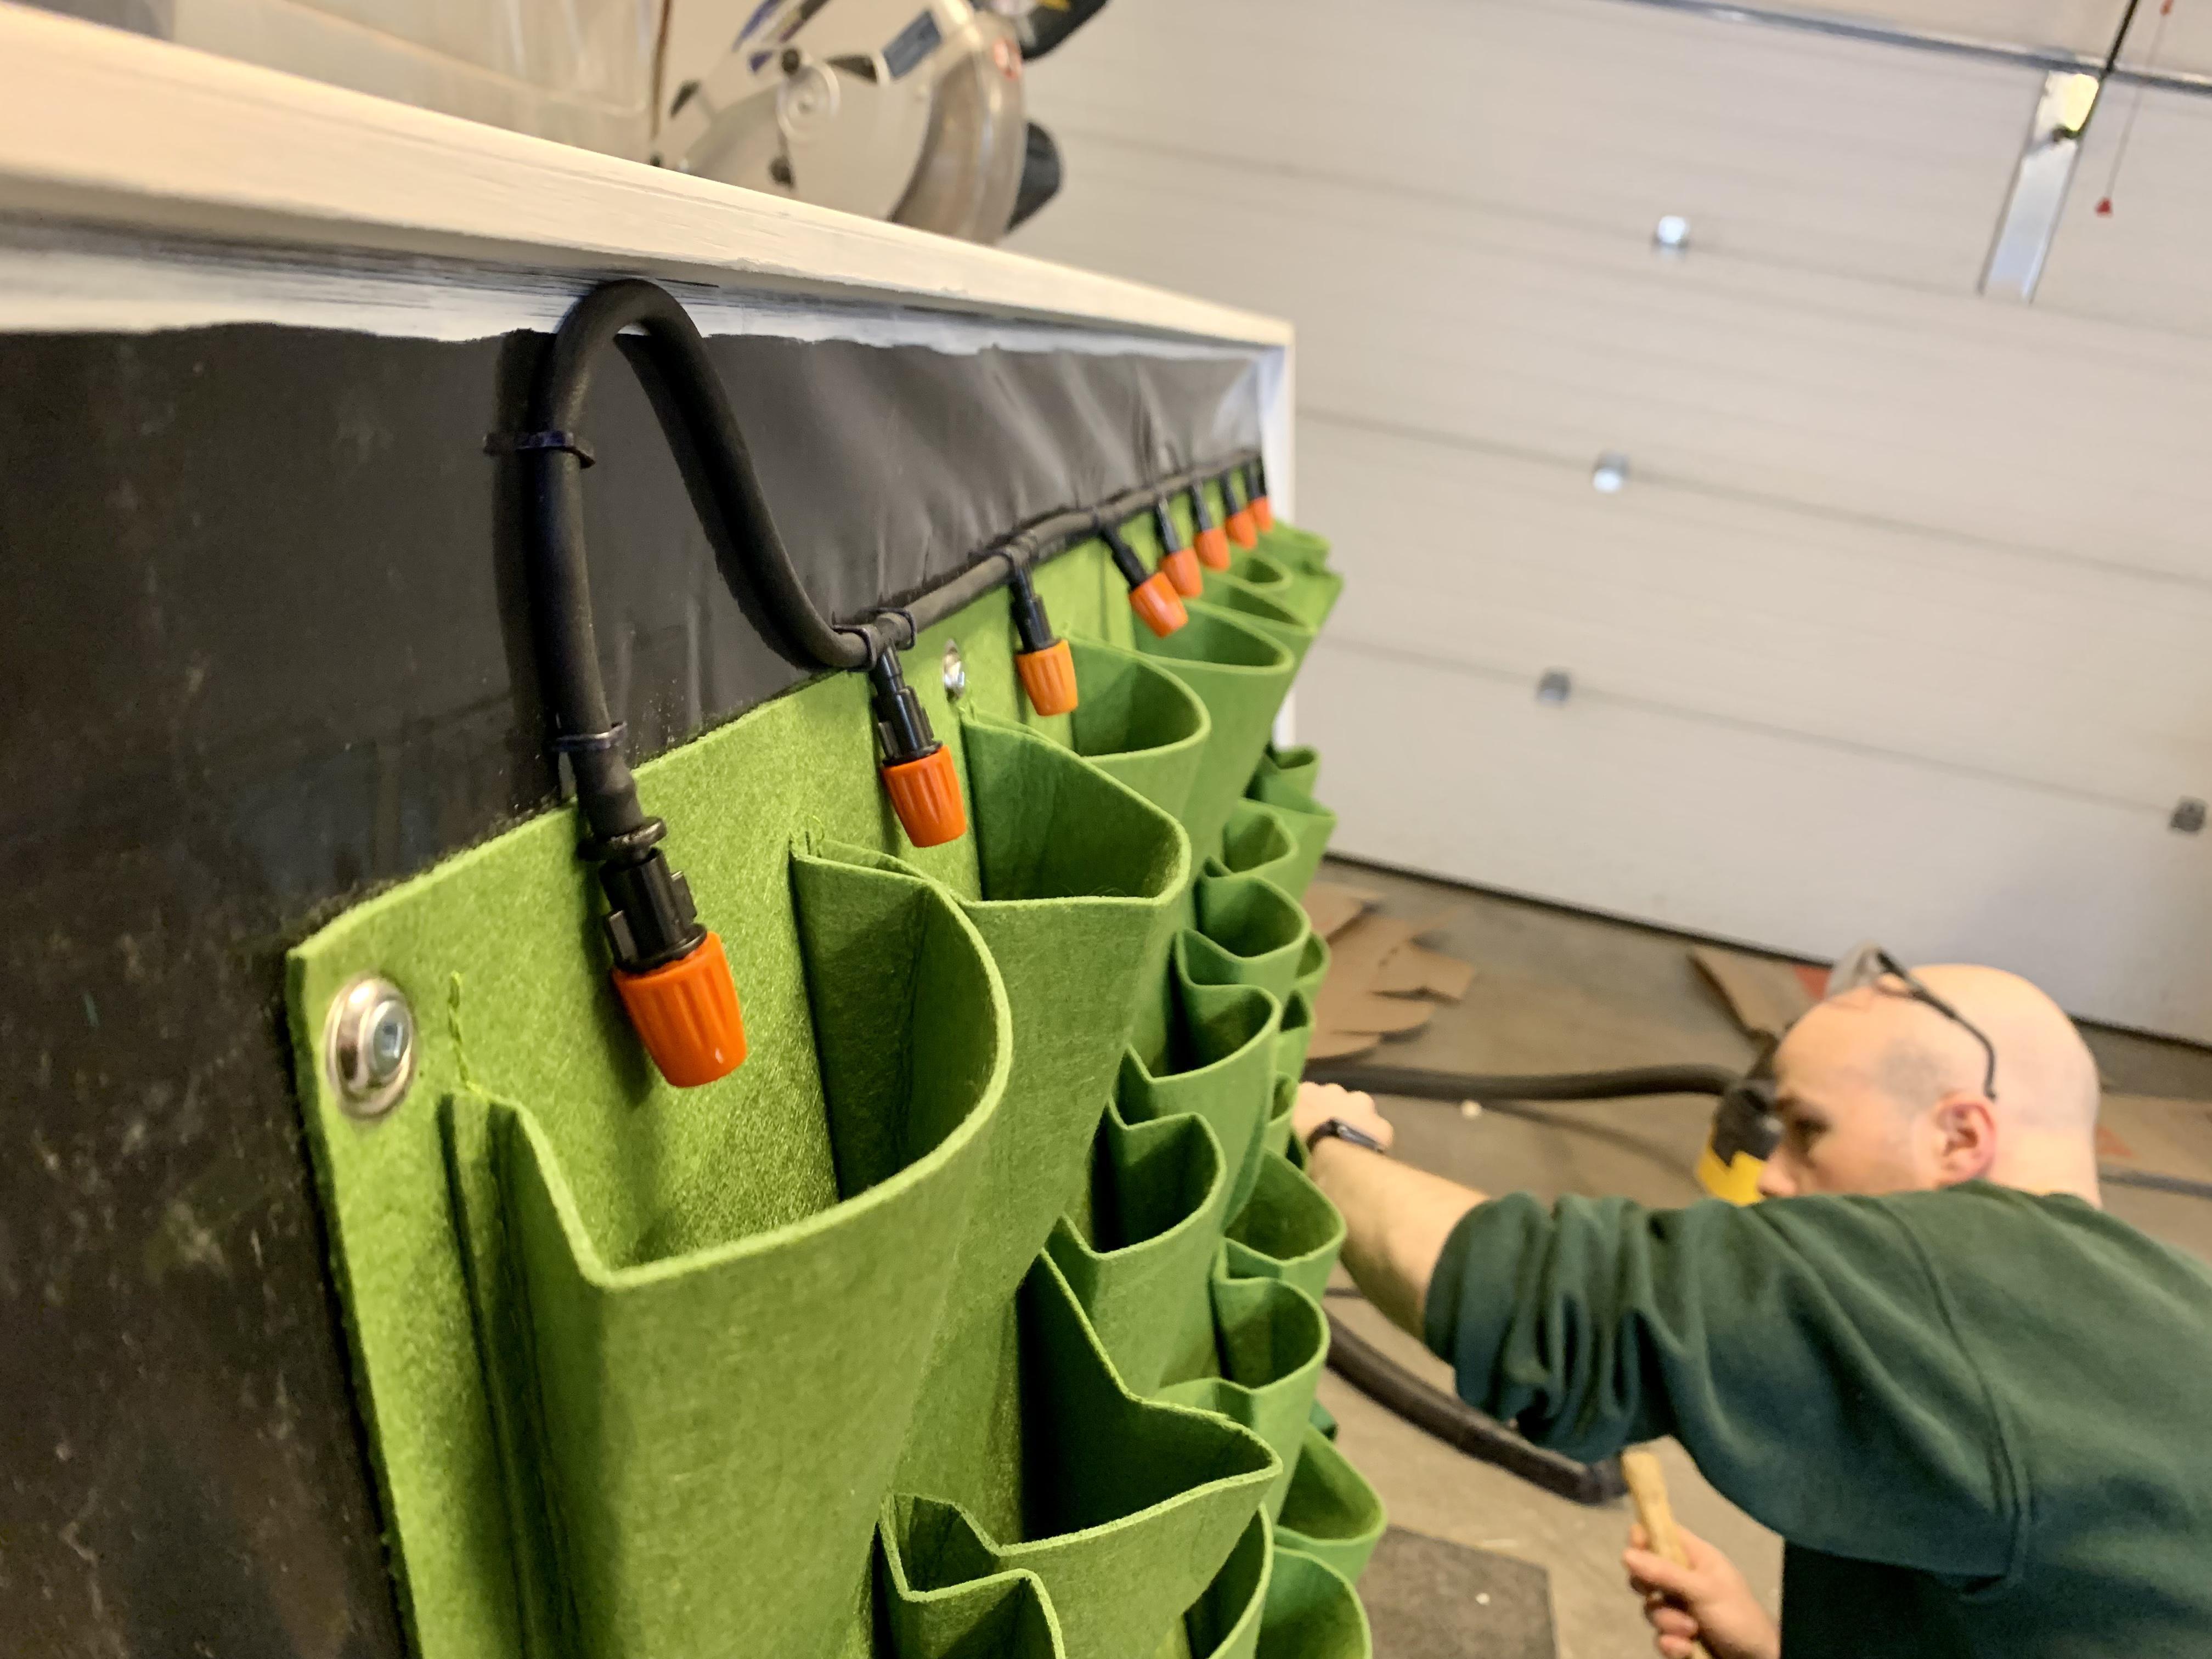
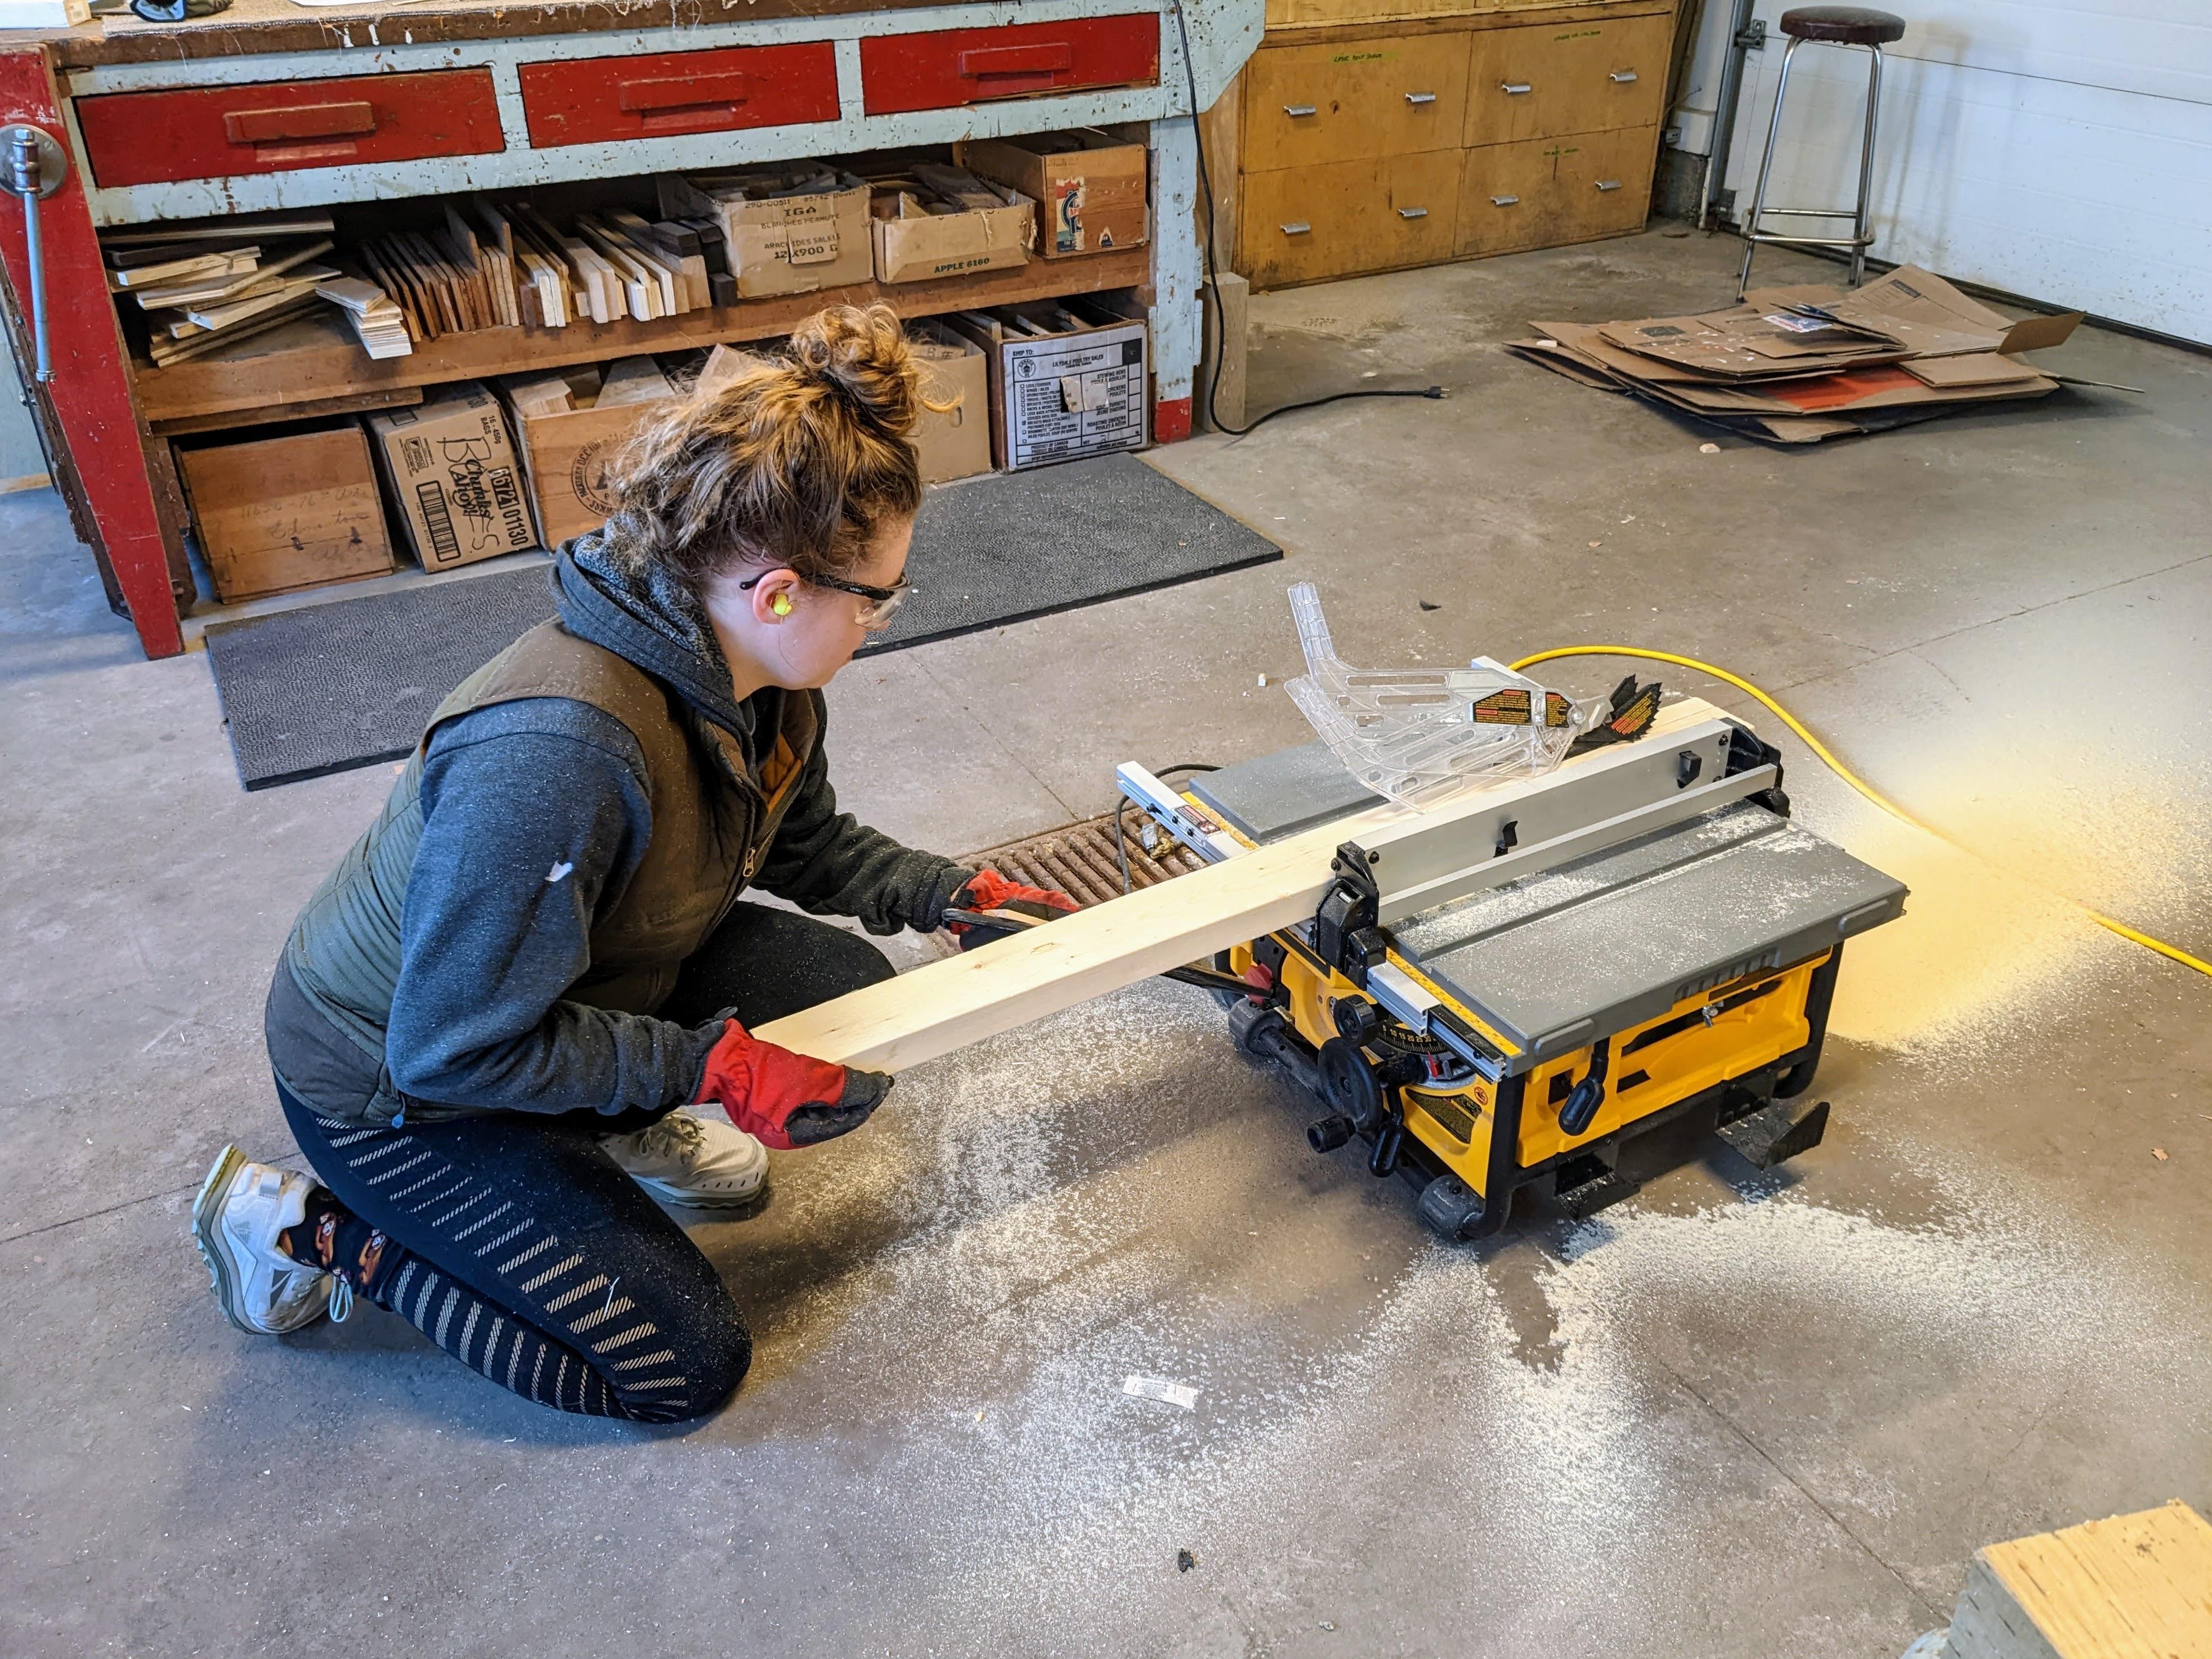
Making some progress on the plant wall!
Still need to figure out how to mount the lighting to the whole system. Hopefully we finish the trim tomorrow.

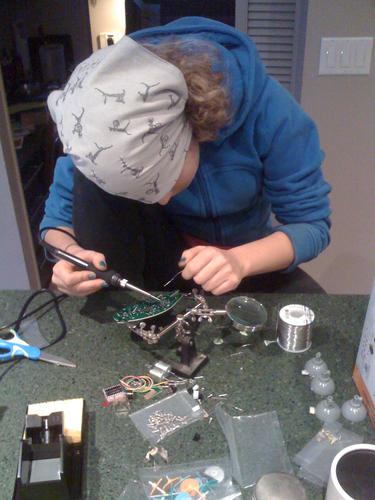
It’s hat day in the lab.
—I made a flower crown from Caligulas in my garden.
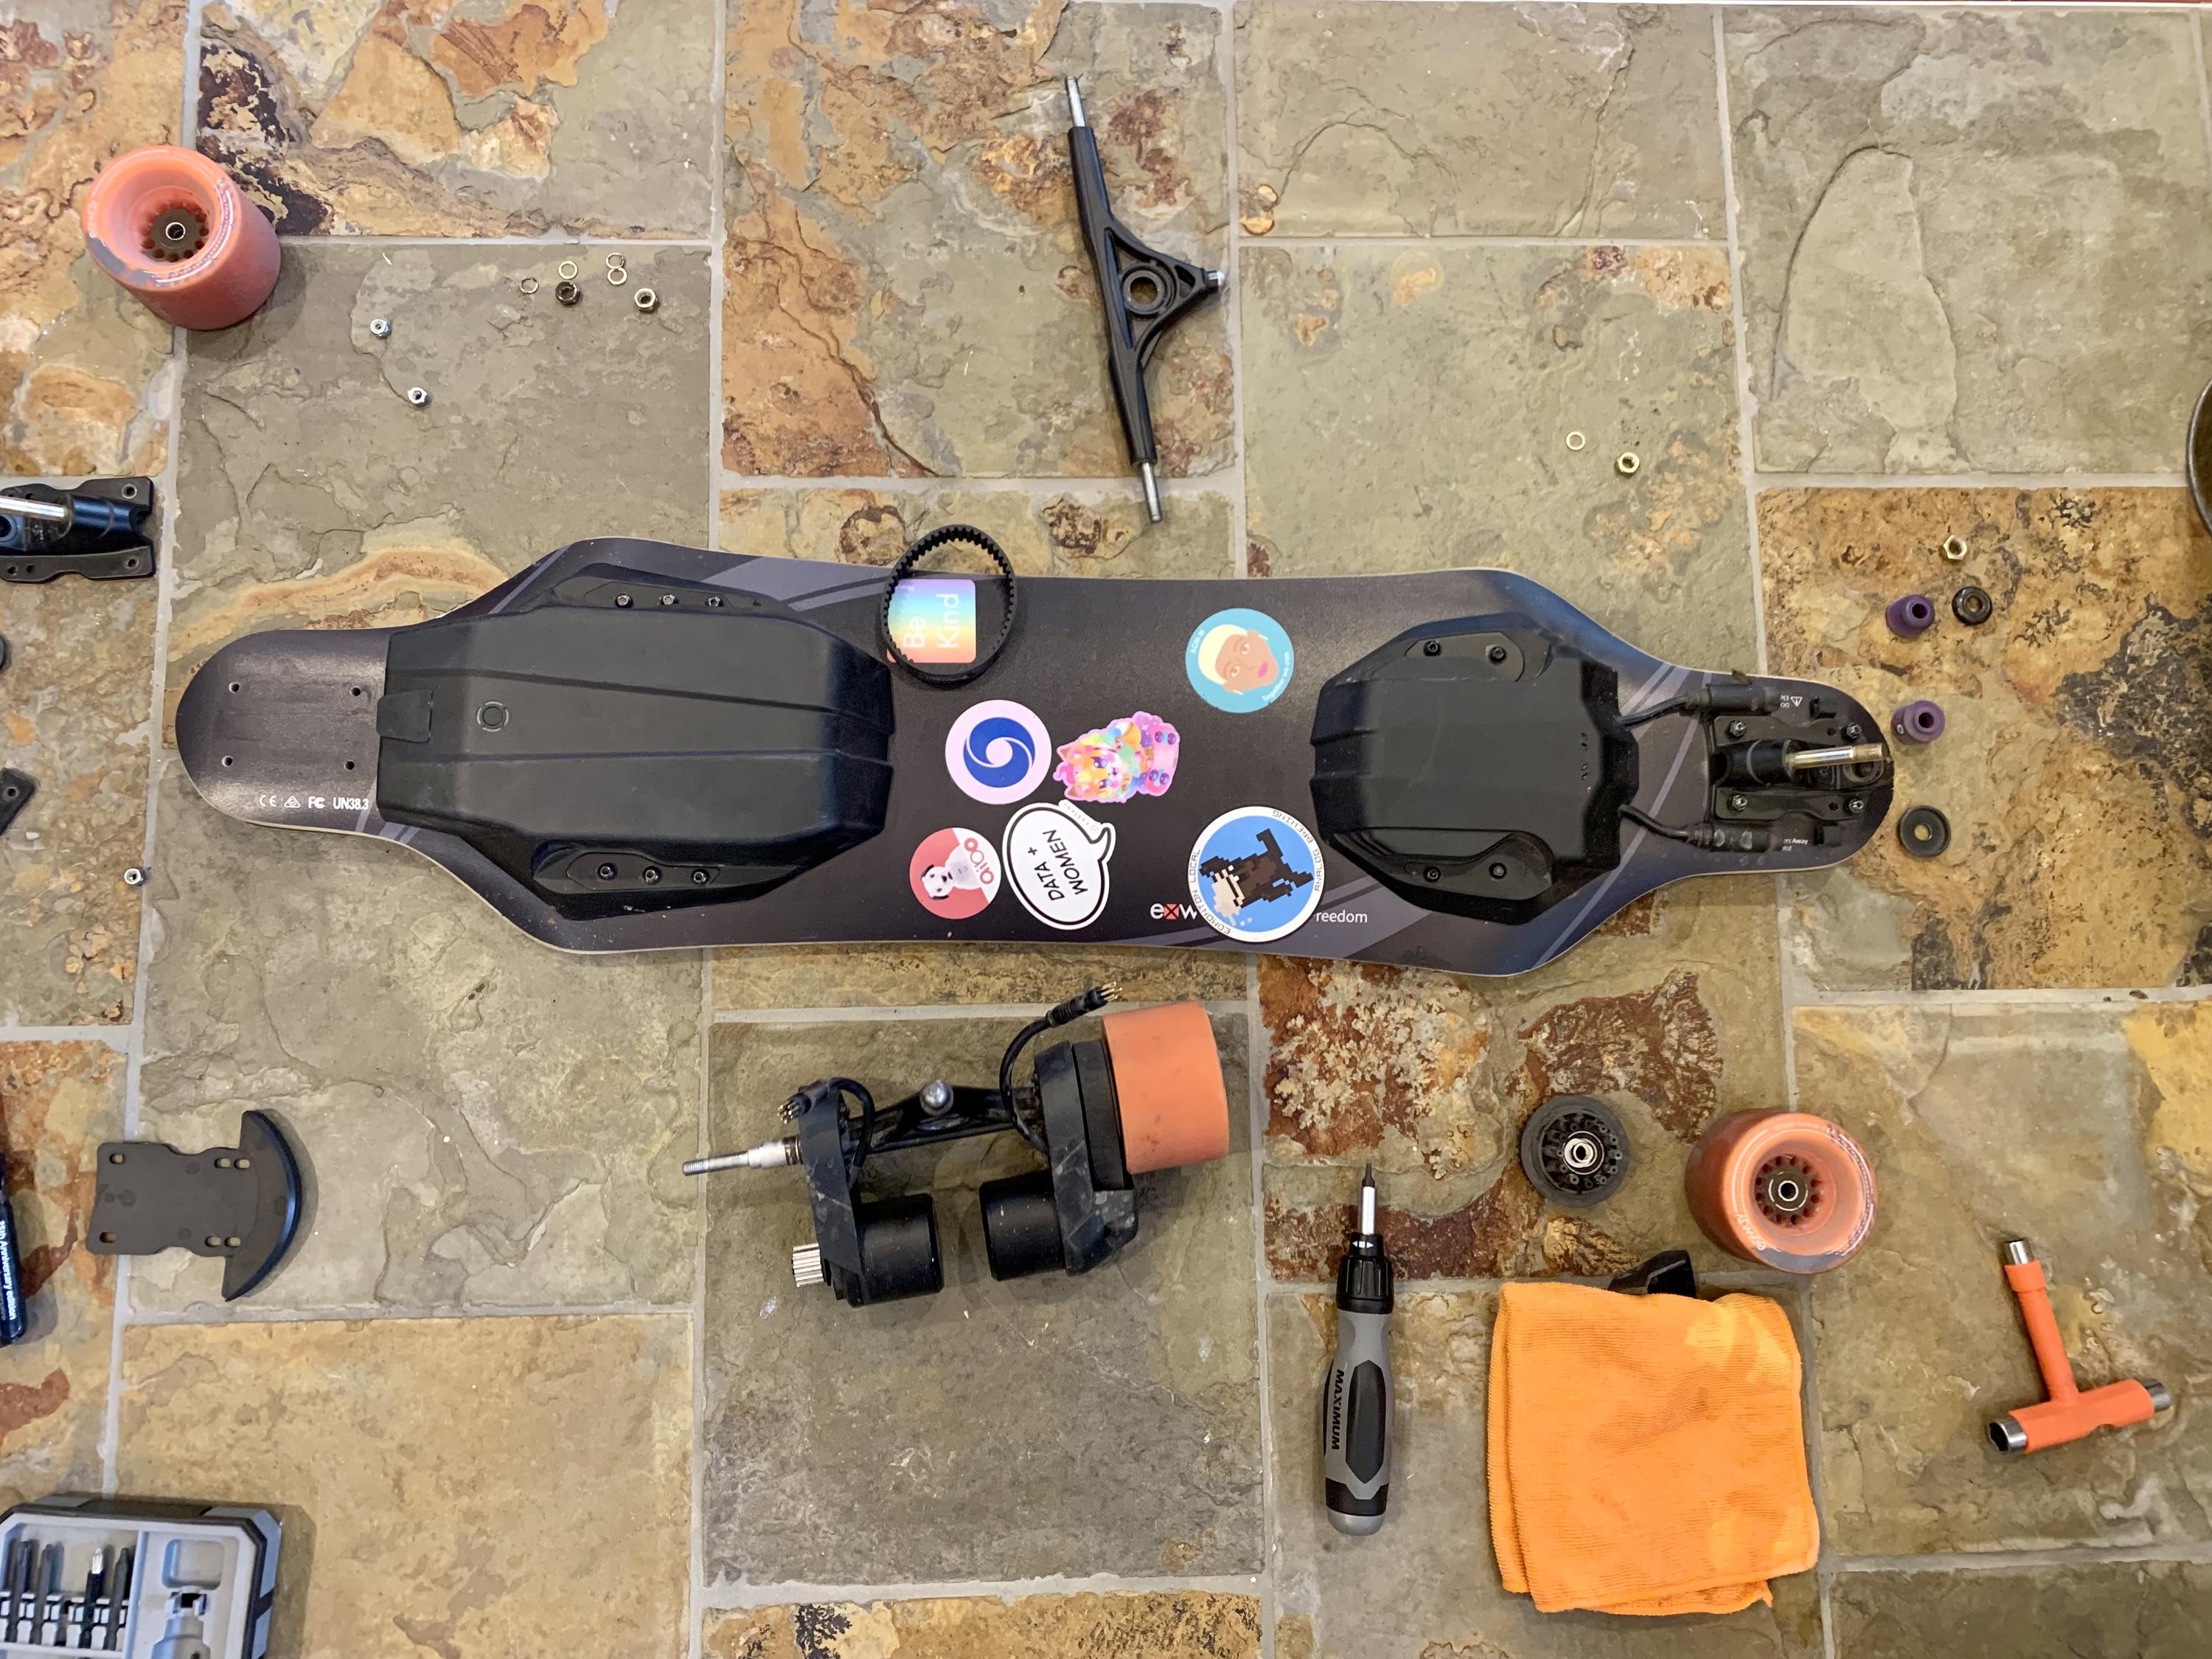
Doing a little spring tune-up on the e-sk8.
Skateboarding is the best hobby I’ve picked up in years. I got an electric board so that I could boot around town, and not have to worry about locking up a bike.
Recently though I’ve been spending a lot more time on my human, powered board. There’s something really nice about aimlessly rolling around town.
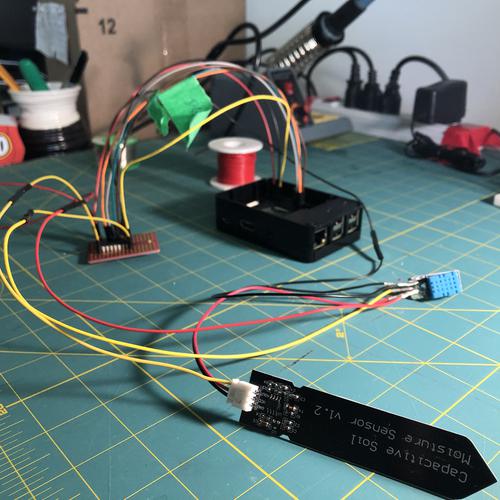
Doing some gardening this evening.
Setting up a small pump to drip irrigate a few plants based on the soil moisture as read by a capacitive sensor.
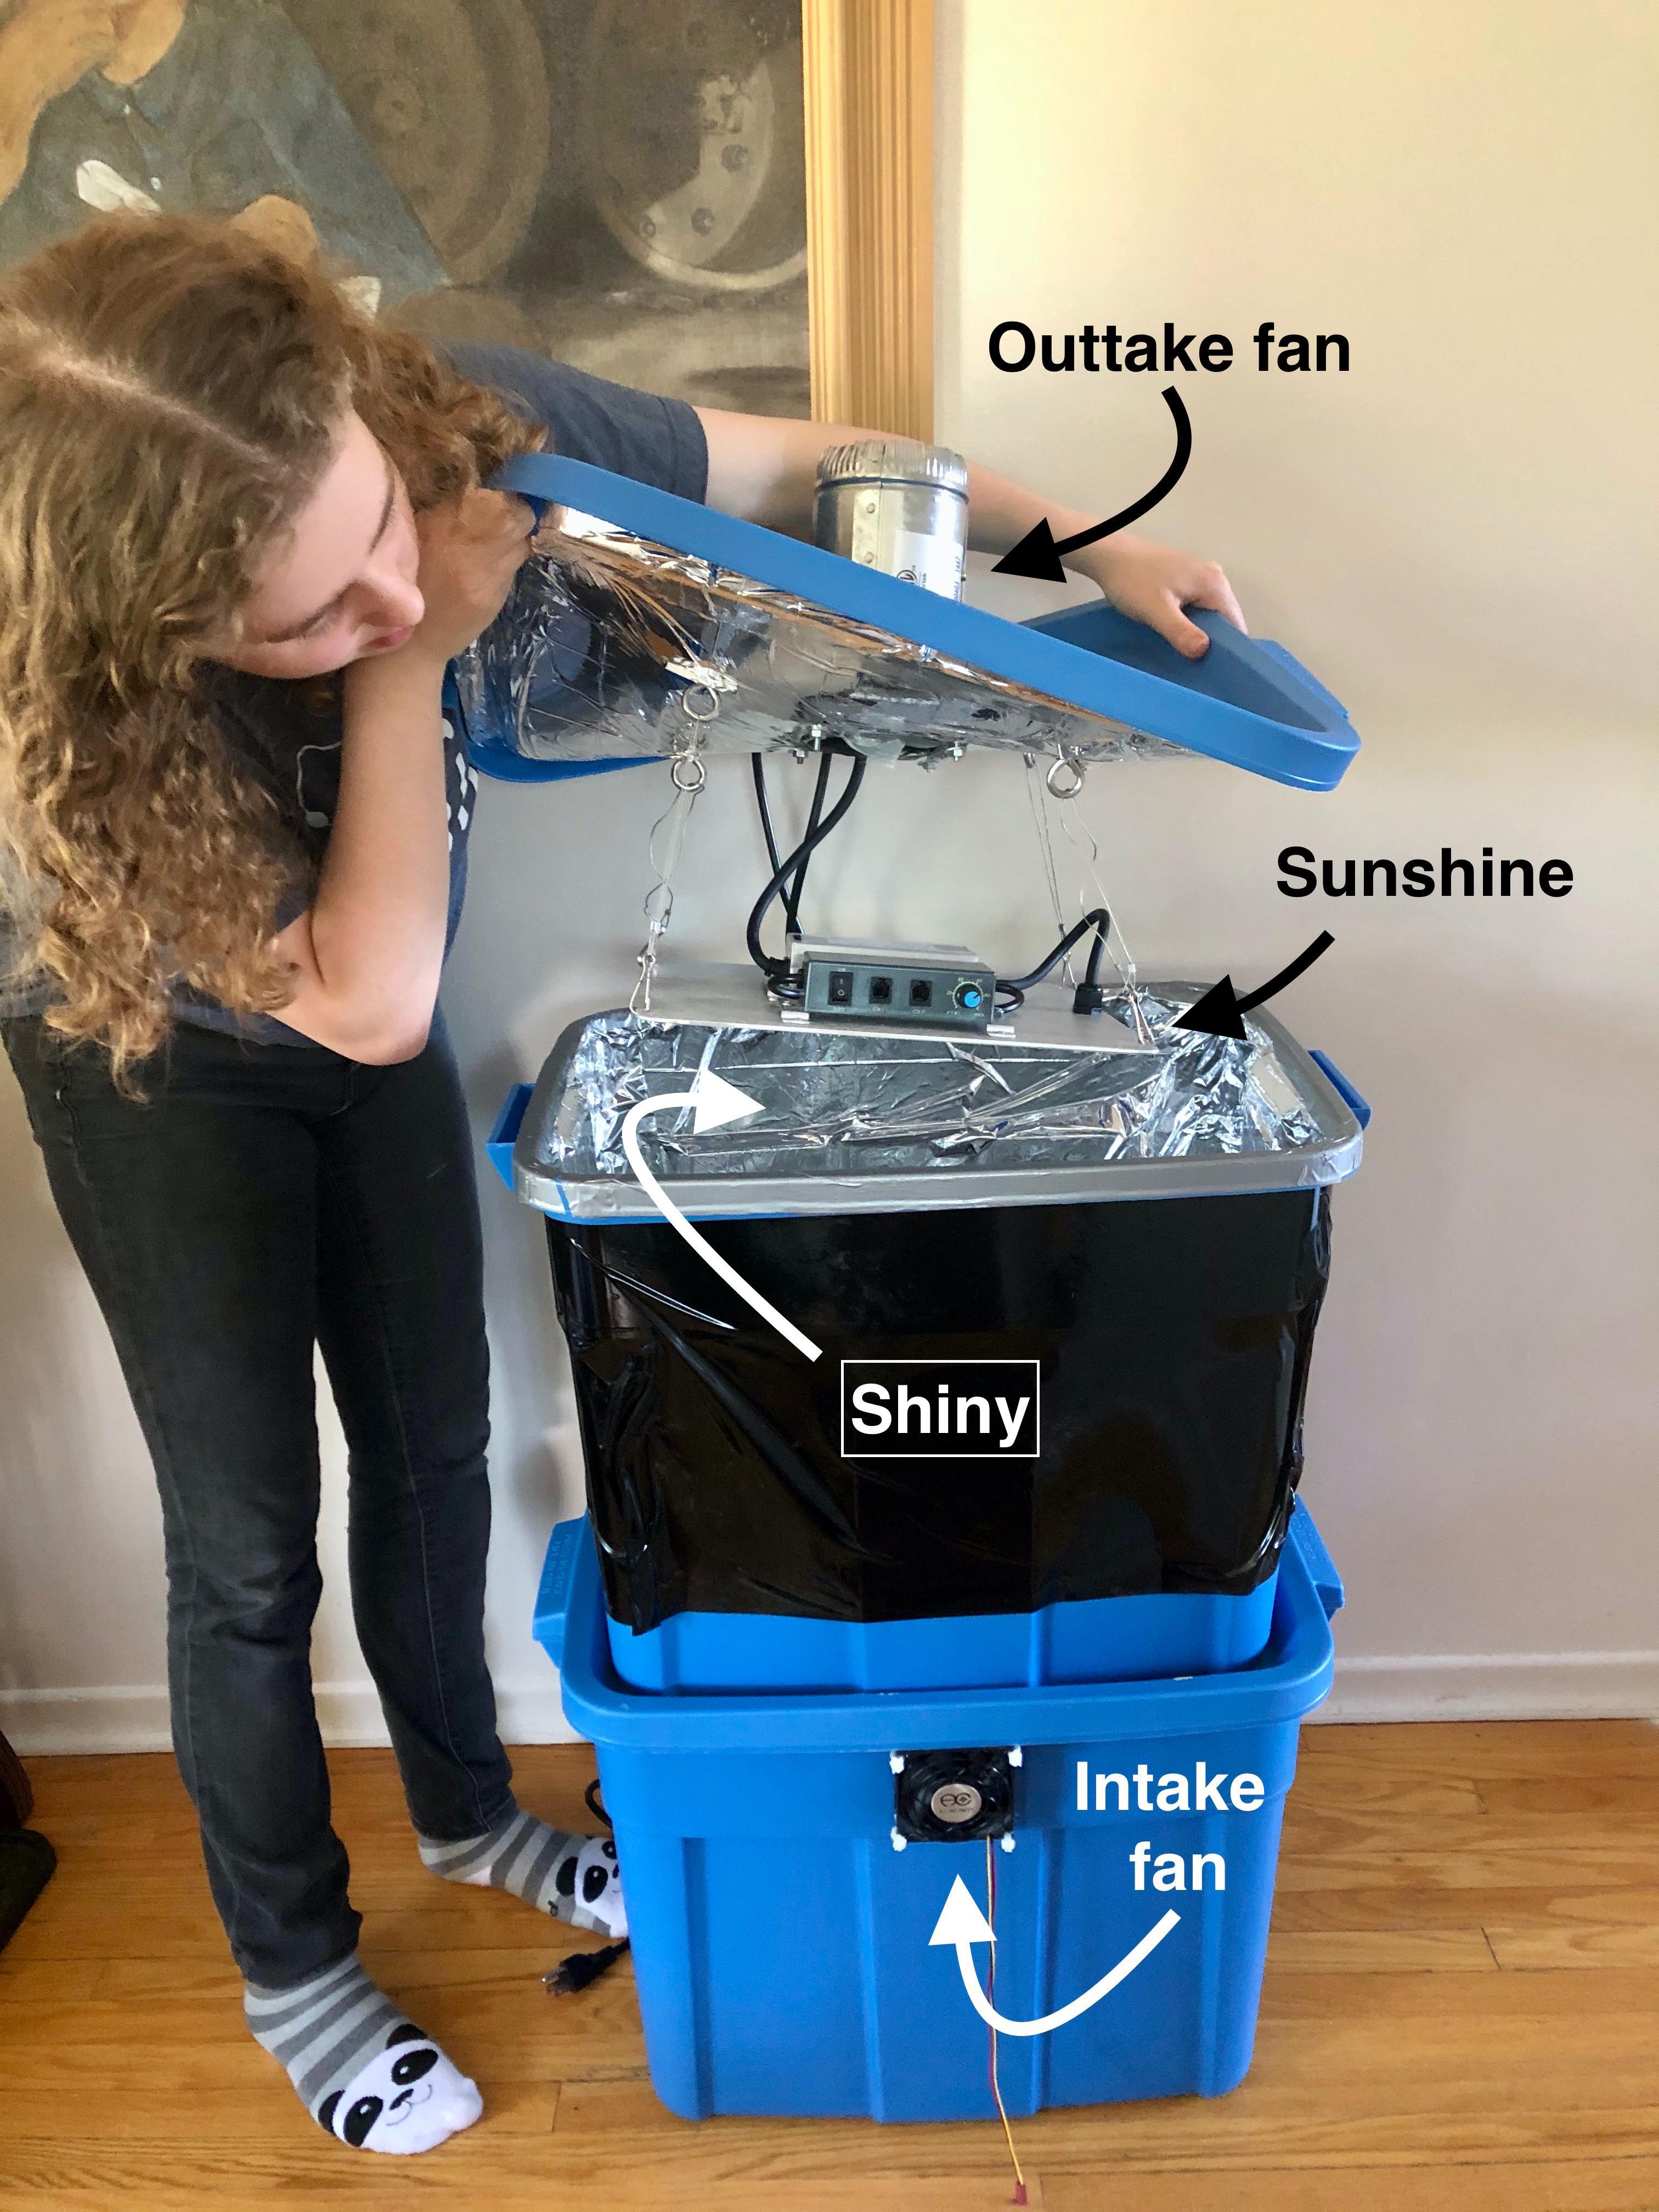
People who live in northern climes enjoy faking the sun. Some people get spray-tans. I made my plants a new home: a box full of sunshine.
Using household materials, I made a tiny greenhouse. Even during the winter, I can cultivate finicky plants and experiment with automated gardening.
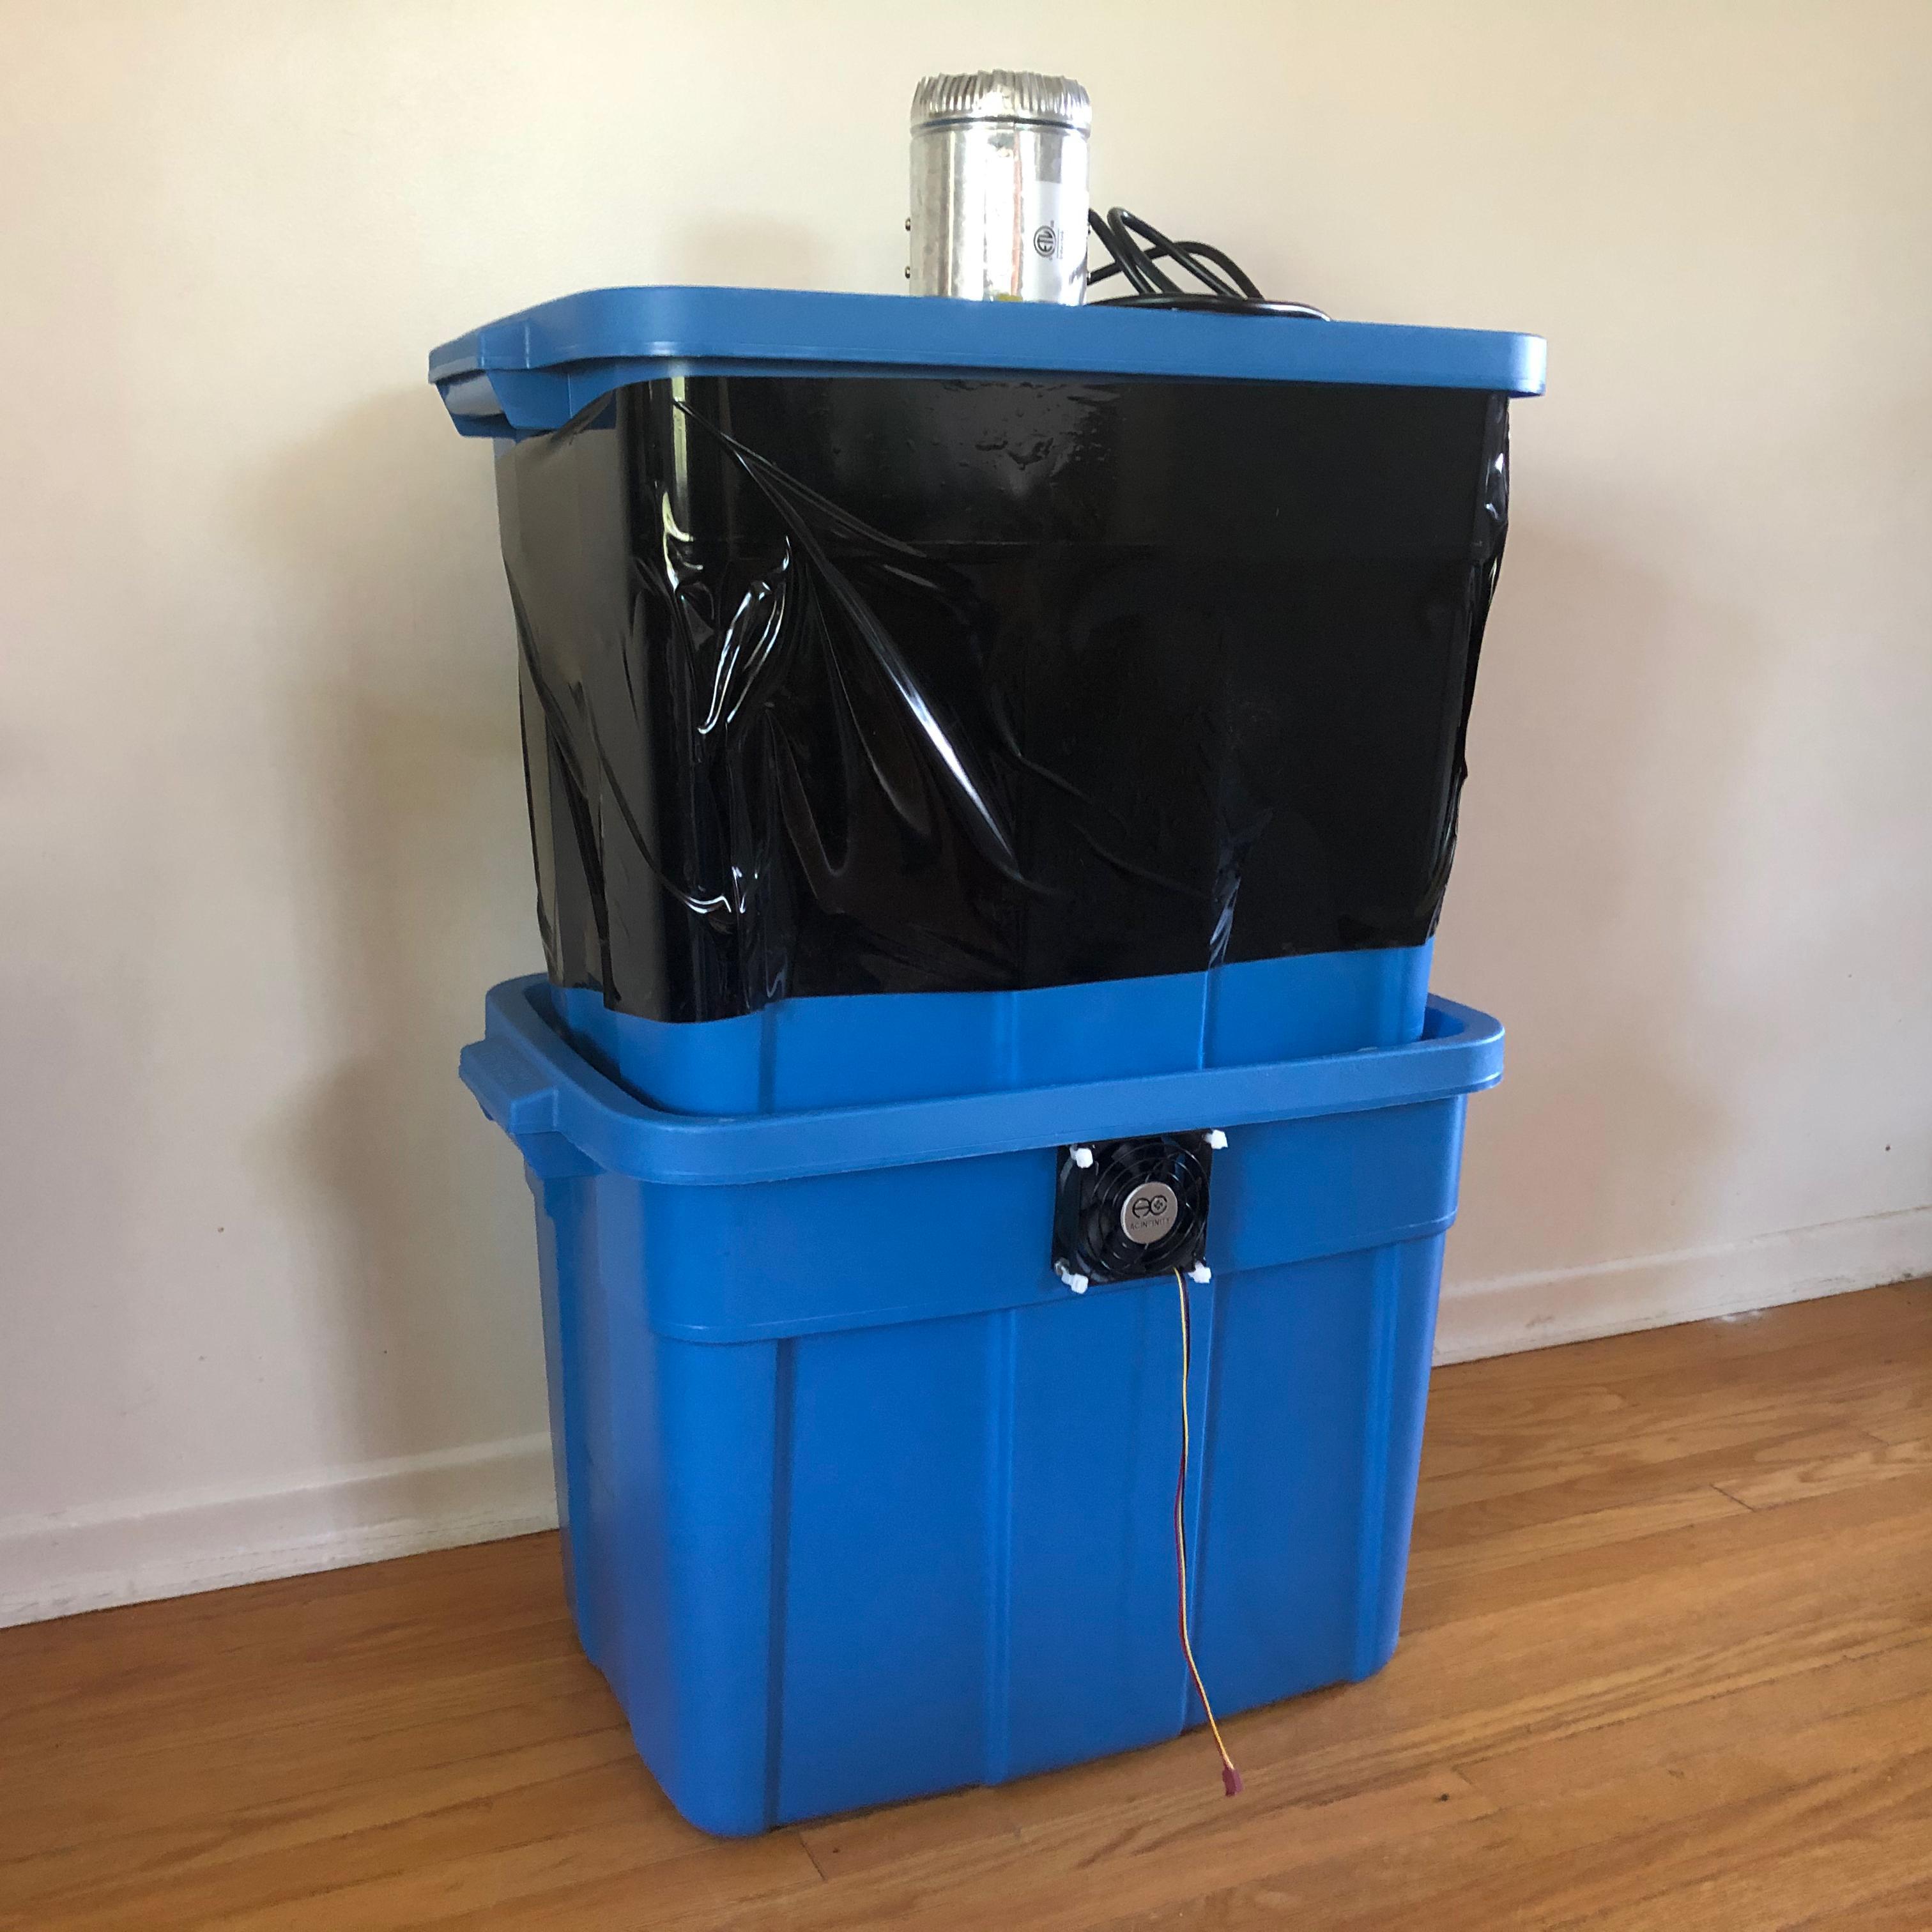
The greenhouse has a small footprint---it can easily slot into the corner of a closet. When deconstructed, it is the size of a single rubbermaid container.
I started this project before I had proper tools, so I designed something that I could construct using only a dremel and a power drill.
I also wanted my project to be fairly simple to put together: I didn't want to have to get a ride to the local hardware store and get pieces pre-cut. As a result, my materials are all things that are common-place: either things that you probably have at home, or things that would be easy to find online. For my build, only needed to purchase the light, fan, and mylar---it was something I could throw together.
materials and parts:
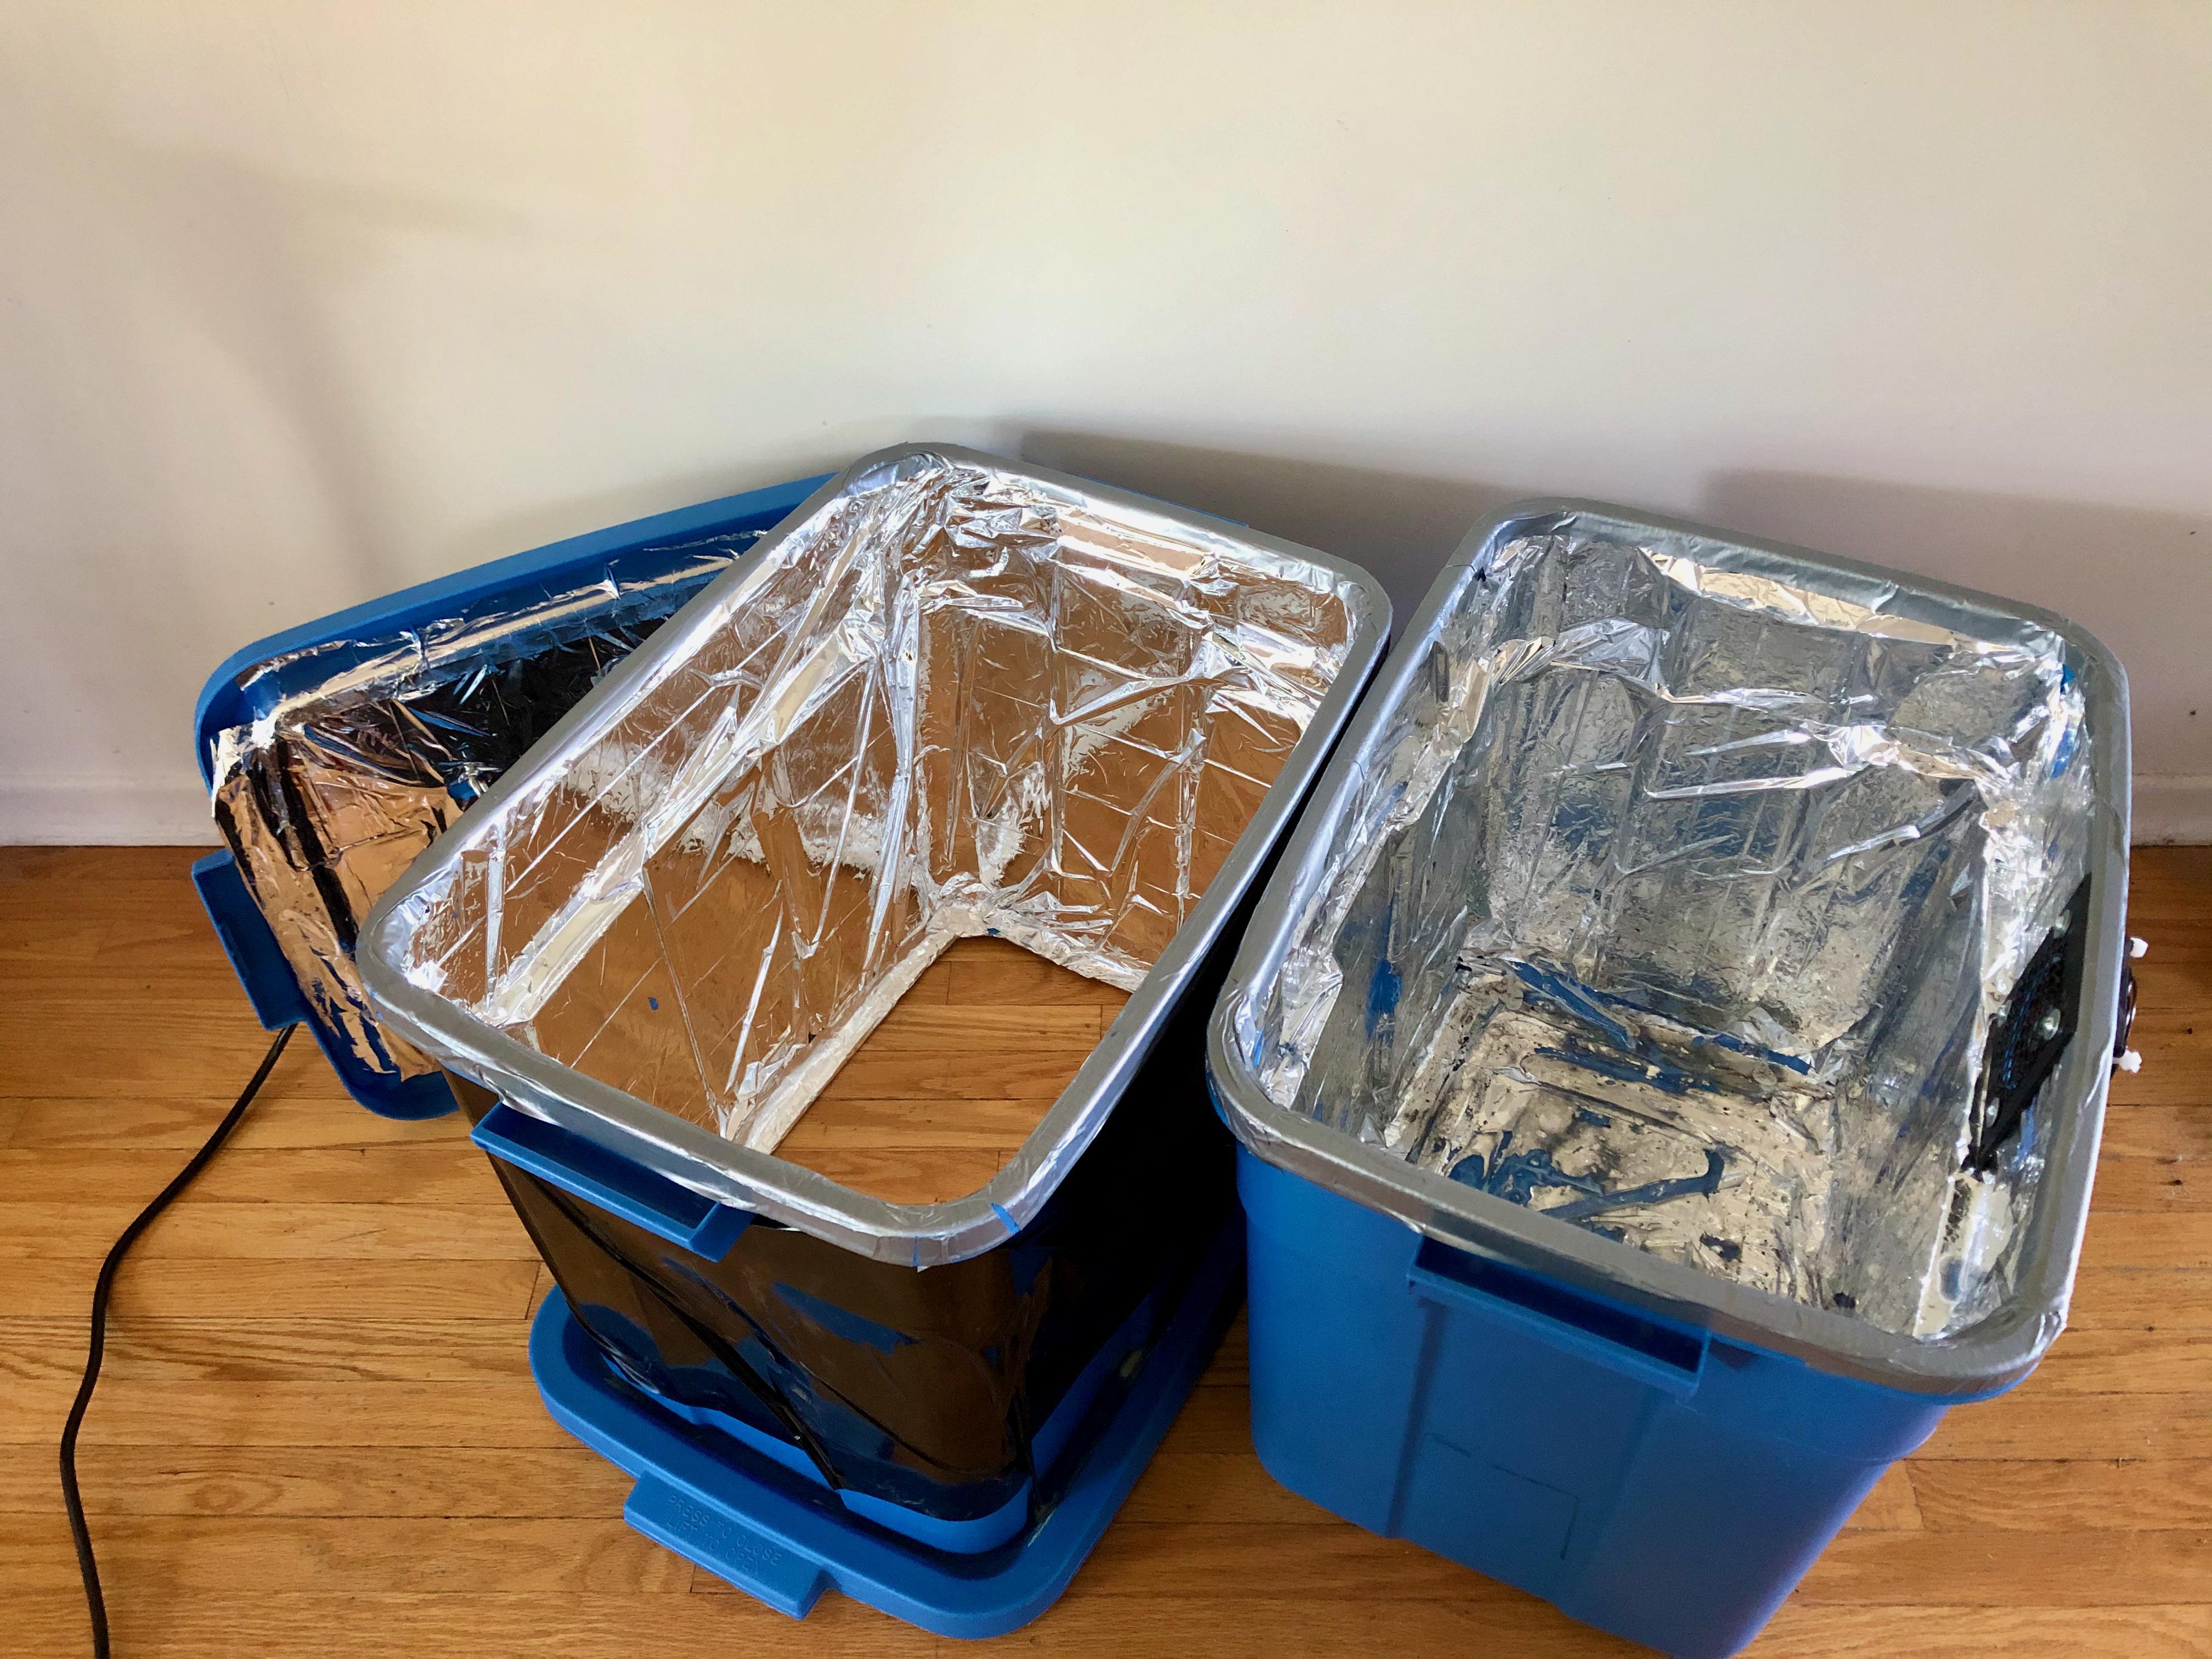
So you have the tools and you have the materials. The first step is to turn the two separate stacked boxes into one mega-box. To do this, cut the bottom out of the top box so that the two boxes form one.
To do this, I glued the top box to the bottom box and used a dremel tool with a saw attachment to cut both the bottom of the box and the lid at the same time.
Cutting both at the same time ensures a good fit between the lid and the upper box, and makes it stack nicely.
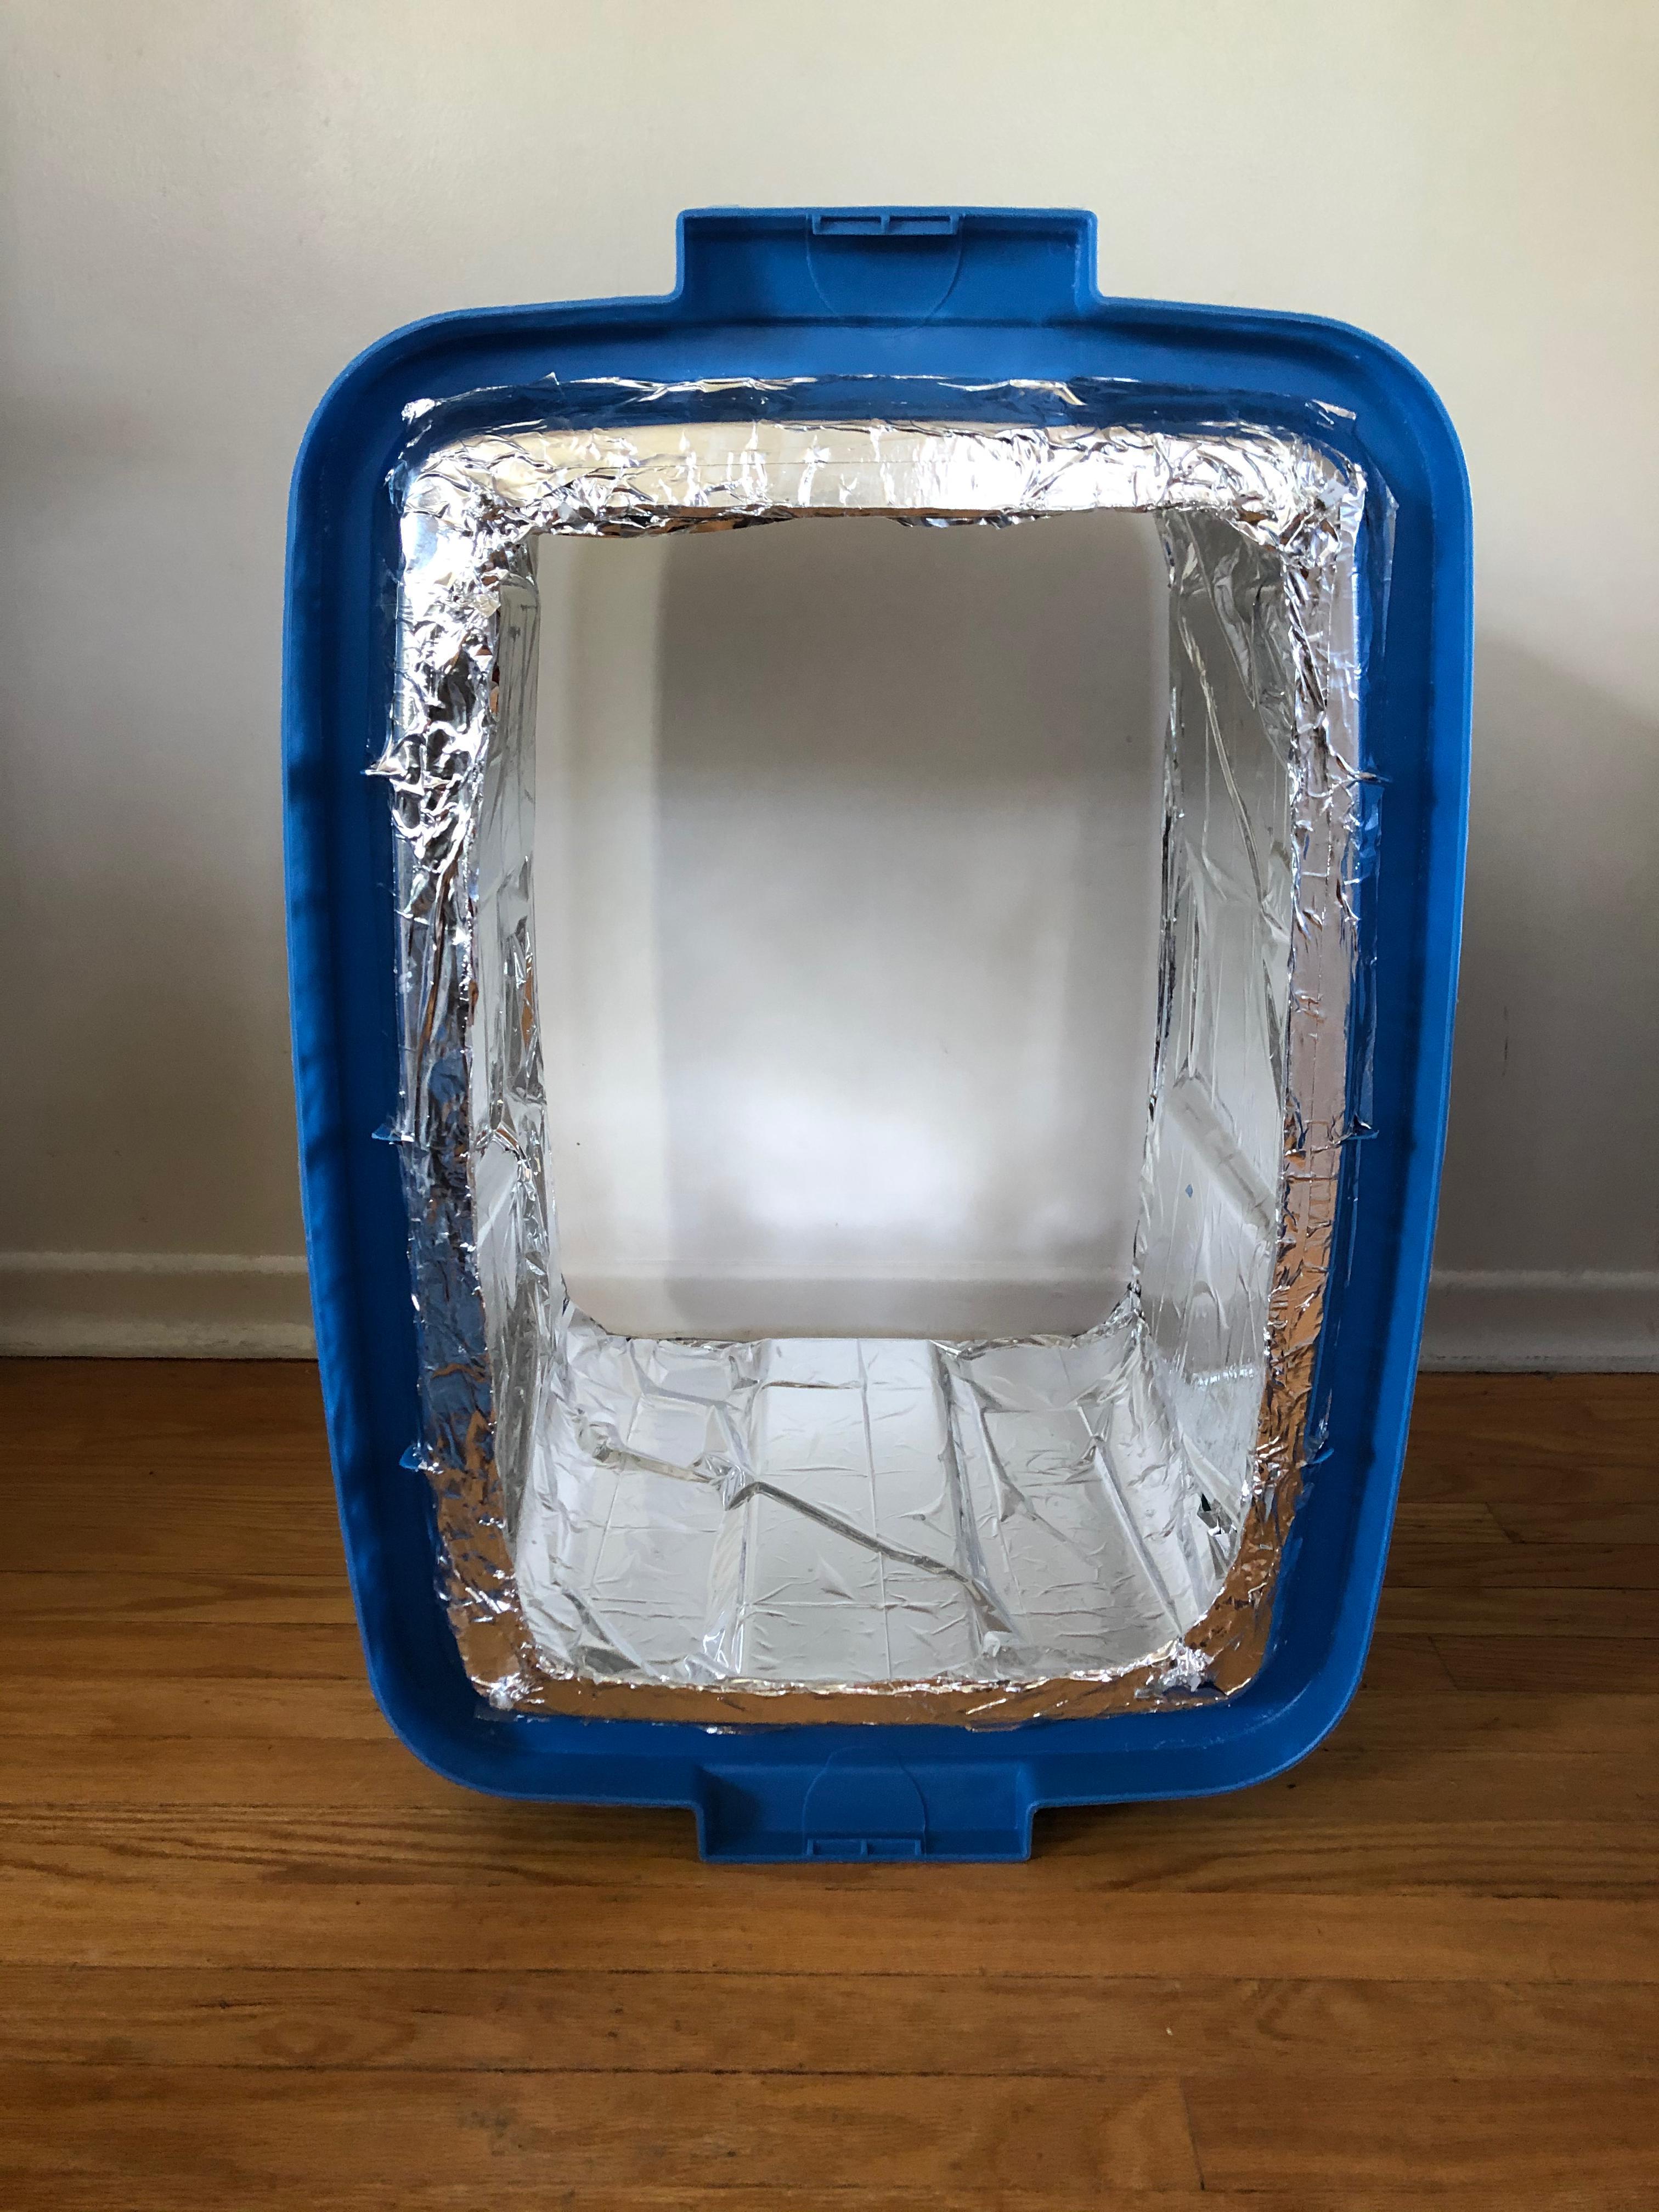
You have a big box now. We're going to shine a light in the box to give the plant what it needs to survive. If we have a single source of light, we want it to be dispersed in the box as efficiently as possible to feed the plant. To disperse the light, I made the walls of the box reflective with mylar.
First, I spread glue on the interior of the box. With the surface of the box primed, I carefully cut and laid sheets of mylar that were sized to perfectly wrap around one layer of the box.
By applying mylar the inside of both boxes becomes a reflective chamber, efficiently making use of whatever lighting you choose.
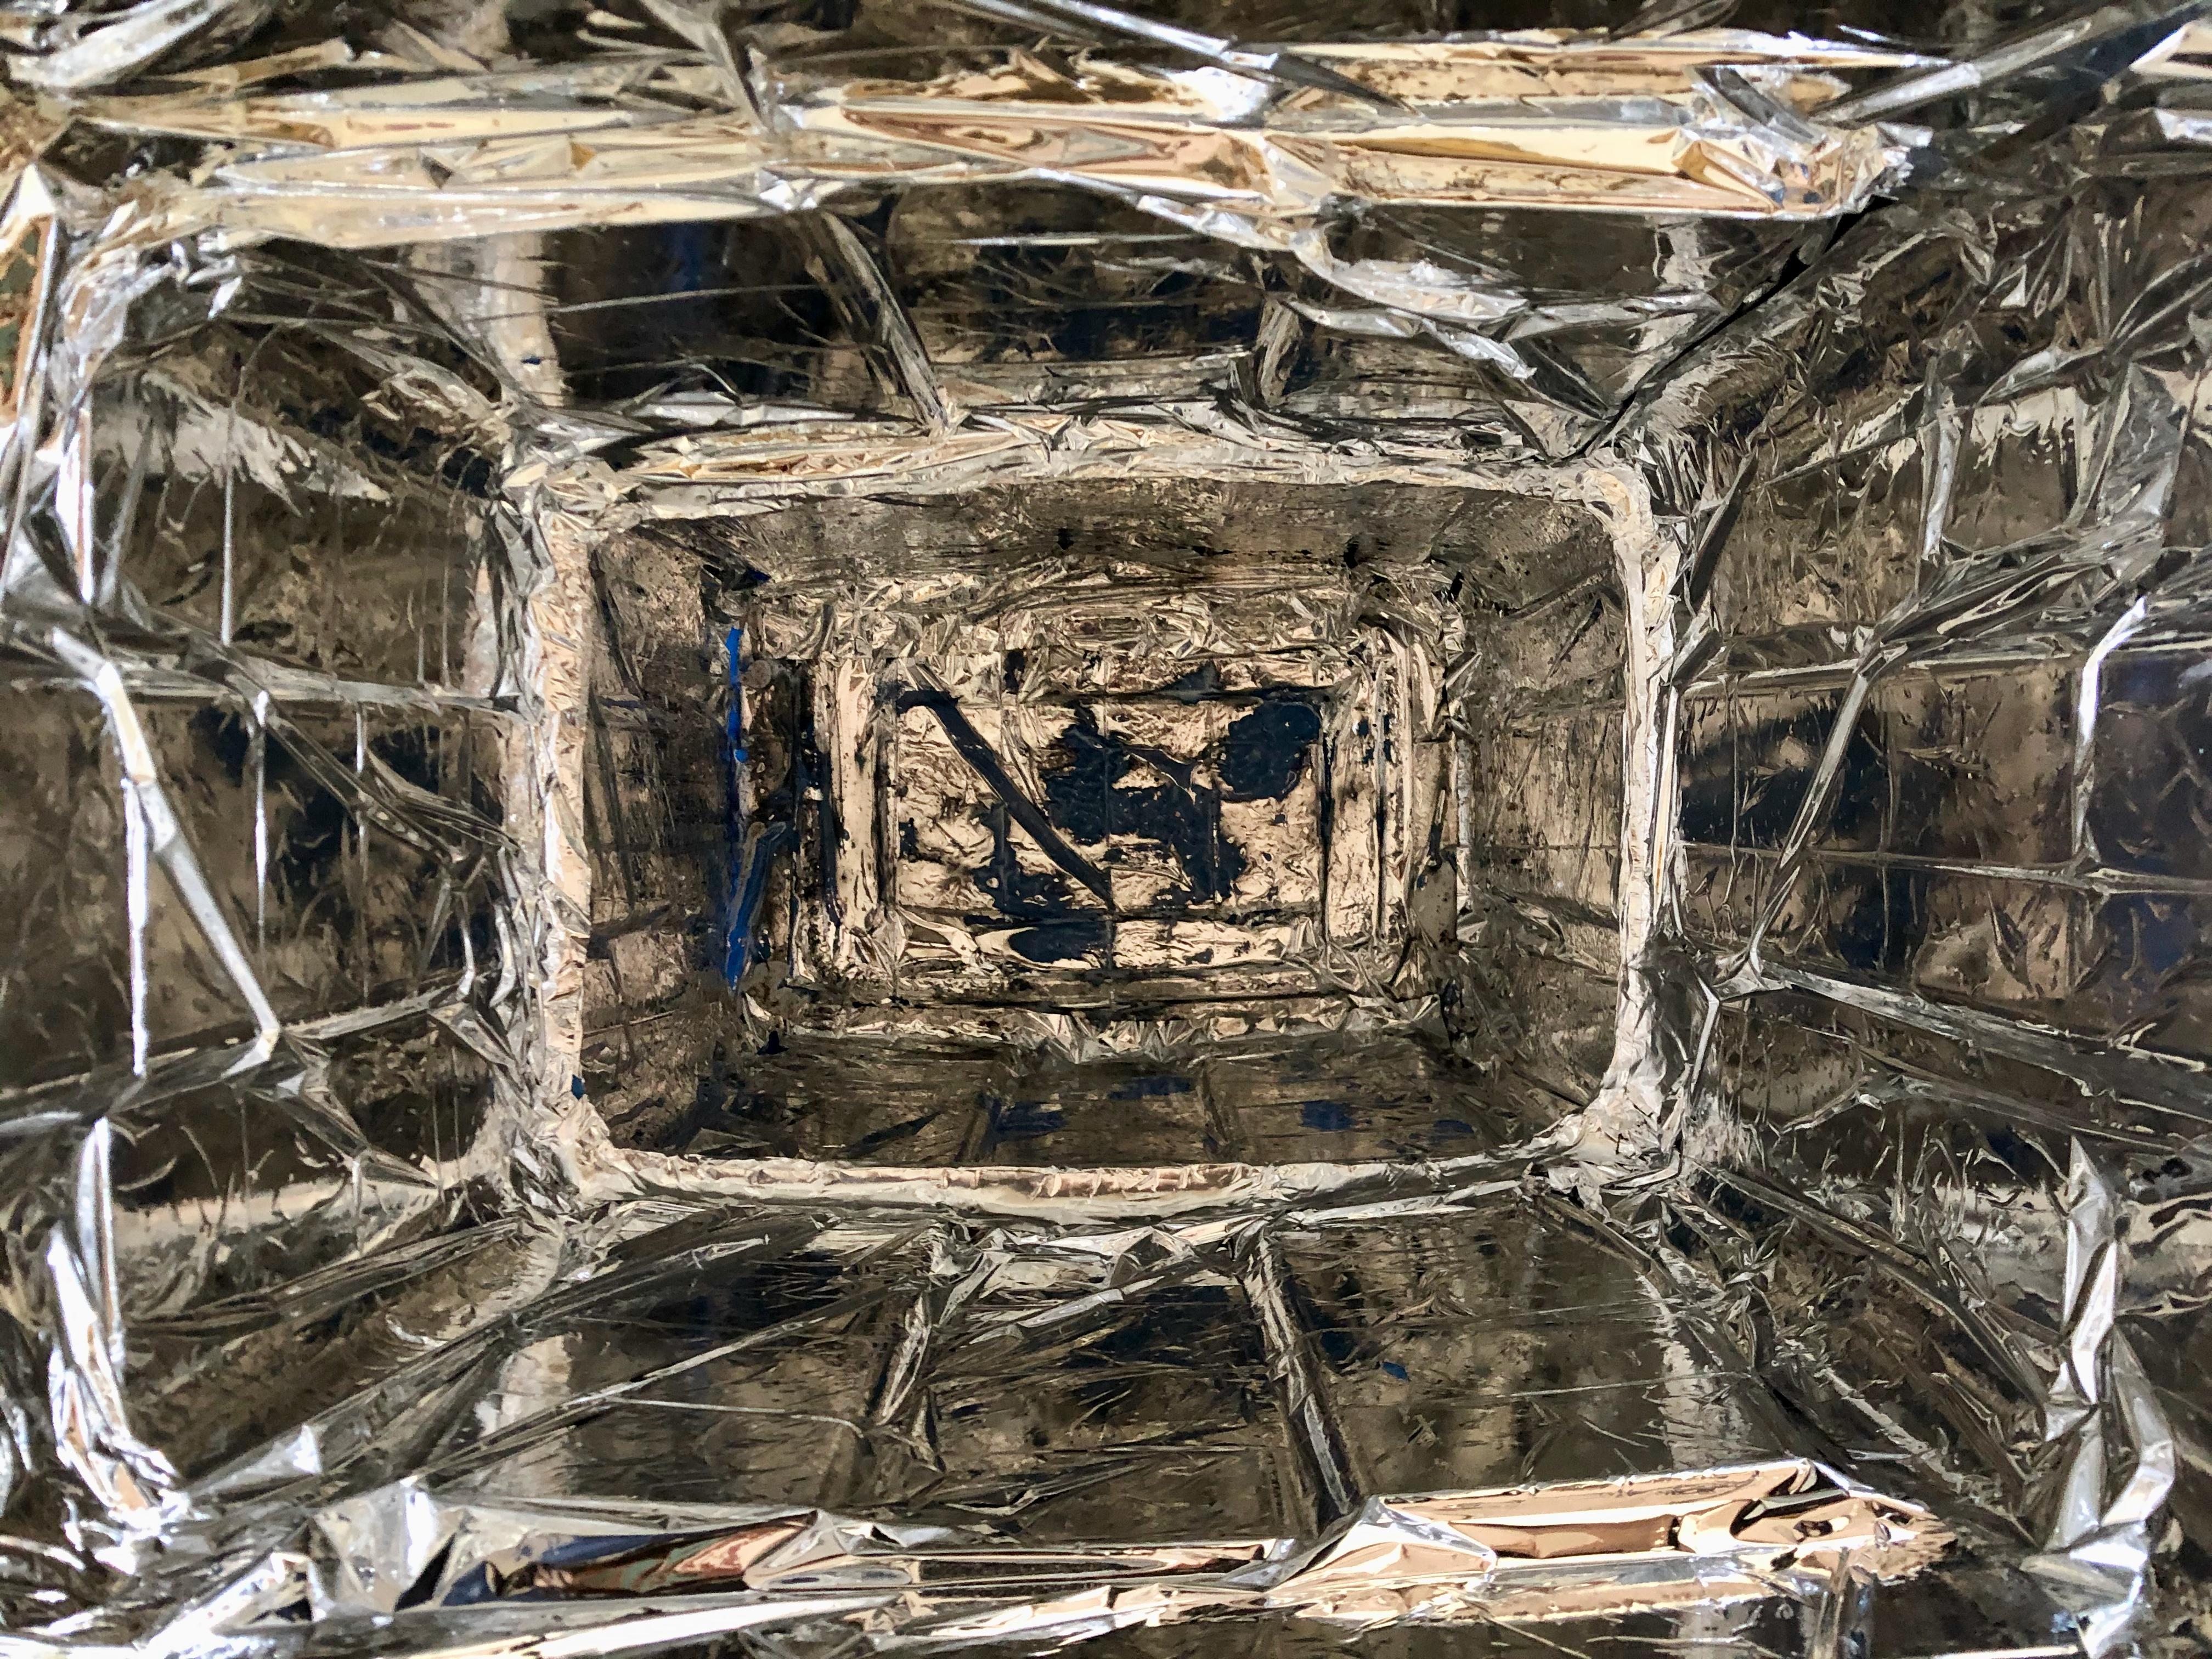
The lip of the bottom box might be a little rough around the mylar. Since you may want to lift the lid from the bottom box to get at your plants, you'll want to tidy it up---you don't want the mylar to tear from the sides when lifting the lid.
To clean up the edges and protect the reflective coating, I applied duct tape all around the edge of the box.

Plants need air circulation. I used a PC Fan for air intake. In most cases, this is all you'll need.
To get a good fit, hold the fan up to the box and trace a square outline of the fan. Inside the square, trace a circle with a diameter that equals the fan. To cut the circular hole, I used a dremel. In each corner of the square, drill out holes. Using screws, attach the fan to the holes drilled.
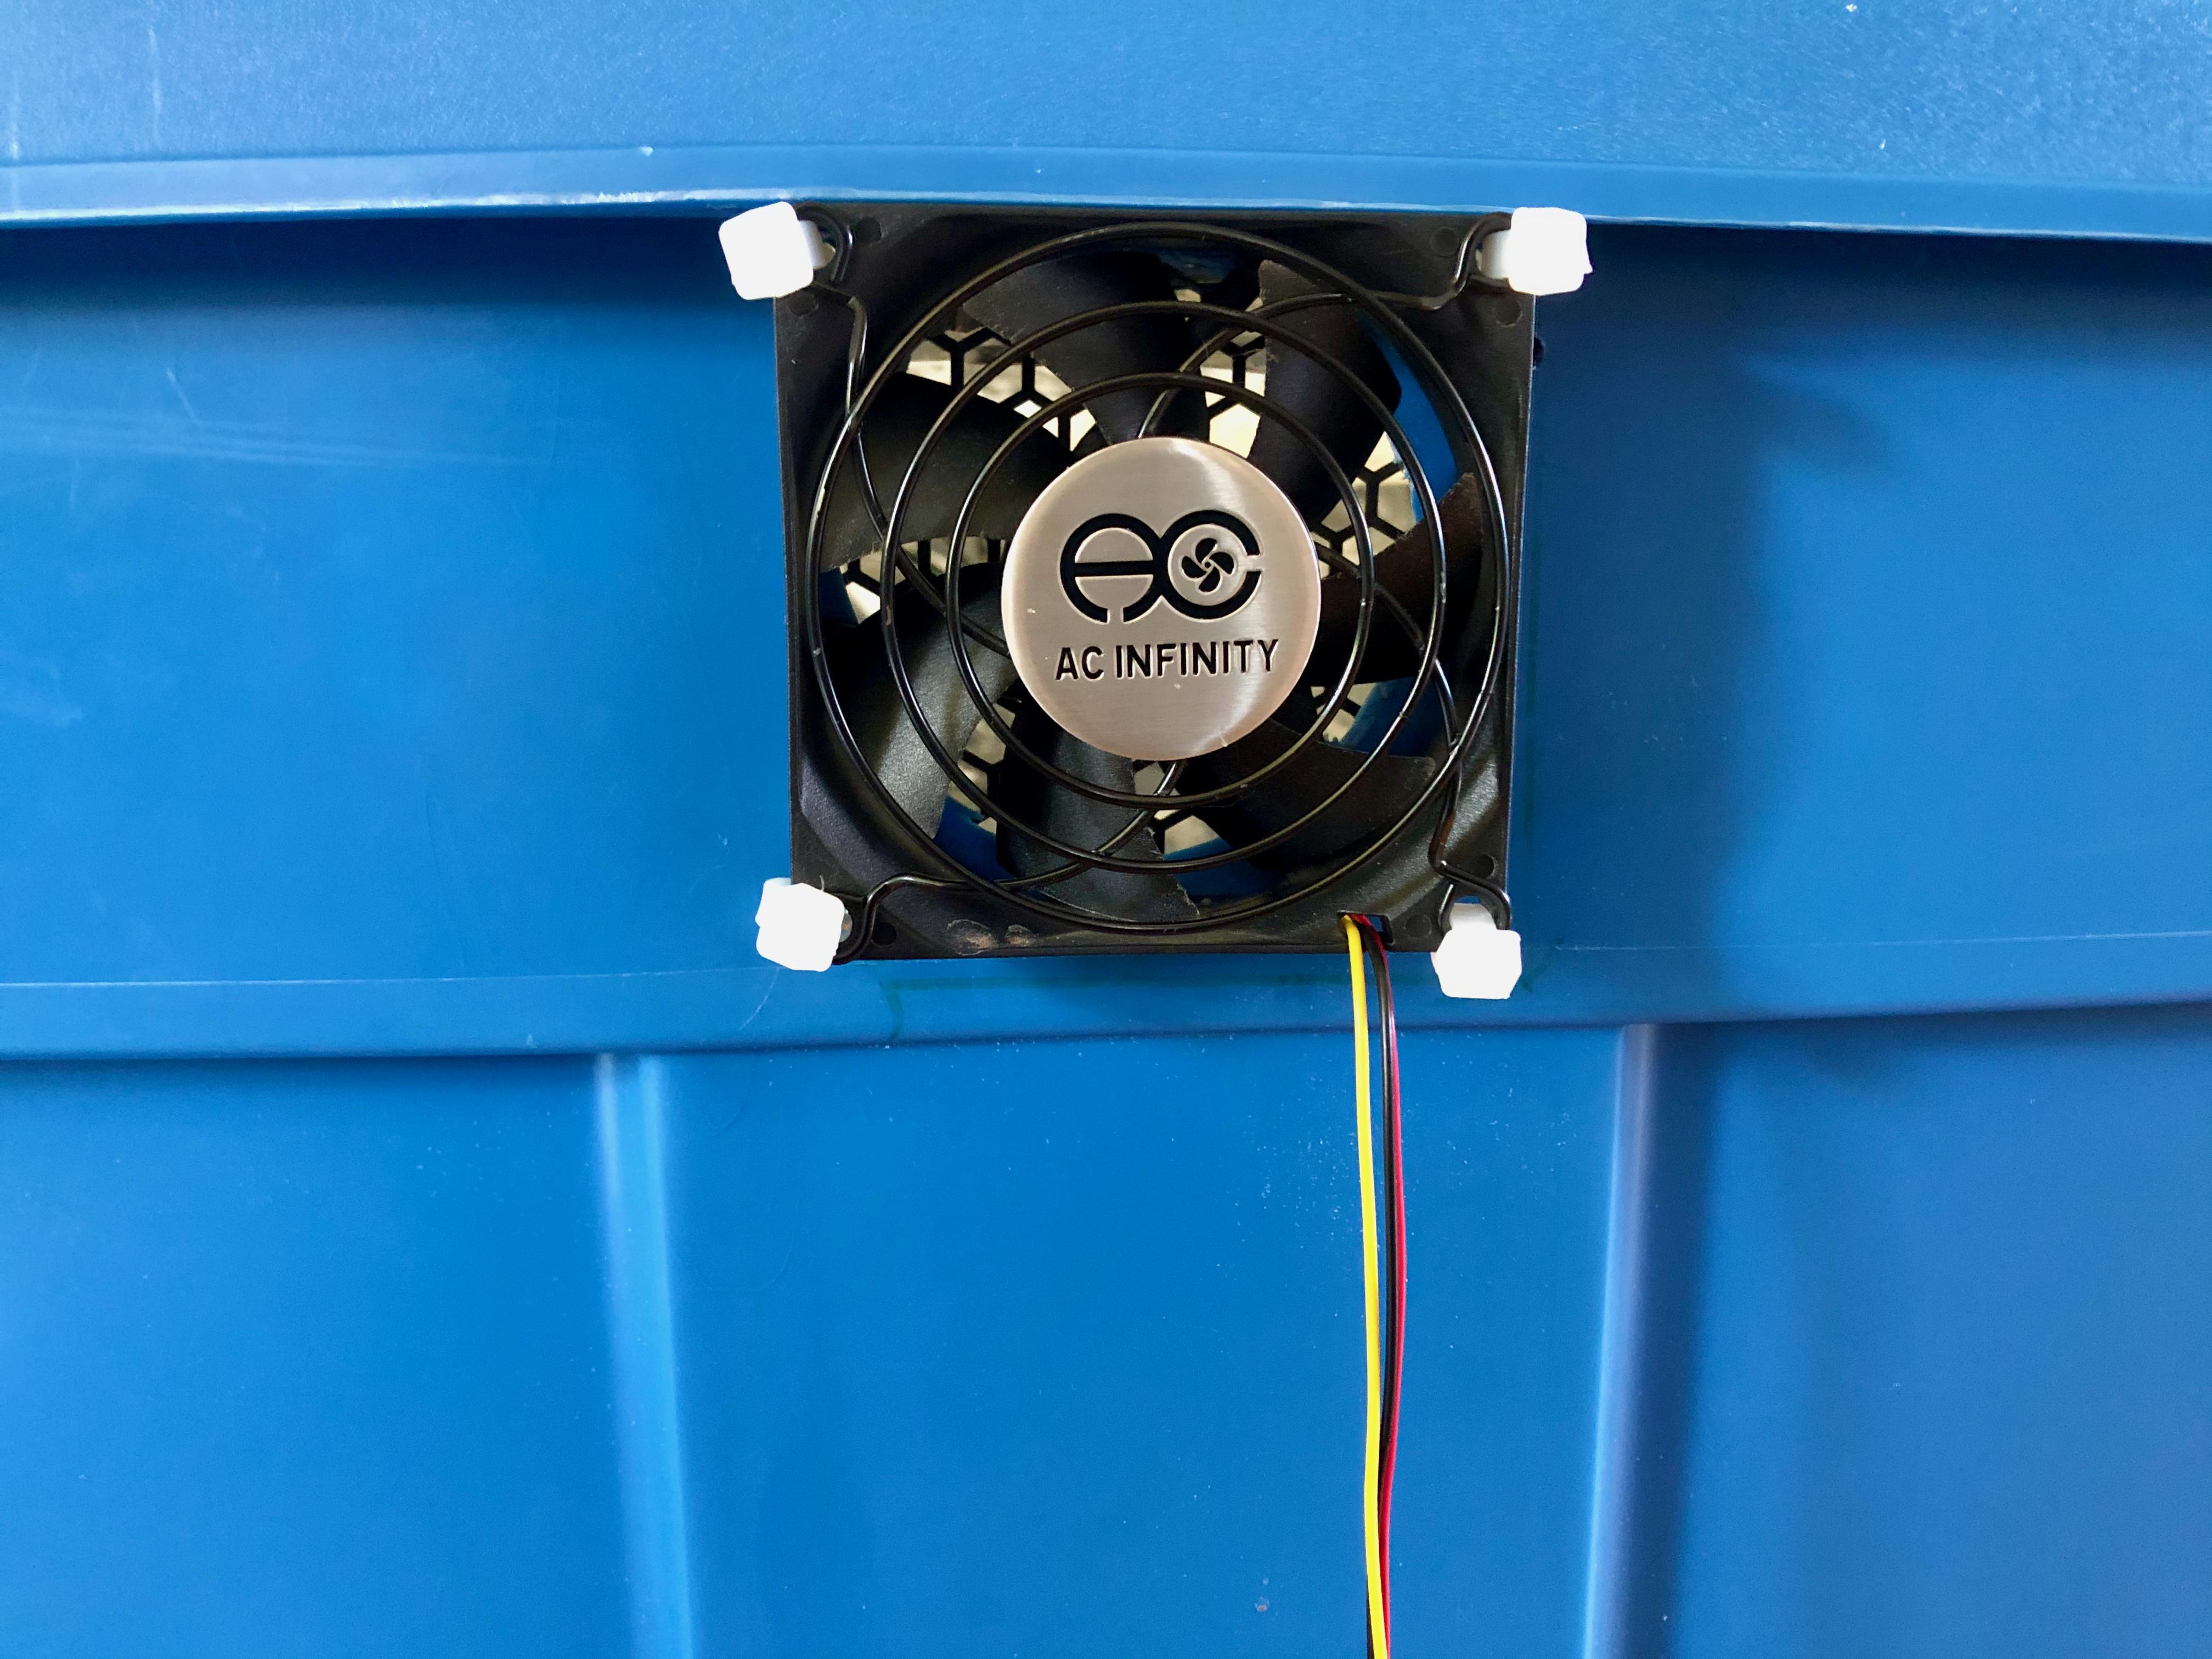
I chose to get protective plates to attach to either side of the fan. This adds a little extra protection and makes sure that anything your growing doesn't get in the fans, and that anything next to the box doesn't get caught.
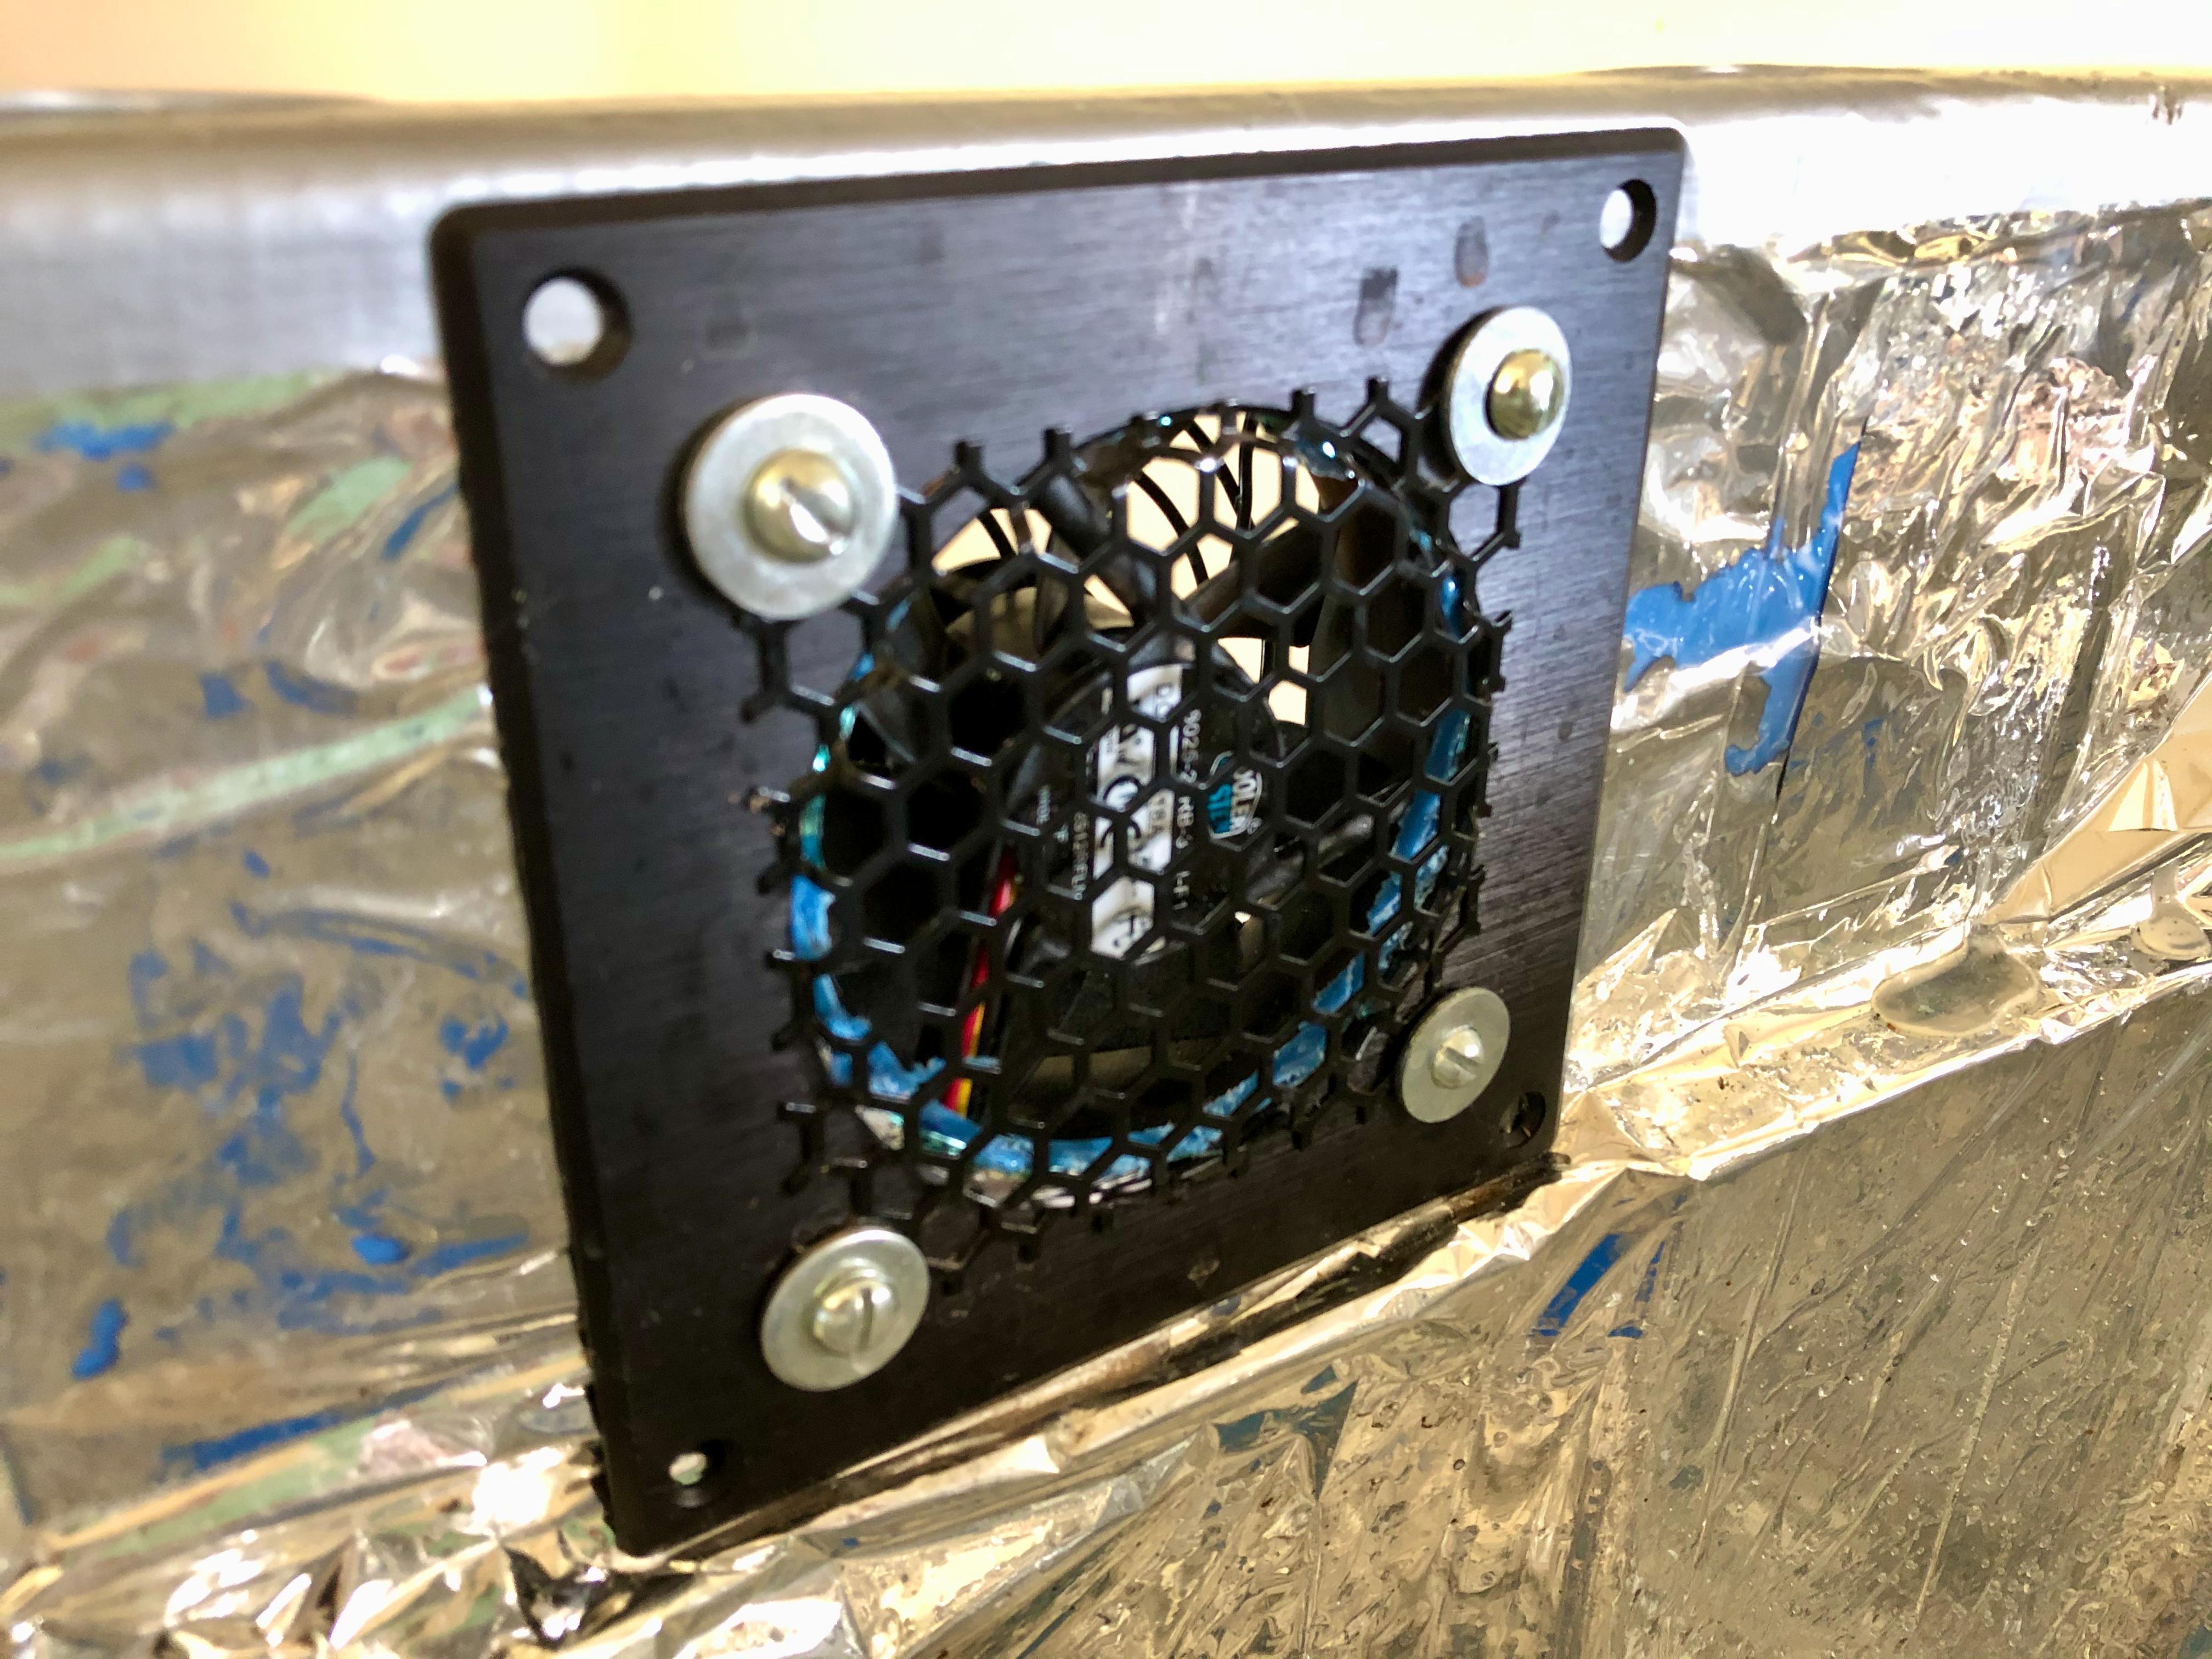
Because I used a 4 inch inline fan for out-take, this wasn't strictly necessary. I knew I was going to probably want to build something bigger later, so I got myself a bigger fan.
My light hangs from the top of the box to give my little plants some sunshine. I drilled four holes into the boxes lid and attached four hooks around the box. These hooks have screws so that you can attach nuts to the end of them. I placed washers between the screw and the nut on either side of the plastic to add some stability and prevent stress from tearing the plastic lid around the drilled holes.
Using a box cutter and the dremel, I made a little hole for the light's power cable to thread through. After attaching the light, you can pull the power cable through the hole and plug it in outside of the box.
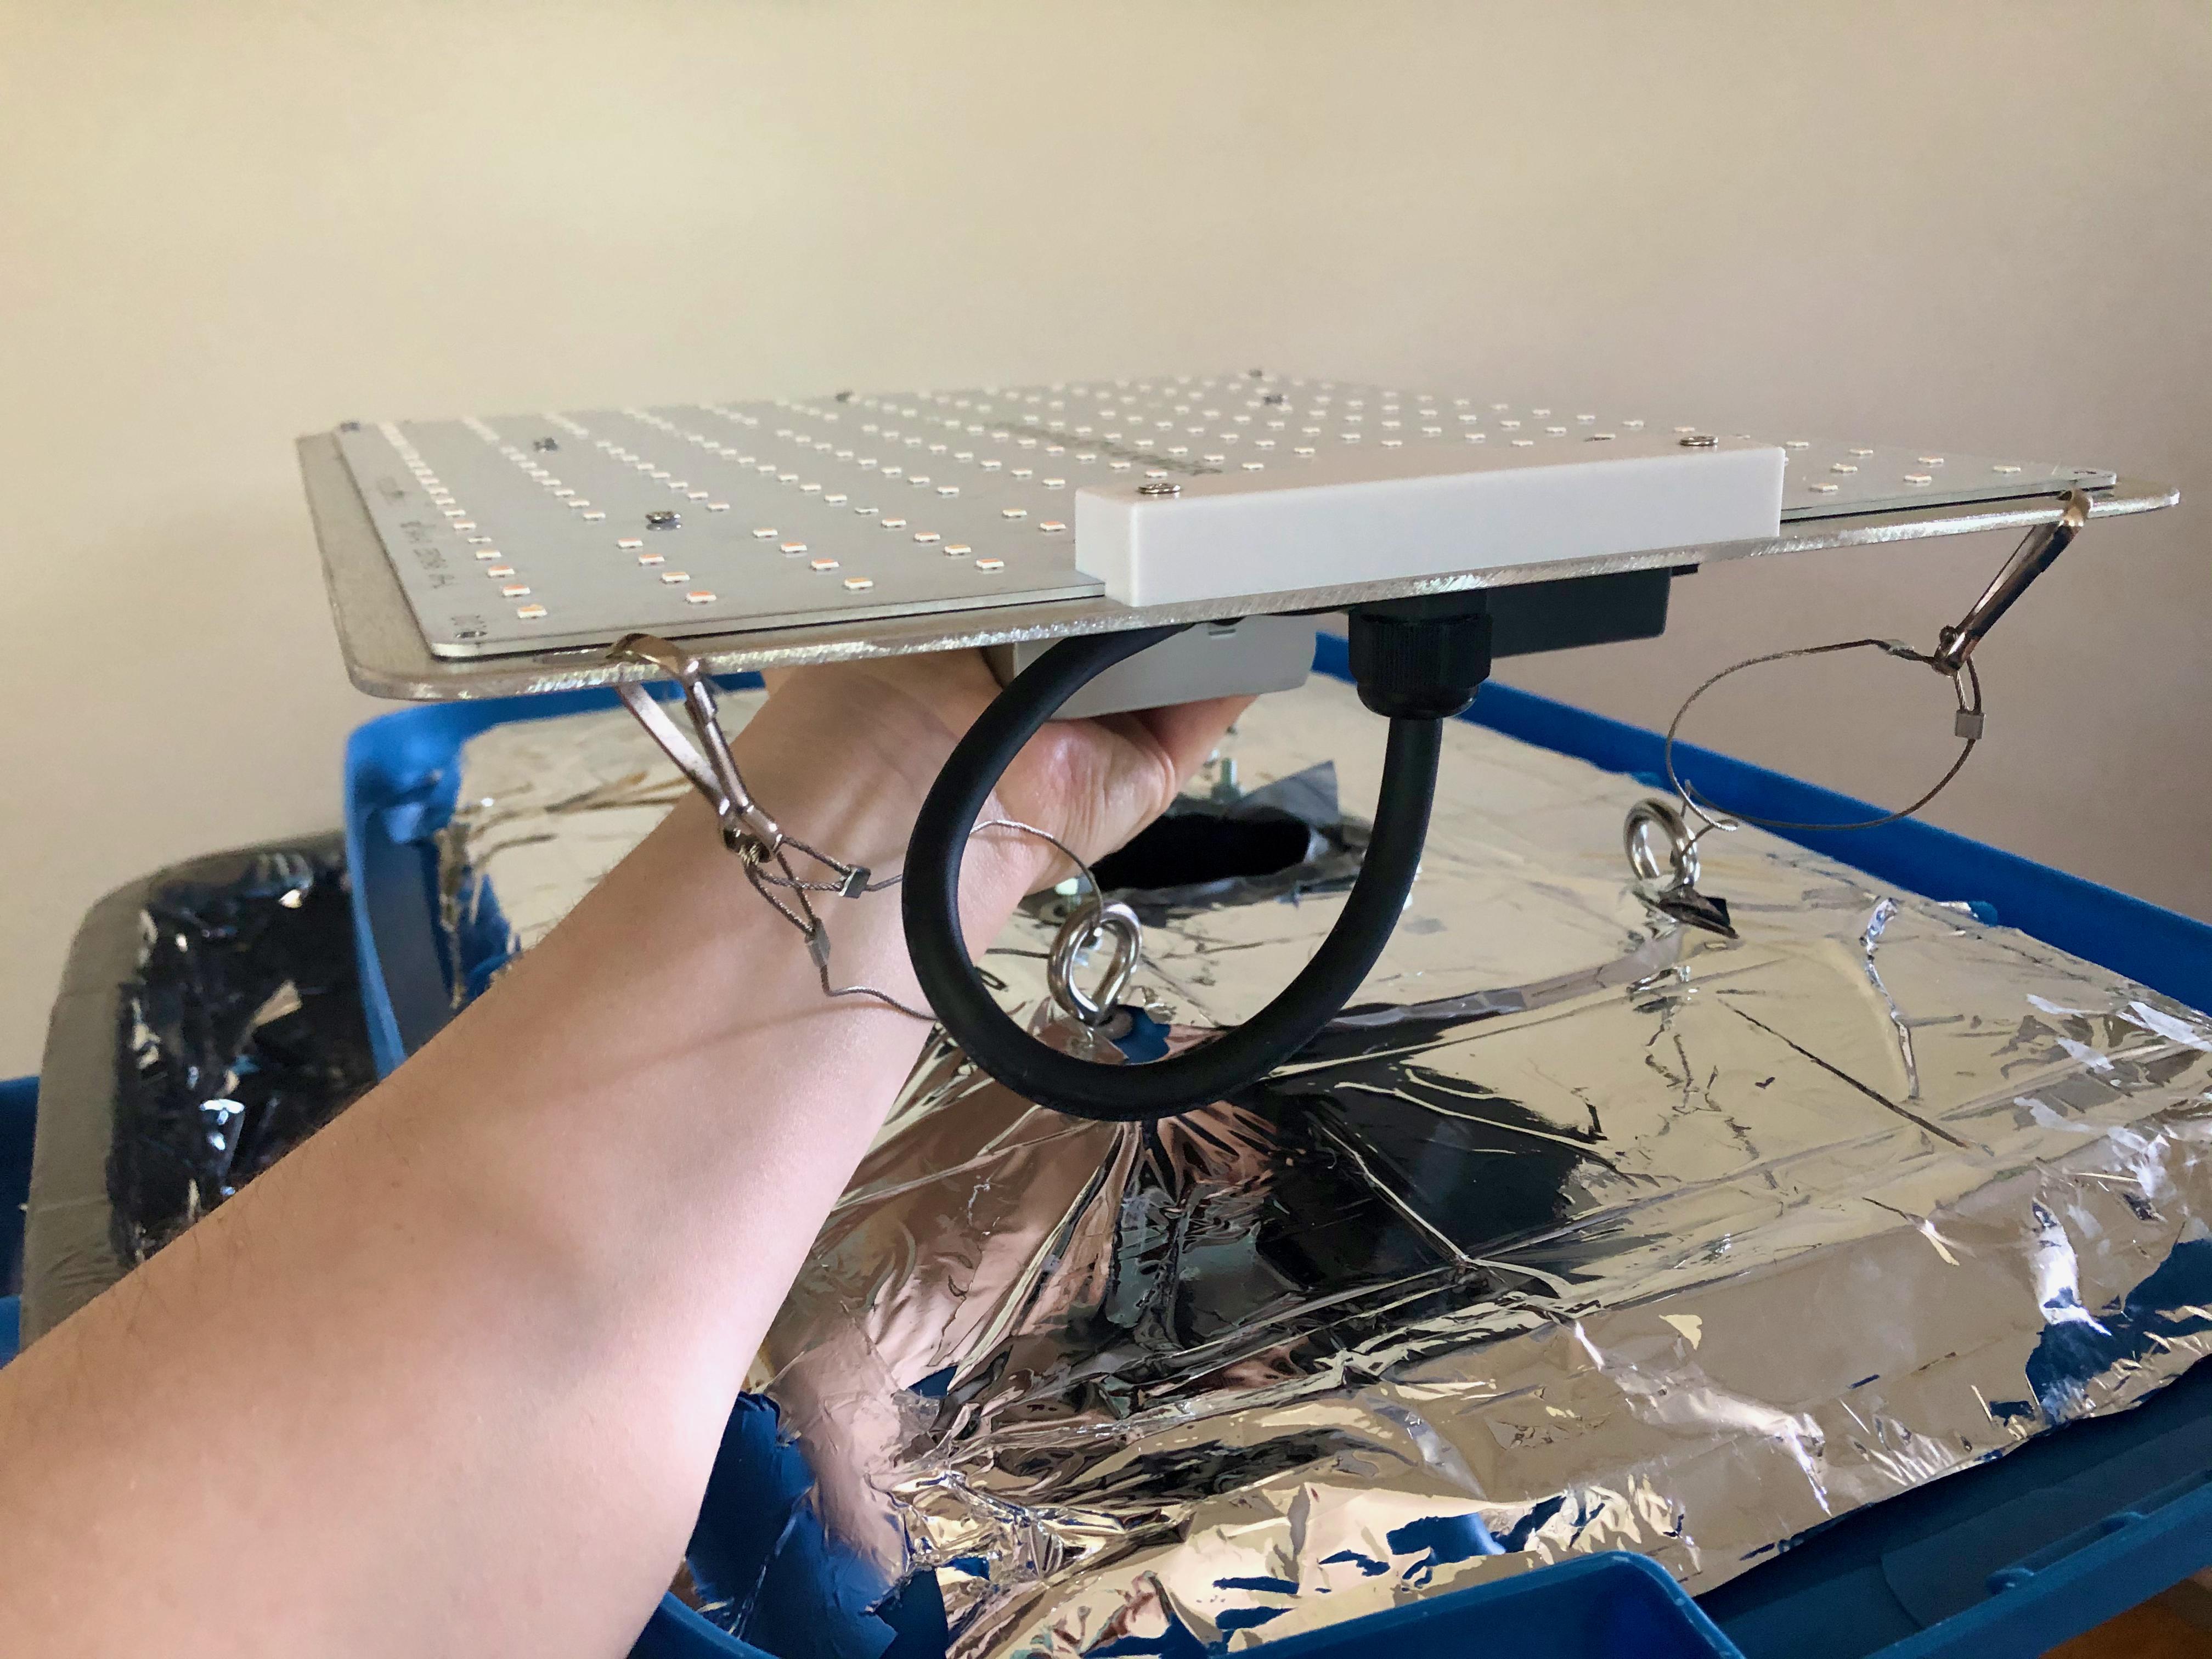
Most lights come with clips and metal cables. I looped these through the hooks and clipped my light in. The draw-back of this is that the light is at a fixed height. For some plants, you need to adjust the height of the light to maintain a correct distance from the plant as it grows. Nothing I plan to grow is that sensitive, so a fixed height is fine for me.

An outtake fan isn't really necessary for a small box. I had a feeling when I started this project that I would get more invested in indoor gardening, so I picked up an inline fan. I knew the fan would be useful for a bigger iteration of the project.
If you're not using an outtake fan, you can simply cut a hole in the top of the box. If you're feeling special, an extra grill to protect the hole would be a nice addition.
You now have a fully functional indoor greenhouse. Slot it into a closet and wait for the fruits of your labour.
Working on my garden.
New sensors to keep a watch over my plants.
1. Make a copy of the DHCP configuration file
Always make a copy of system files that you are editing. If your changes don't work the way you expect, you can always roll back to the safe, stable, starting state you began at. This allows you to try again without creating a number of inter-dependant changes.
sudo cp /etc/dhcpcd.conf /etc/dhcpcd.conf.save
2. Find the current IP address of your device
On unix devices (Macs, Raspberry pis, etc.) you can check your current IP with Hostname -I.
3. Find the IP address of your router and your Domain Name Server
To find the router's address:
ip r | grep default.
To find the Domain Name Server's address:
grep "nameserver" /etc/resolv.conf
These are typically the same address for a home network.
Why add /24? Check out this discussion on subnet masks
4. Edit the DHCP configuration file
At the end of the file add a block where each of the variables are replaced with the values we previously found:
interface wlan0
    static ip_address=<device_ip>/24
    static routers=<router_ip>
    static domain_name_servers=<domain_name_server_ip>
This sets a static IP for the wireless lan, or wlan0 interface on your device. If you want to also set the ethernet interface, add the exact same block again, but change wlan0 to eth0
.
5. Reboot!
sudo reboot
And you're done!
If it didn't work out, you can always revert your changes by running:
sudo cp /etc/dhcpcd.conf.save /etc/dhcpcd.conf
You've got a raspberry pi. Maybe it's a pi 2 or 3 that doesn't have a wifi chip. You bought a USB dongle and plugged it in, but you can't manage to get it to go. The driver that came with the dongle doesn't compile for raspberry pis, and nothing on the pi forums works.
Here's a quick guide for installing the RT8812 driver onto your pi.
1. Get the source kernel installer:
sudo wget https://raw.githubusercontent.com/notro/rpi-source/master/rpi-source -O /usr/bin/rpi-source && sudo chmod +x /usr/bin/rpi-source && /usr/bin/rpi-source -q --tag-update
2. Install bc, a maths package:
sudo apt-get install bc
3. Install the kernel:
rpi-source
4. Fetch the driver by cloning it:
git clonehttps://github.com/Kongaloosh/rtl8821CU
note: this repo points to an 8821 driver. If you need another kind of driver, maybe start with a different repo. You should be able to change the configuration of this repo to suit your needs.
There are now three non-standard things you need to do in order for the driver to work with both your pi and the dongle you've purchased:
a. Figure out the dongle's Manufacturer and product ID.
b. Modify the makefile to specify the dongle the driver is for.
c. tweak the driver makefile to suit the pi
Plug the wifi dongle into the pi and run lsusb to check out what's been plugged into your pi. For instance, when I run it, it looks something like this:
Bus 001 Device 004: ID 0bda:c811 Realtek Semiconductor Corp.
Bus 001 Device 003: ID 0424:ec00 Standard Microsystems Corp. SMSC9512/9514 Fast Ethernet Adapter
Bus 001 Device 002: ID 0424:9514 Standard Microsystems Corp. SMC9514 Hub
Bus 001 Device 001: ID 1d6b:0002 Linux Foundation 2.0 root hub
look at device 04; this is my wifi dongle. If you're having difficulty figuring out which device it is, unplug your dongle and run lsusb again. whichever device disappeared is your dongle! This is the dongle that I purchased.
Take note of the last four digits of the ID. The ID for my dongle is 0bda:c811, so in my case it's c811.
I now know two things about my dongle: the manufacturer (Realtek Semiconductor Corp) and the product ID (c811).
Open os_dep/linux/usb_intf.c using your favourite editor (i.e., nano, vim)
# ifdef CONFIG_RTL8812A
    /*=== Realtek demoboard ===*/
    {USB_DEVICE(USB_VENDER_ID_REALTEK, 0x8812), .driver_info = RTL8812},
    {USB_DEVICE(USB_VENDER_ID_REALTEK, 0xc811), .driver_info = RTL8821},  # my driver!
    {USB_DEVICE(USB_VENDER_ID_REALTEK, 0x881A), .driver_info = RTL8812},
You might be lucky. When you look in the file, you may find that there's already a line describing your dongle! If that's so, mosey on to the next step.
If like me, you're not so lucky, you now need to add the usb device you want the driver to interface with in this file. Each section will be prefaced with an ifdef CONFIG_RTLXXXXx. These define the interfaces for each section. They match the interface with the appropriate driver. In this case, I added the driver
open up Make with your favourite editor and change two lines
CONFIG_PLATFORM_I386_PC = y
CONFIG_PLATFORM_ARM_RPI = n
so that they now read
CONFIG_PLATFORM_I386_PC = n
CONFIG_PLATFORM_ARM_RPI = y
This tells the driver to build for our raspberry pi.
Having modified `usb_intf.c and Make, we can continue business-as-usual compiling the driver.
5. Make sure we can run the installation script:
sudo chmod +x install.sh
6. Run the installation script:
./install.sh
7. Load our new module into the linux kernel:
sudo insmod 8812au.ko
sudo cp 8812au.ko /lib/modules/$(uname -r)/kernel/drivers/net/wireless
8. Generate a dependency description:
sudo depmod
You should now be done!!! You can verify this by running iwconfig, which should produce an output like so:
wlan0 IEEE 802.11AC  ESSID:"Kongaloosh"  Nickname:"<WIFI@REALTEK>"
      Mode:Managed  Frequency:5.765 GHz  Access Point: C4:04:15:10:86:75
      Bit Rate:434 Mb/s   Sensitivity:0/0
      Retry:off   RTS thr:off   Fragment thr:off
      Power Management:off
      Link Quality=84/100  Signal level=52/100  Noise level=0/100
      Rx invalid nwid:0  Rx invalid crypt:0  Rx invalid frag:0
      Tx excessive retries:0  Invalid misc:0   Missed beacon:0
which means your wireless lan is working! Congratulations.
You need to fetch the headers again. There are links below to forum discussions that cover the topic of headers and missing libraries.
Check to make sure that you added your usb interface properly to usb_intf.c. Make sure that you ran things in the correct order. Check to see if you're getting error messages that you missed.
If you've been following other tutorials, and made changes to your pi already, it may behoove you to make a clean install and start from scratch.
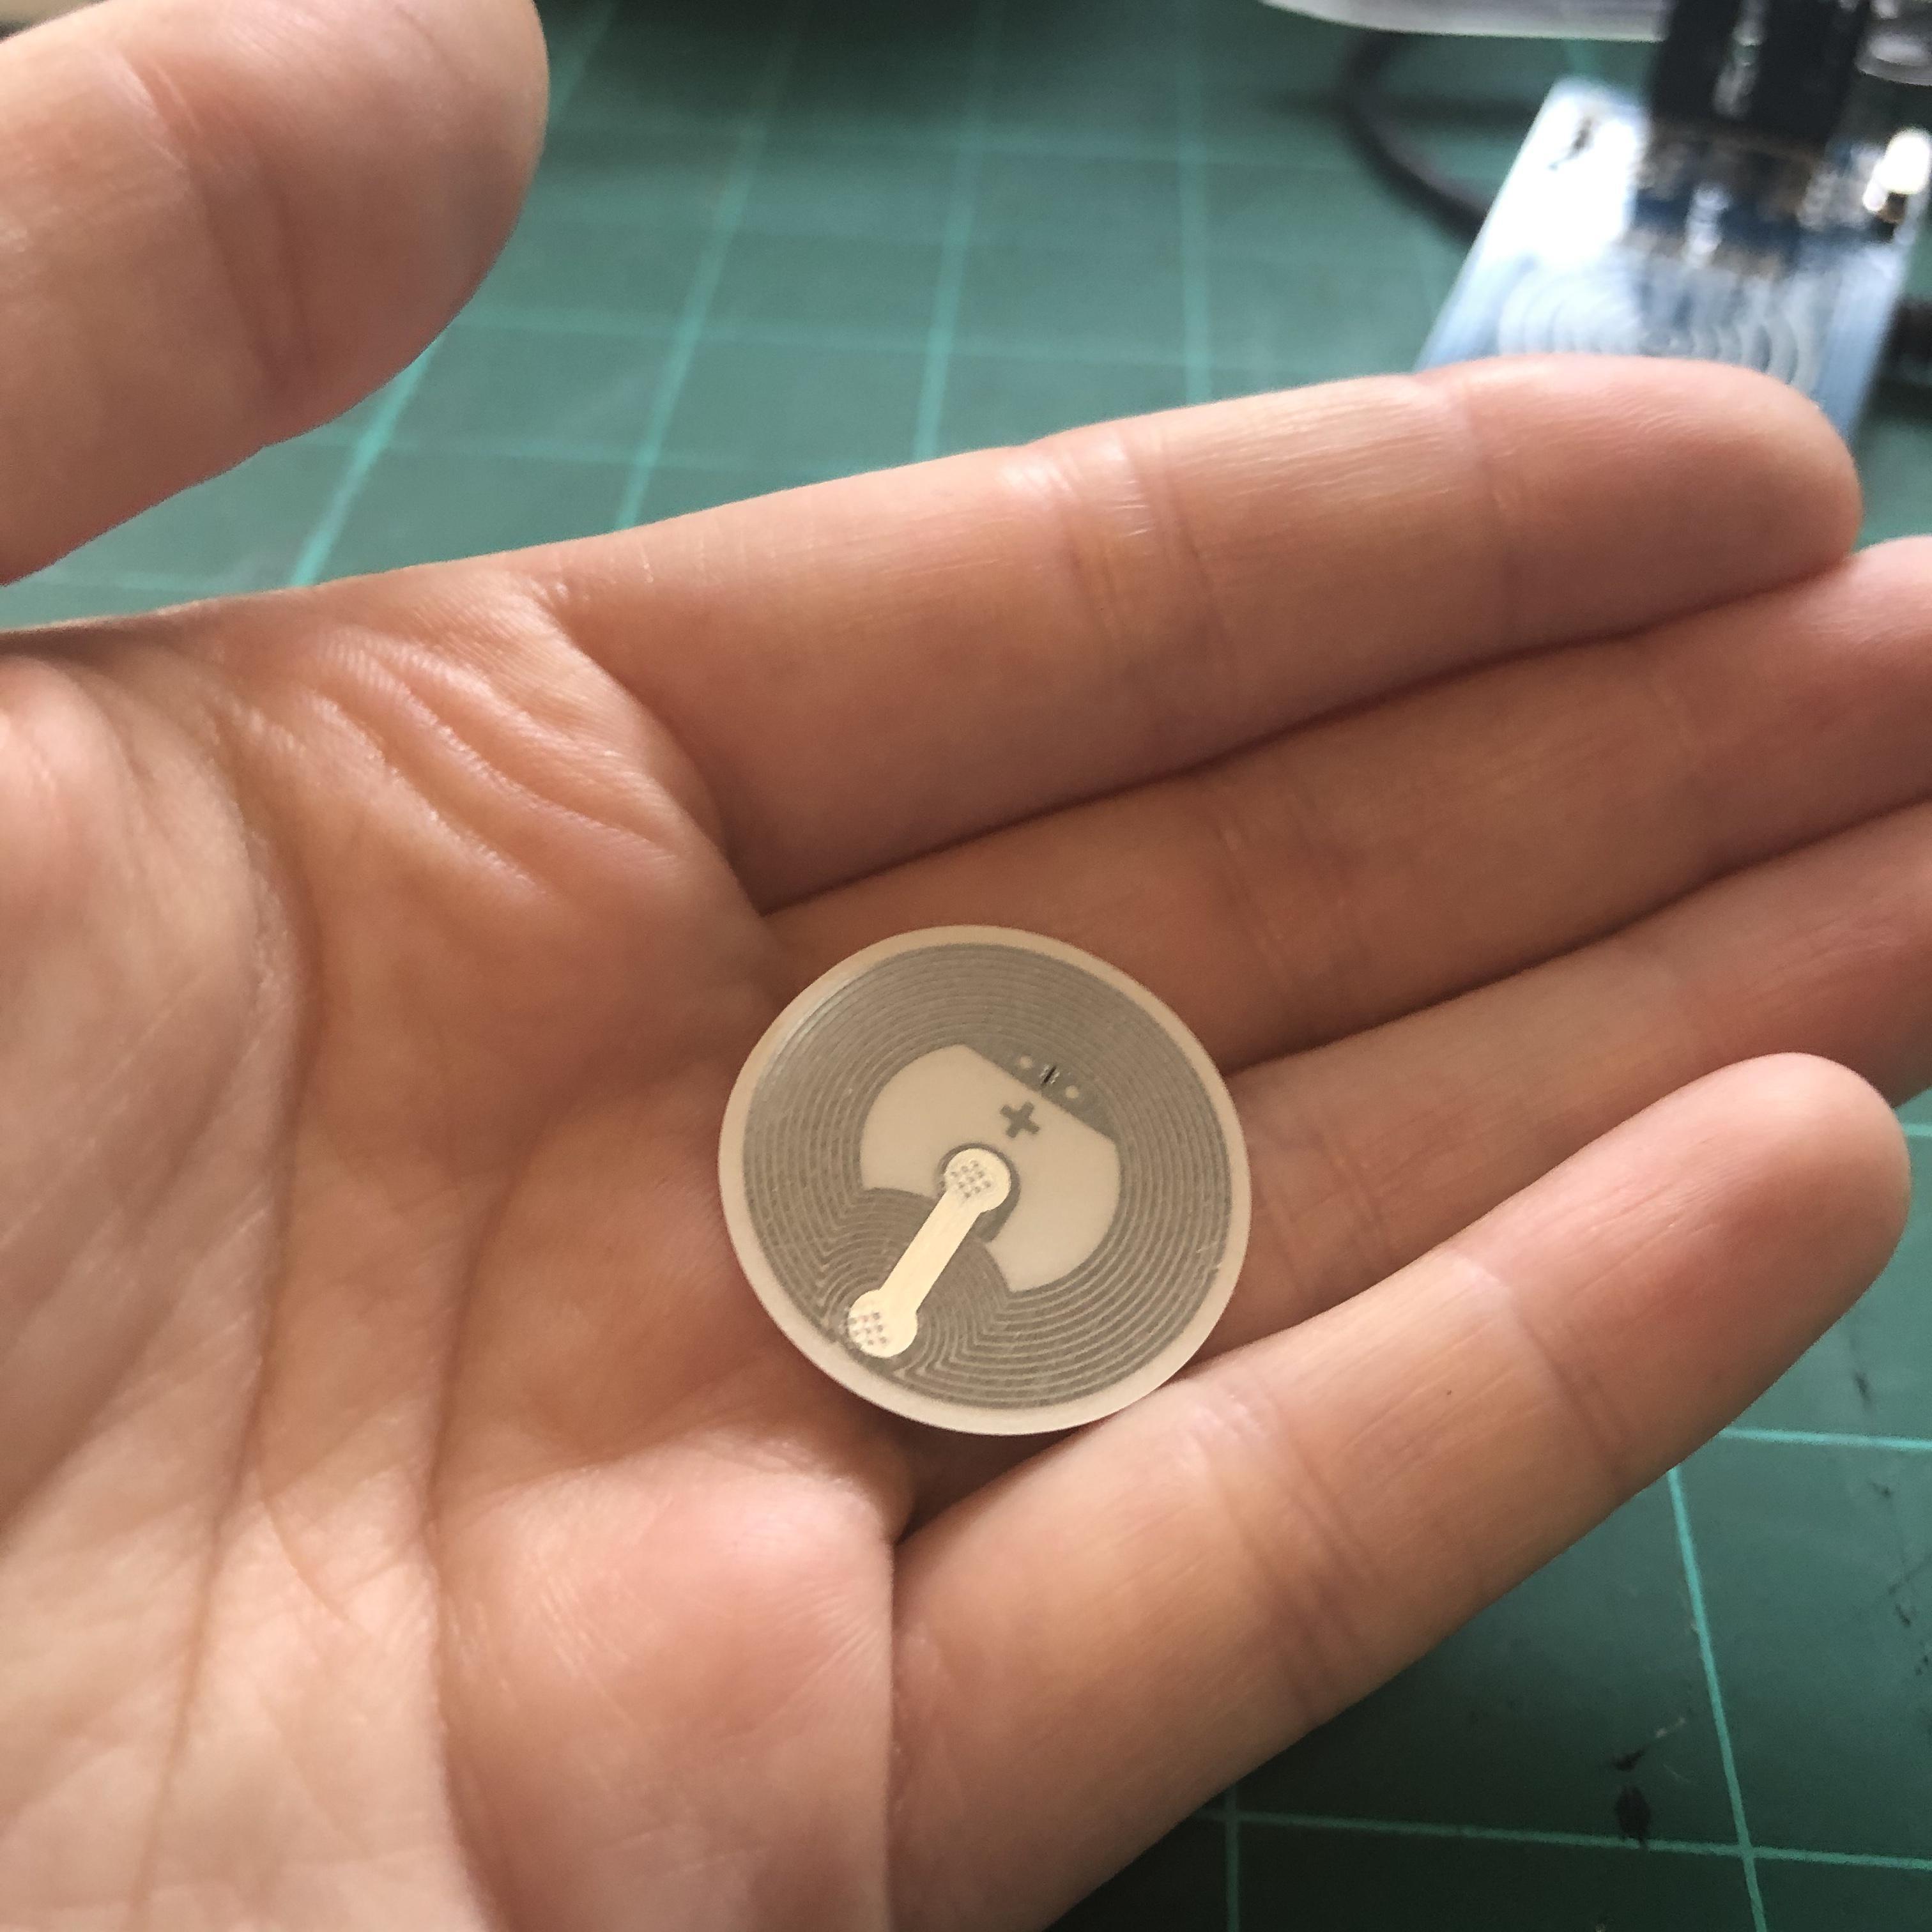
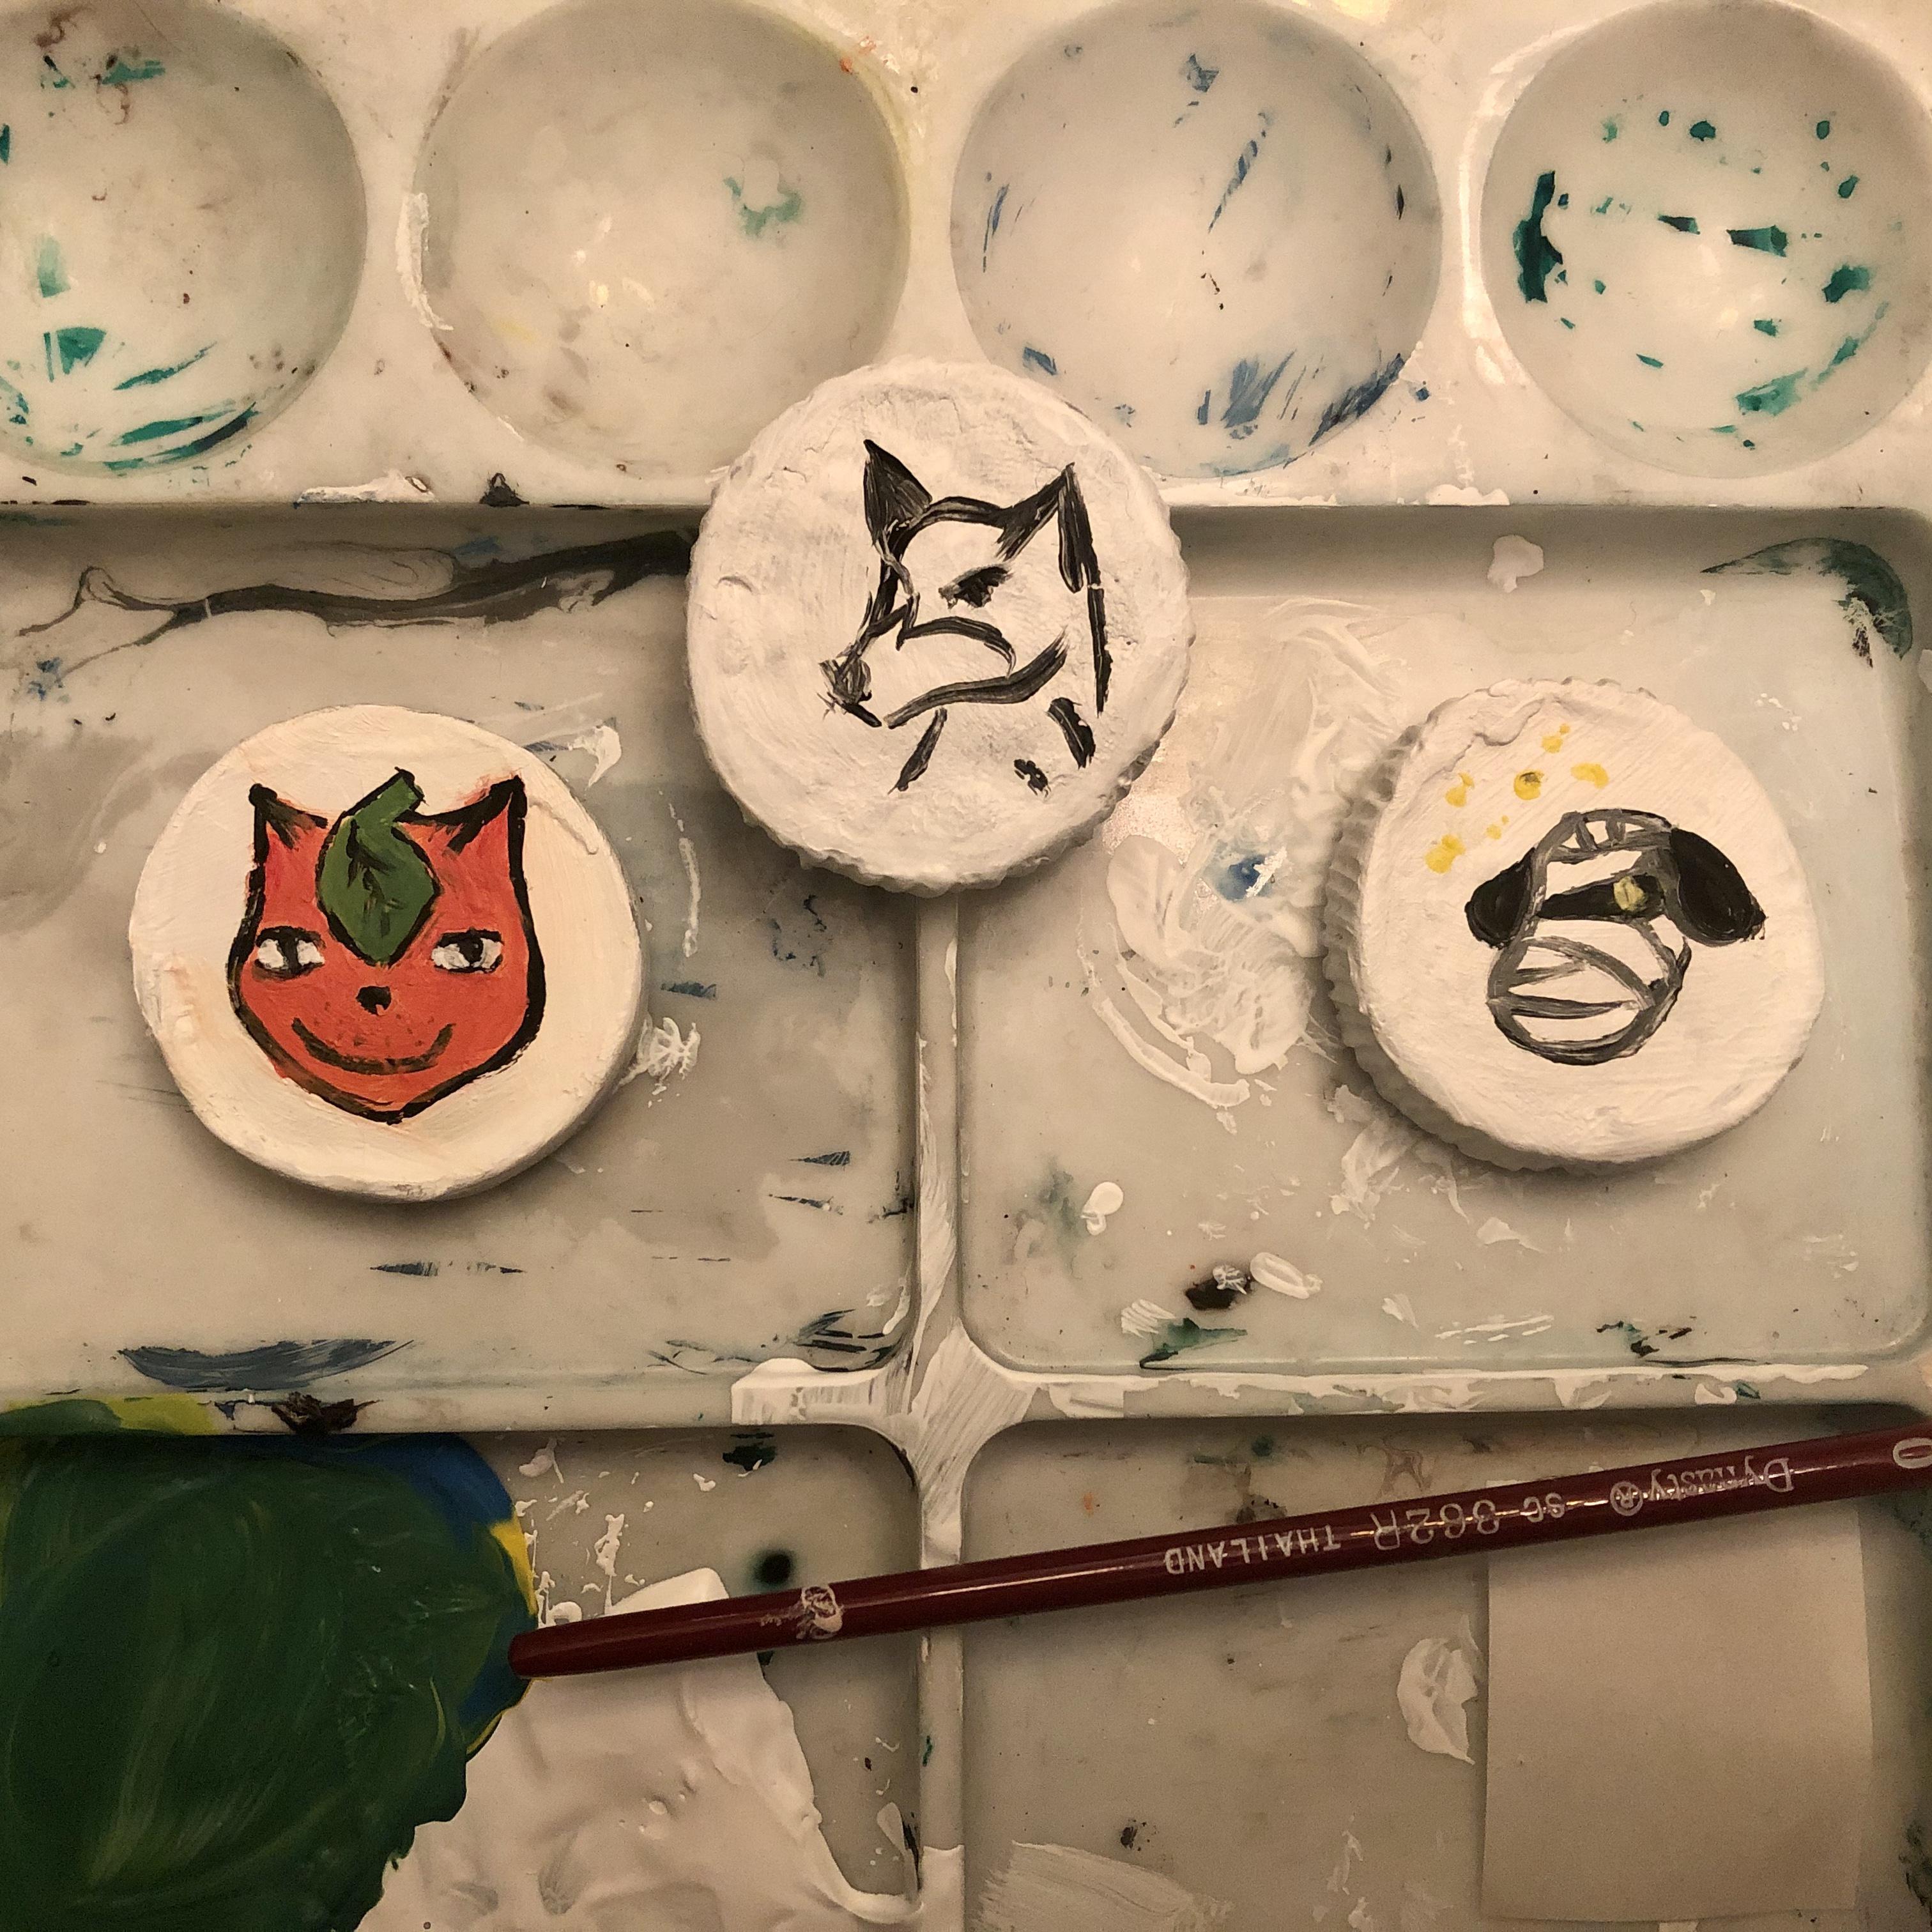
Animal crossing launched recently, and I've been making little surprise amiibos for my friends.

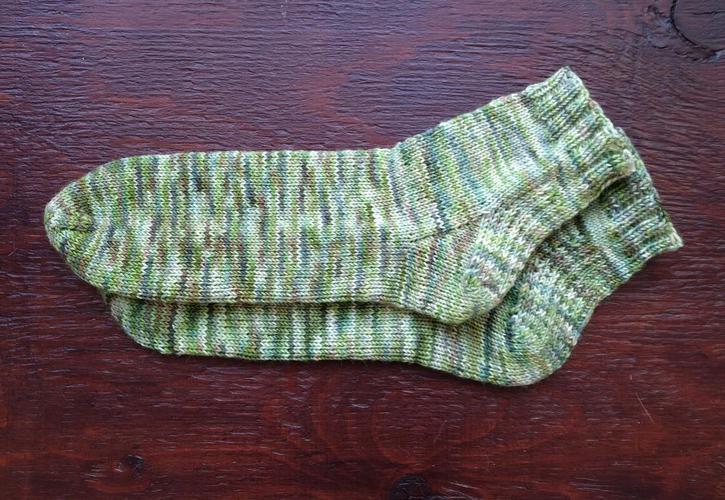
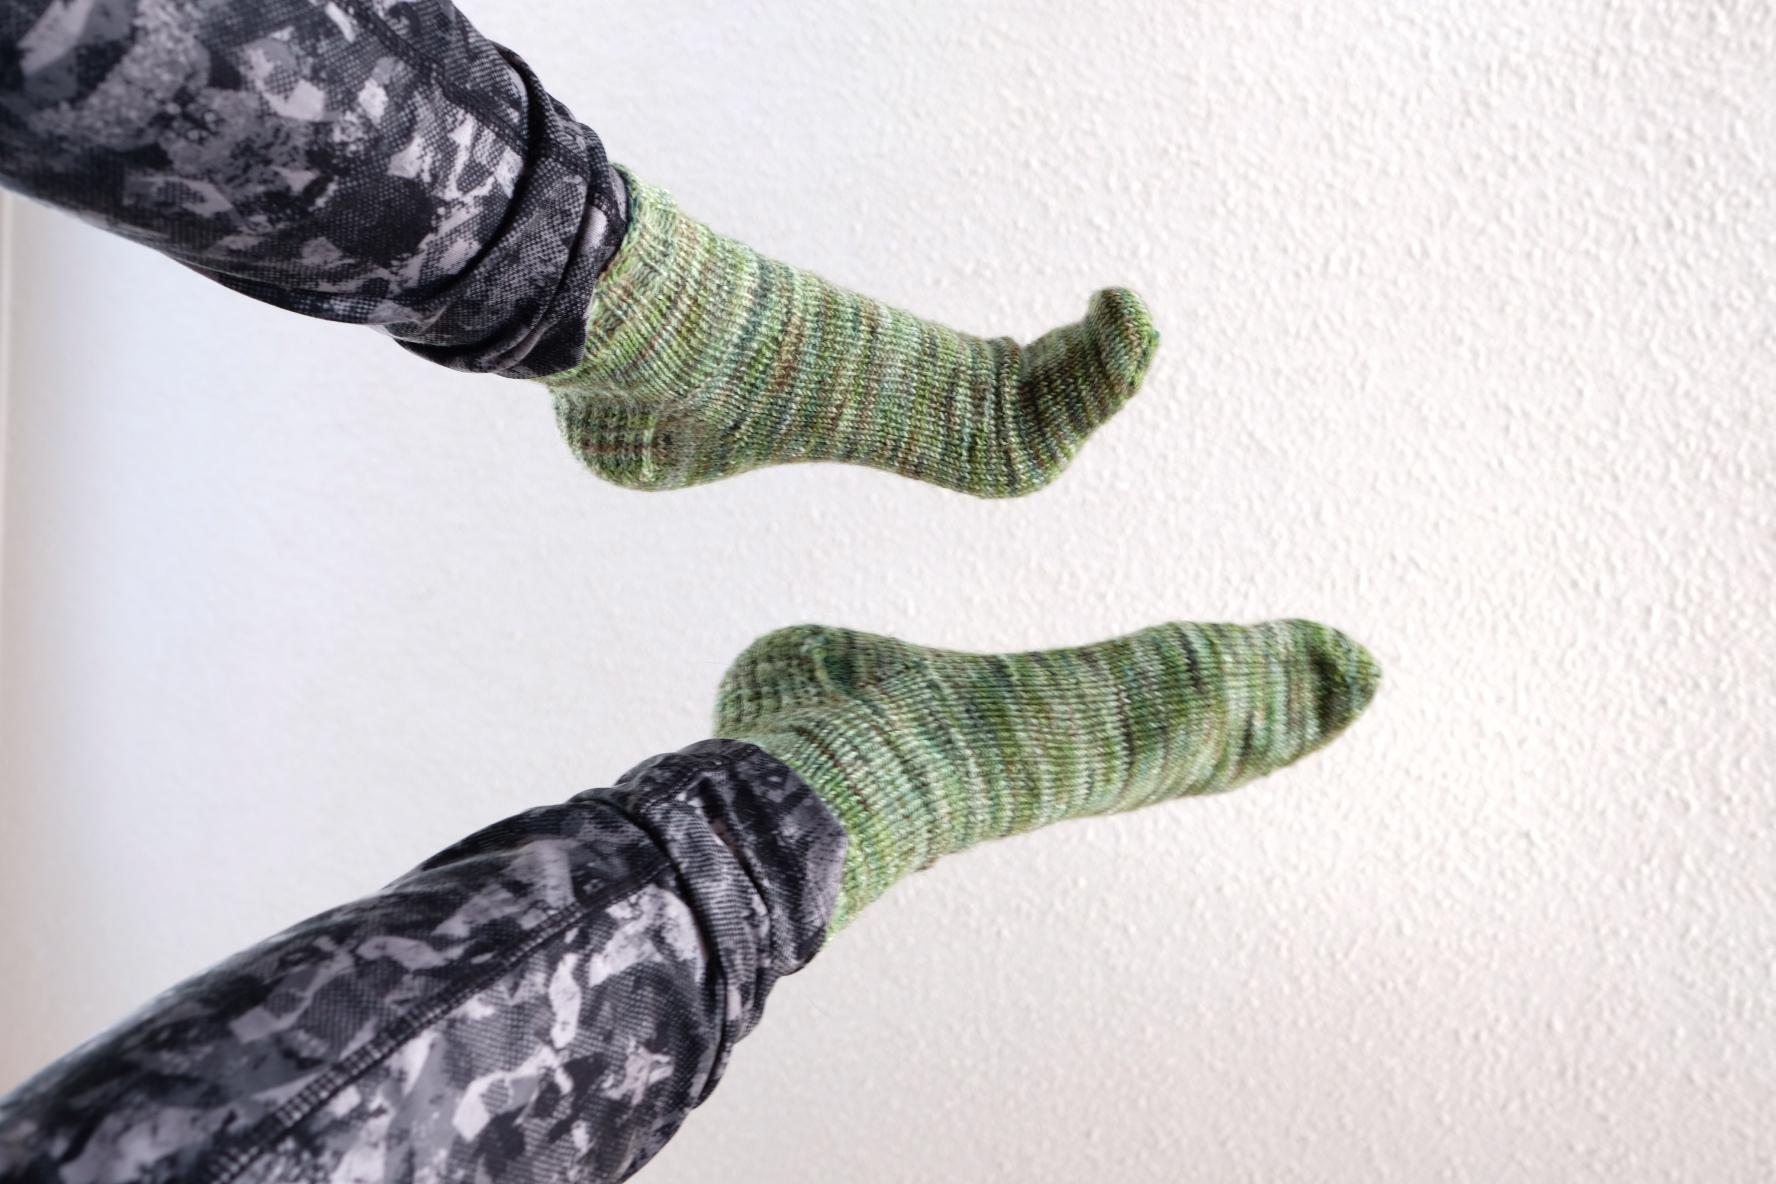
I finished some green socks just in time for St. Patrick’s day ☘️🧦 ended up re-knitting the heels three times trying to get the fit right. During the process, I discovered that I have a fairly high instep, so I can’t use a number of toe-up heel patterns. The fit turned out great, especially considering this is my first pair of socks! I can see custom socks being a regular fixture on my needles this year 🍀
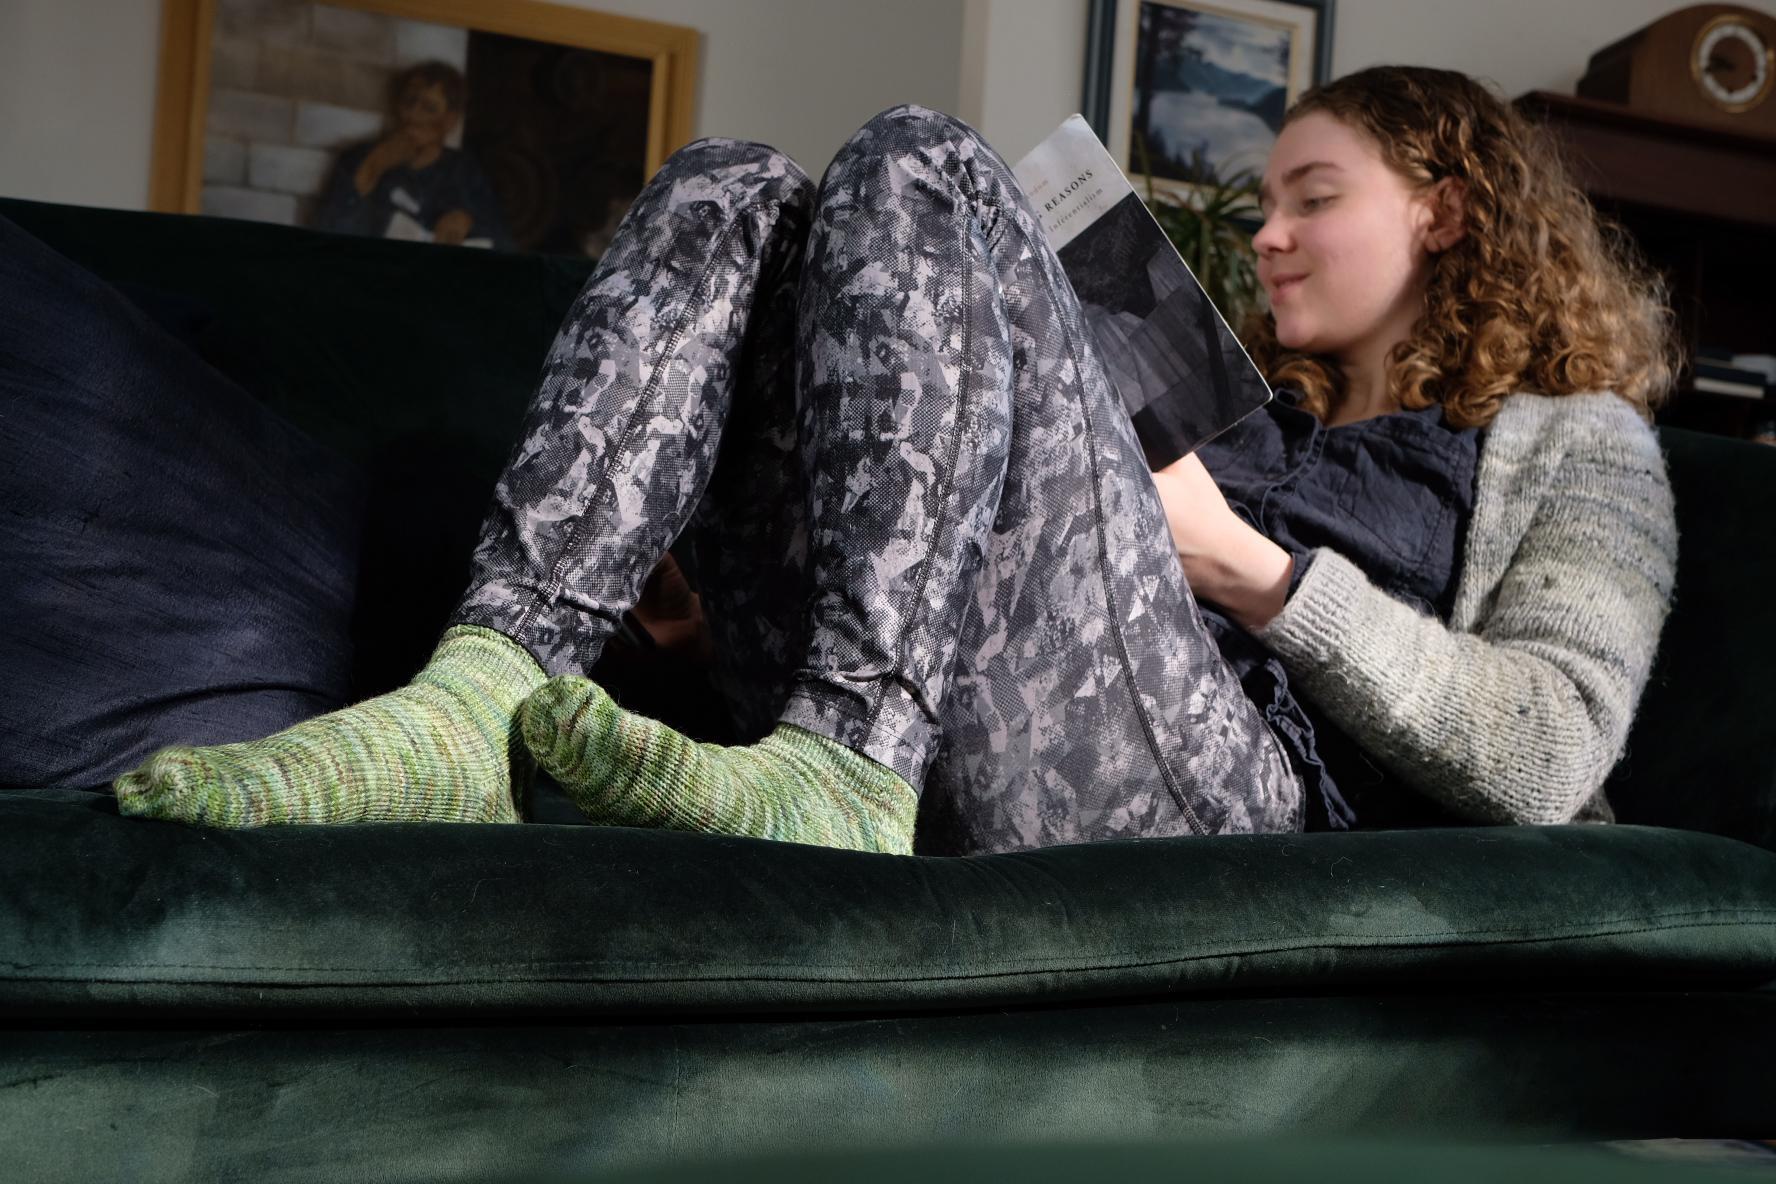
Colourway is ‘Endor’ by @blackcatcustomyarn

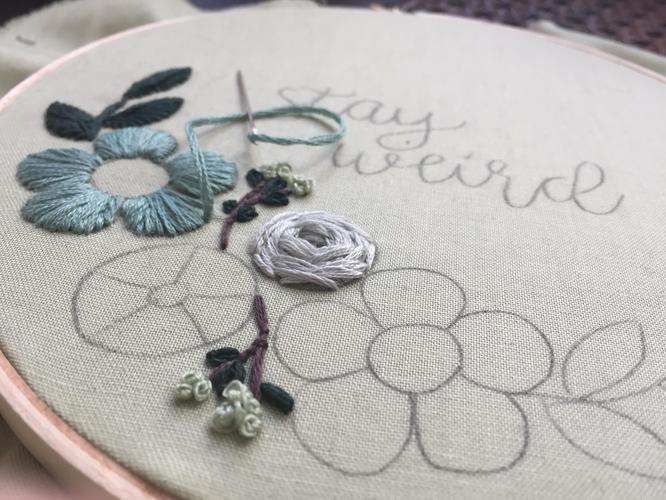
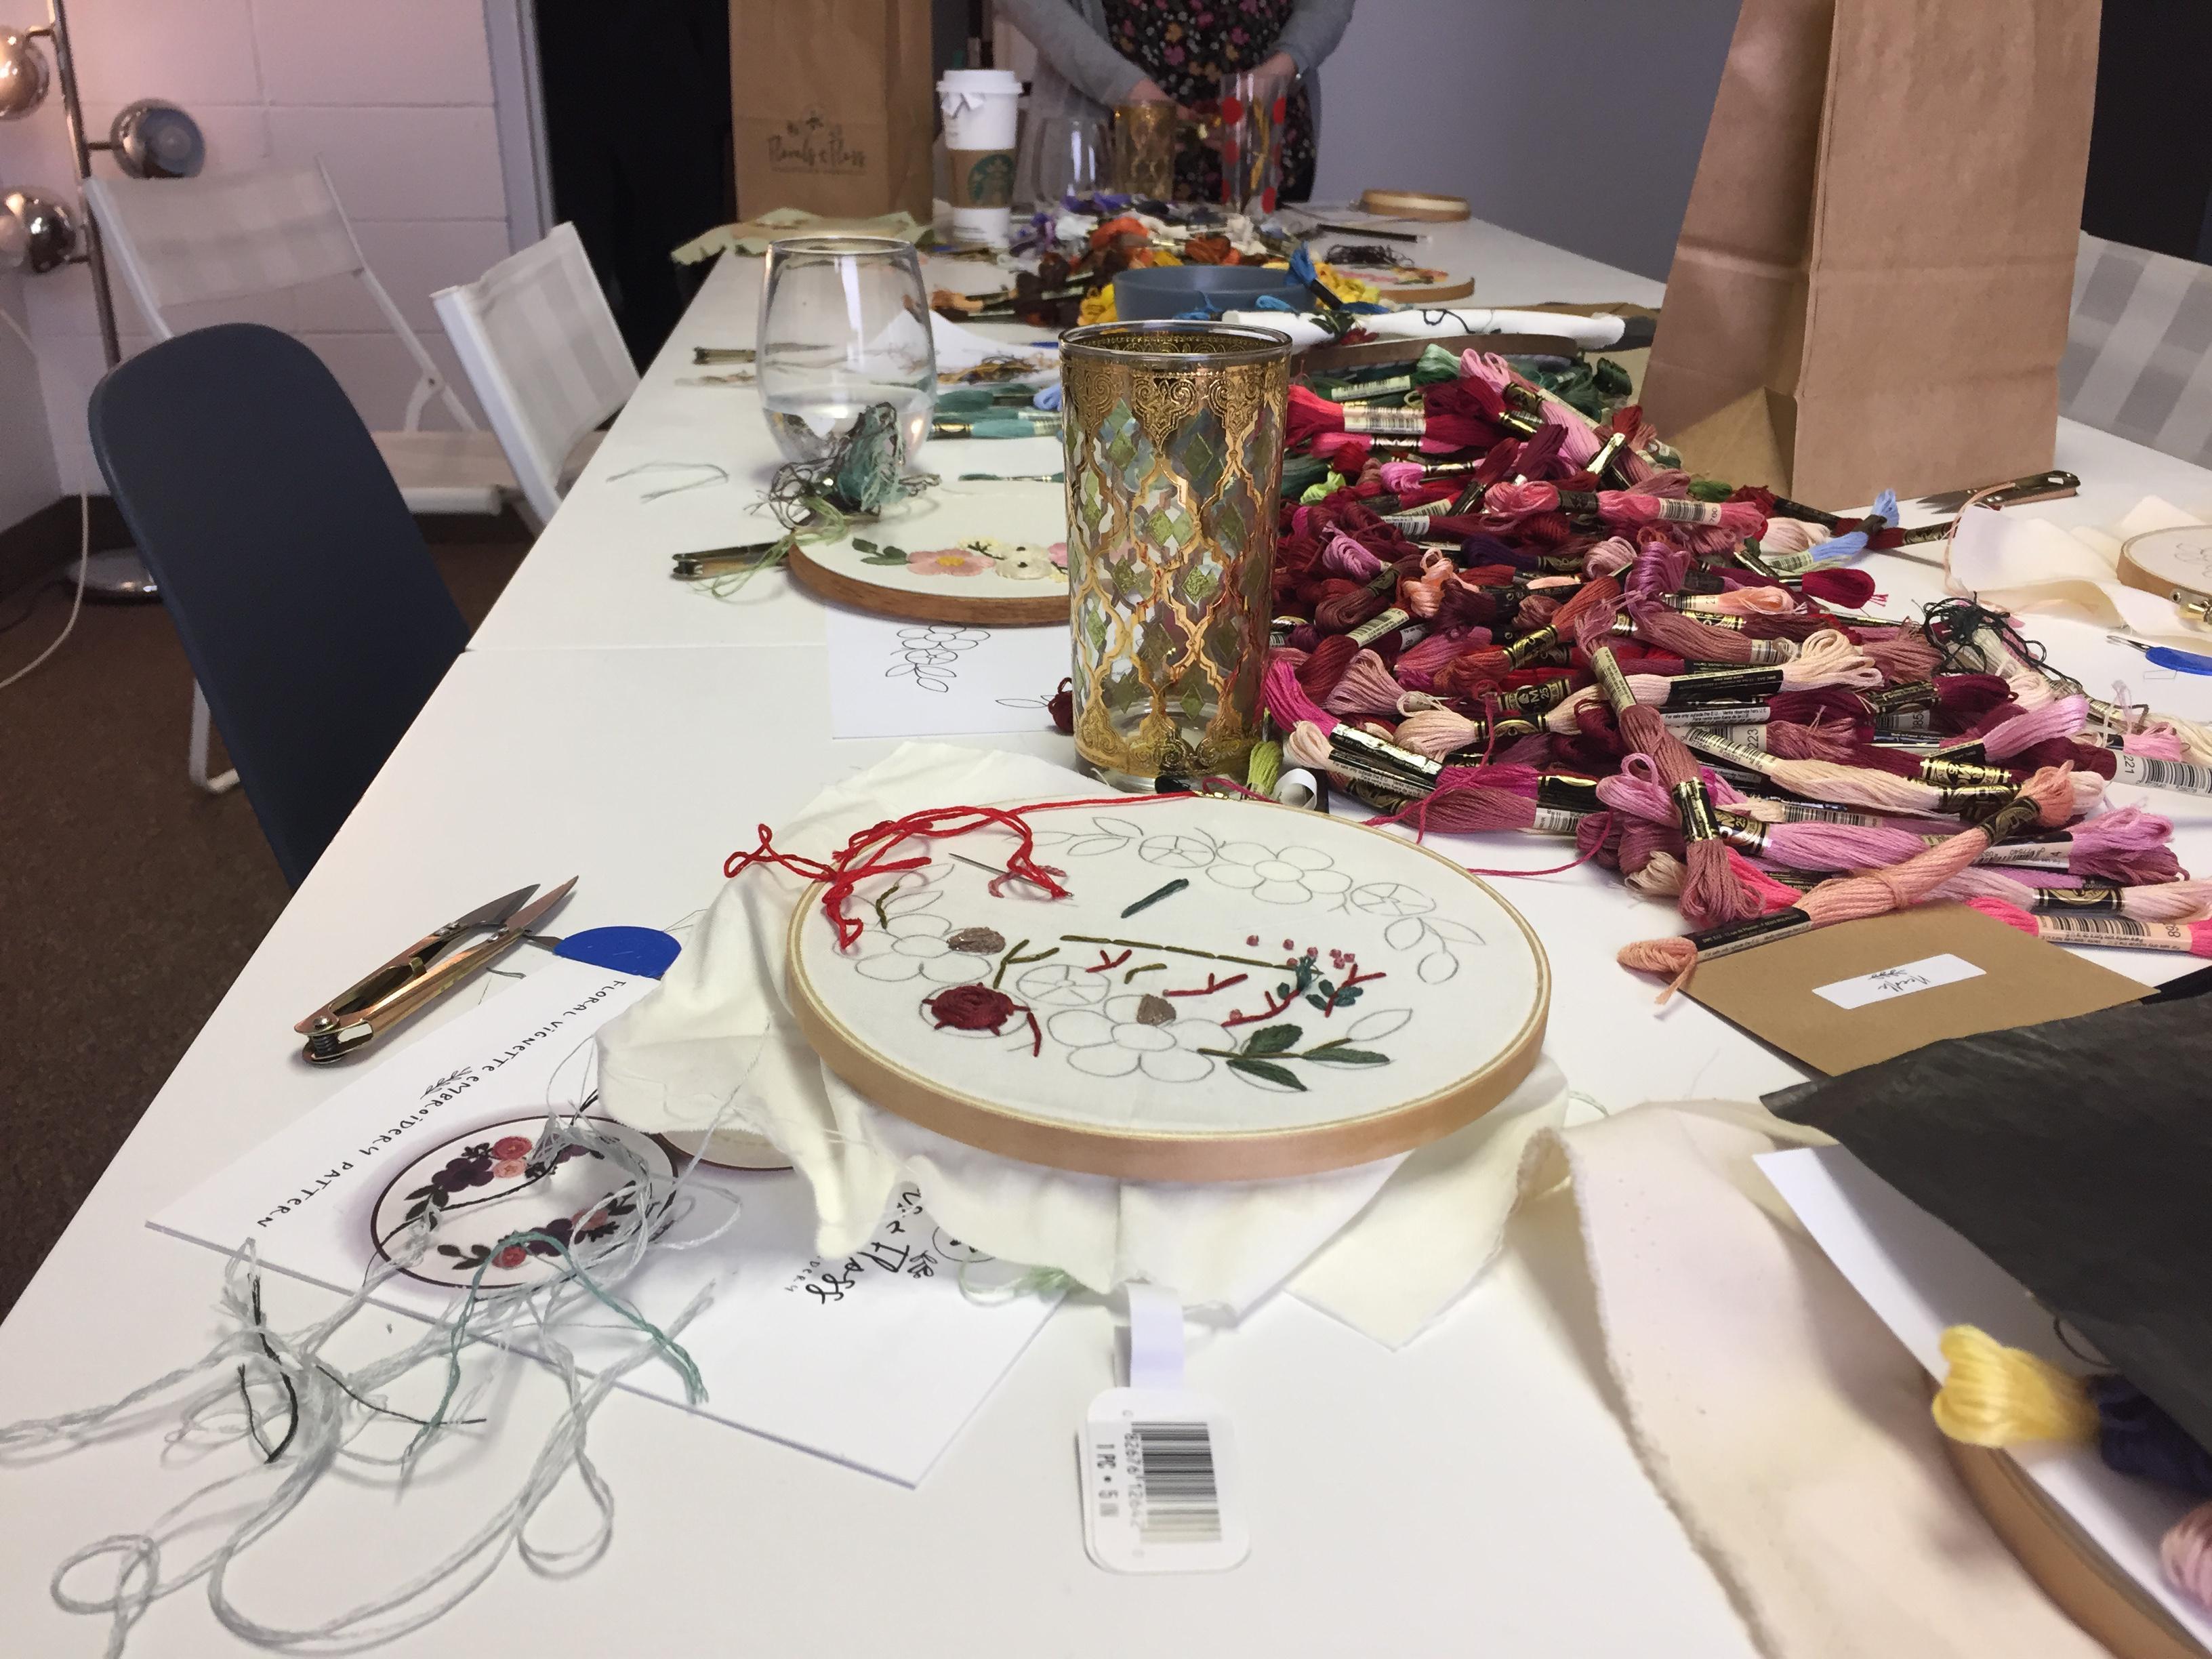
I took a break from ICML reviewing yesterday to go to an embroidery class. My goal is to get good enough to make my own patches to put on jackets and backpacks.
Embroidery is actually strangely addictive! I can see why embroidery is enjoying a revival in the crafting community.
The class was actually really great; having the chance to chat with a bunch of crafters and makers was a blast. It was also the first time in a long time that I've been at an event that's predominantly women that's not focused on tech and professional development.

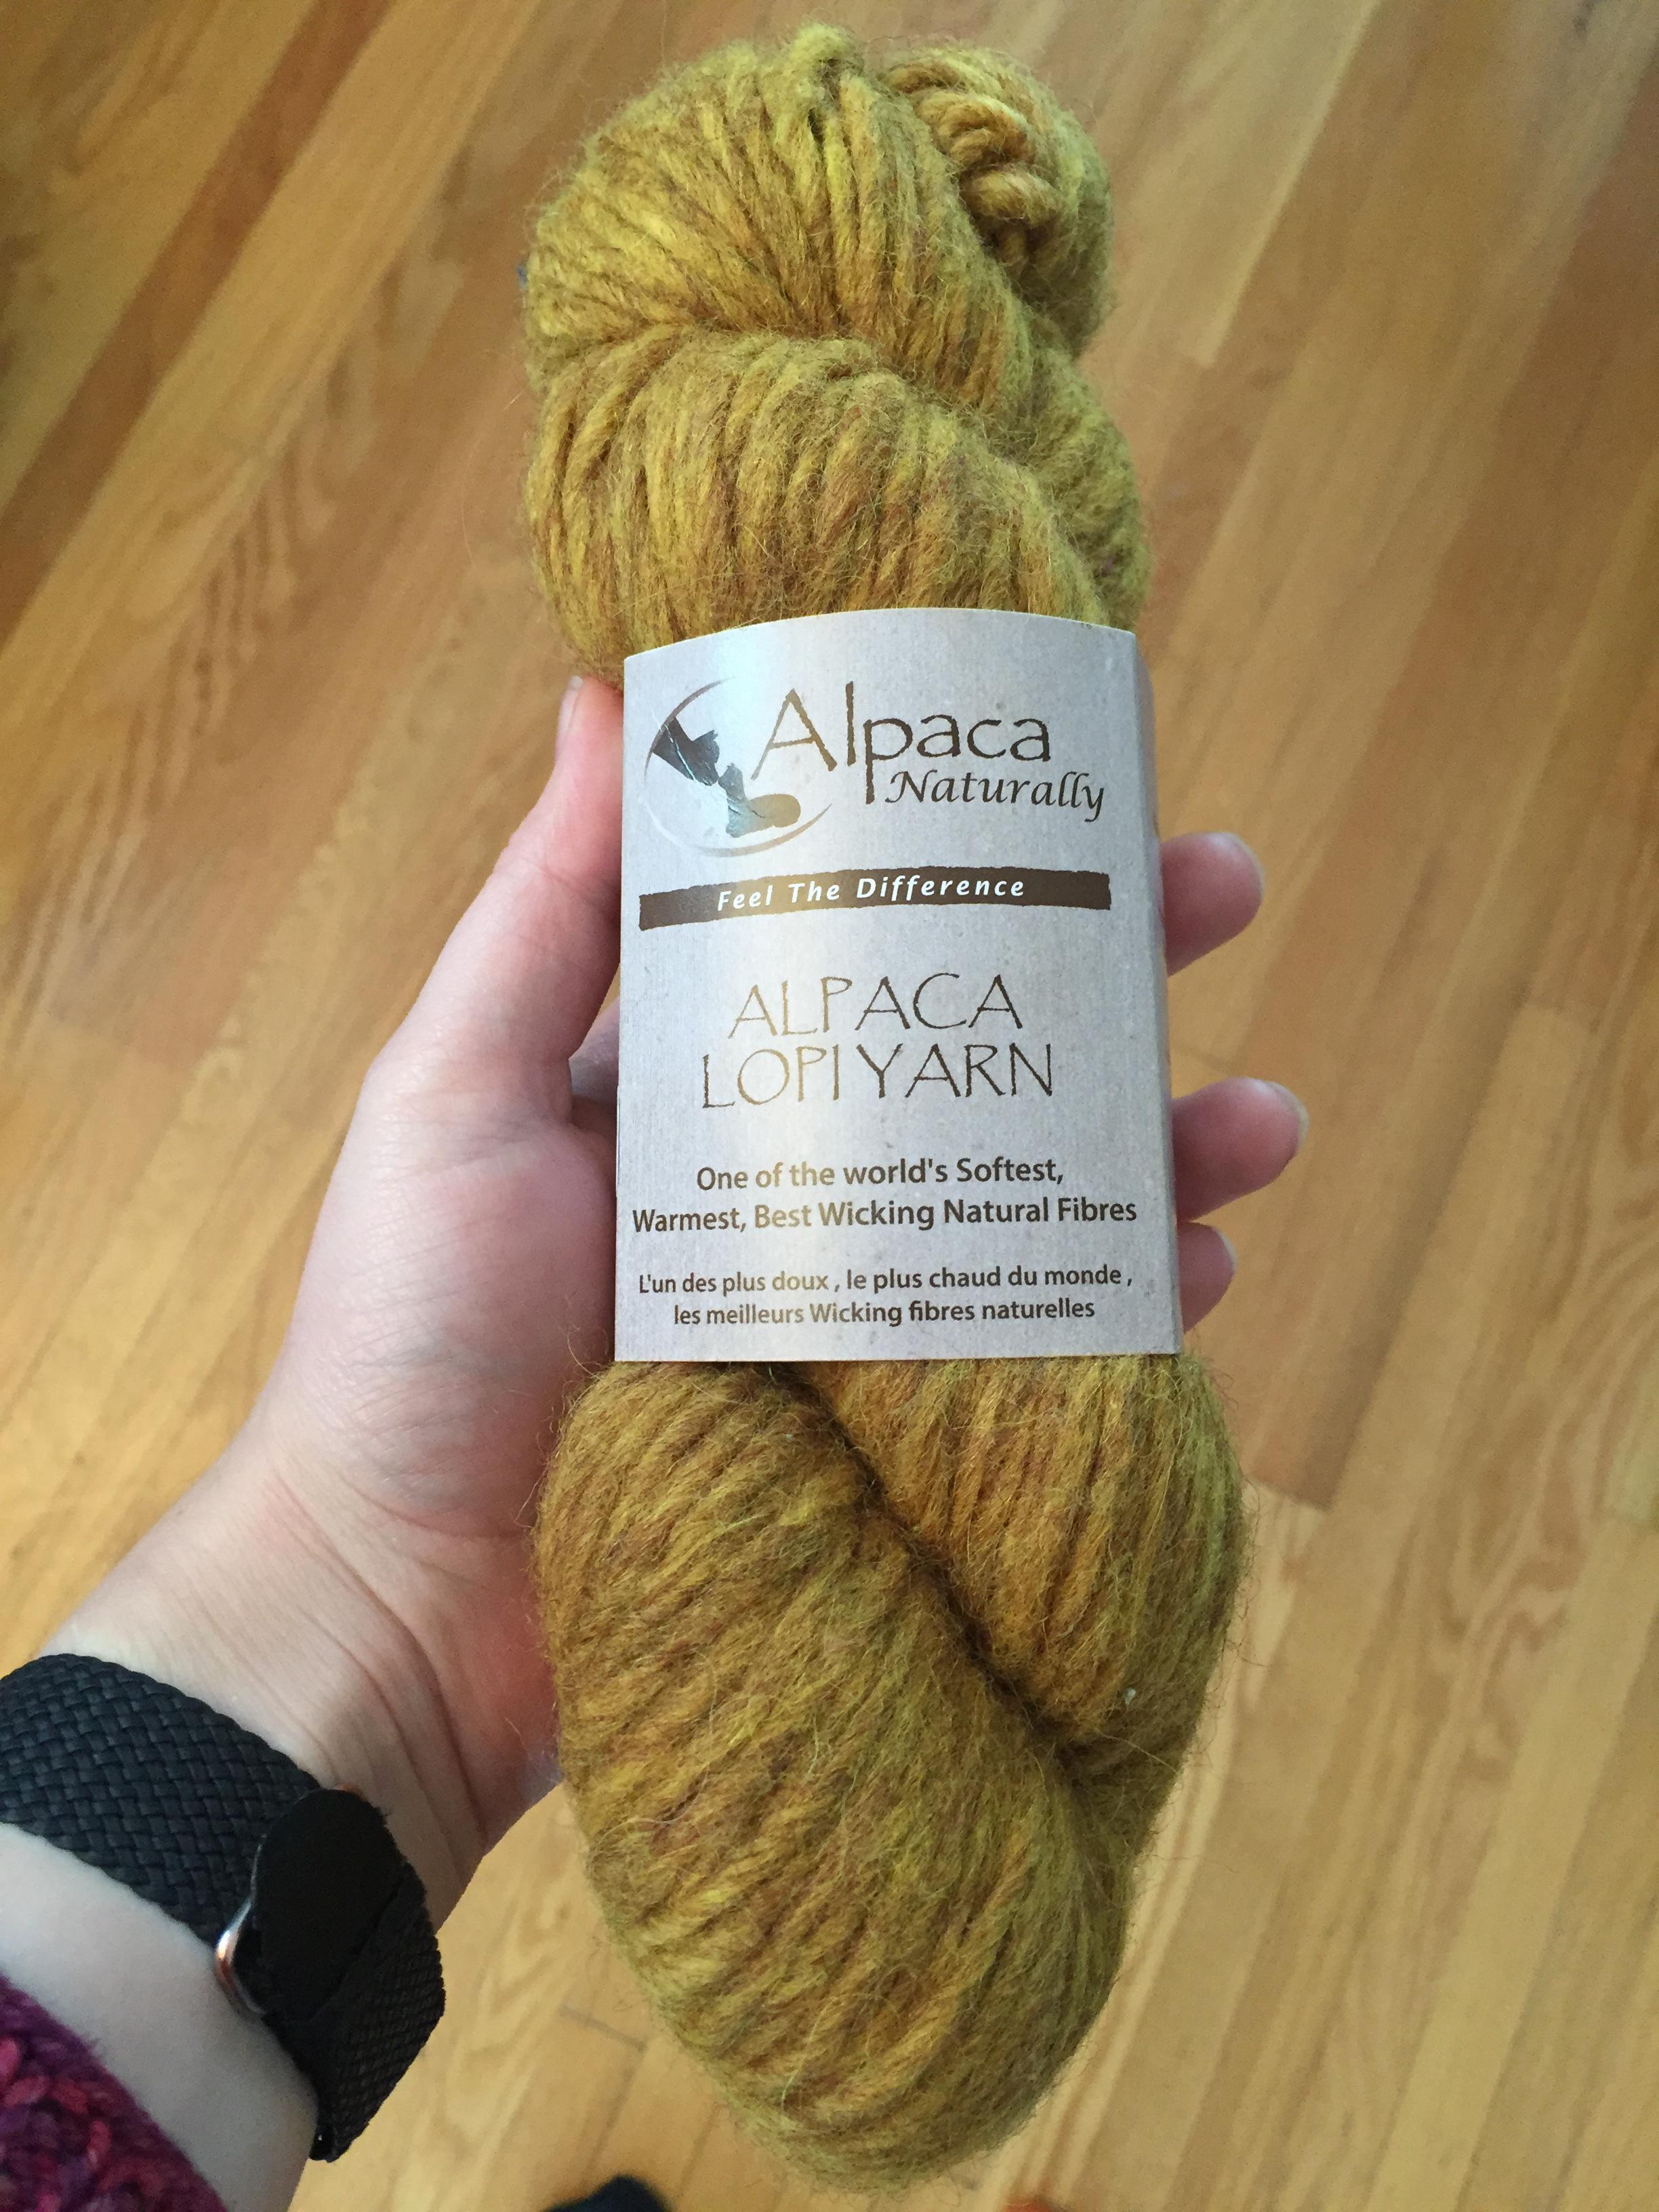
I recently made a hat for Matt. I used some super-soft alpaca yarn that I picked up from an industrial-revolution era wool spinner located in Alberta. I managed to find a colour which was close to the alpaca logo they use on their site to keep it on-brand.
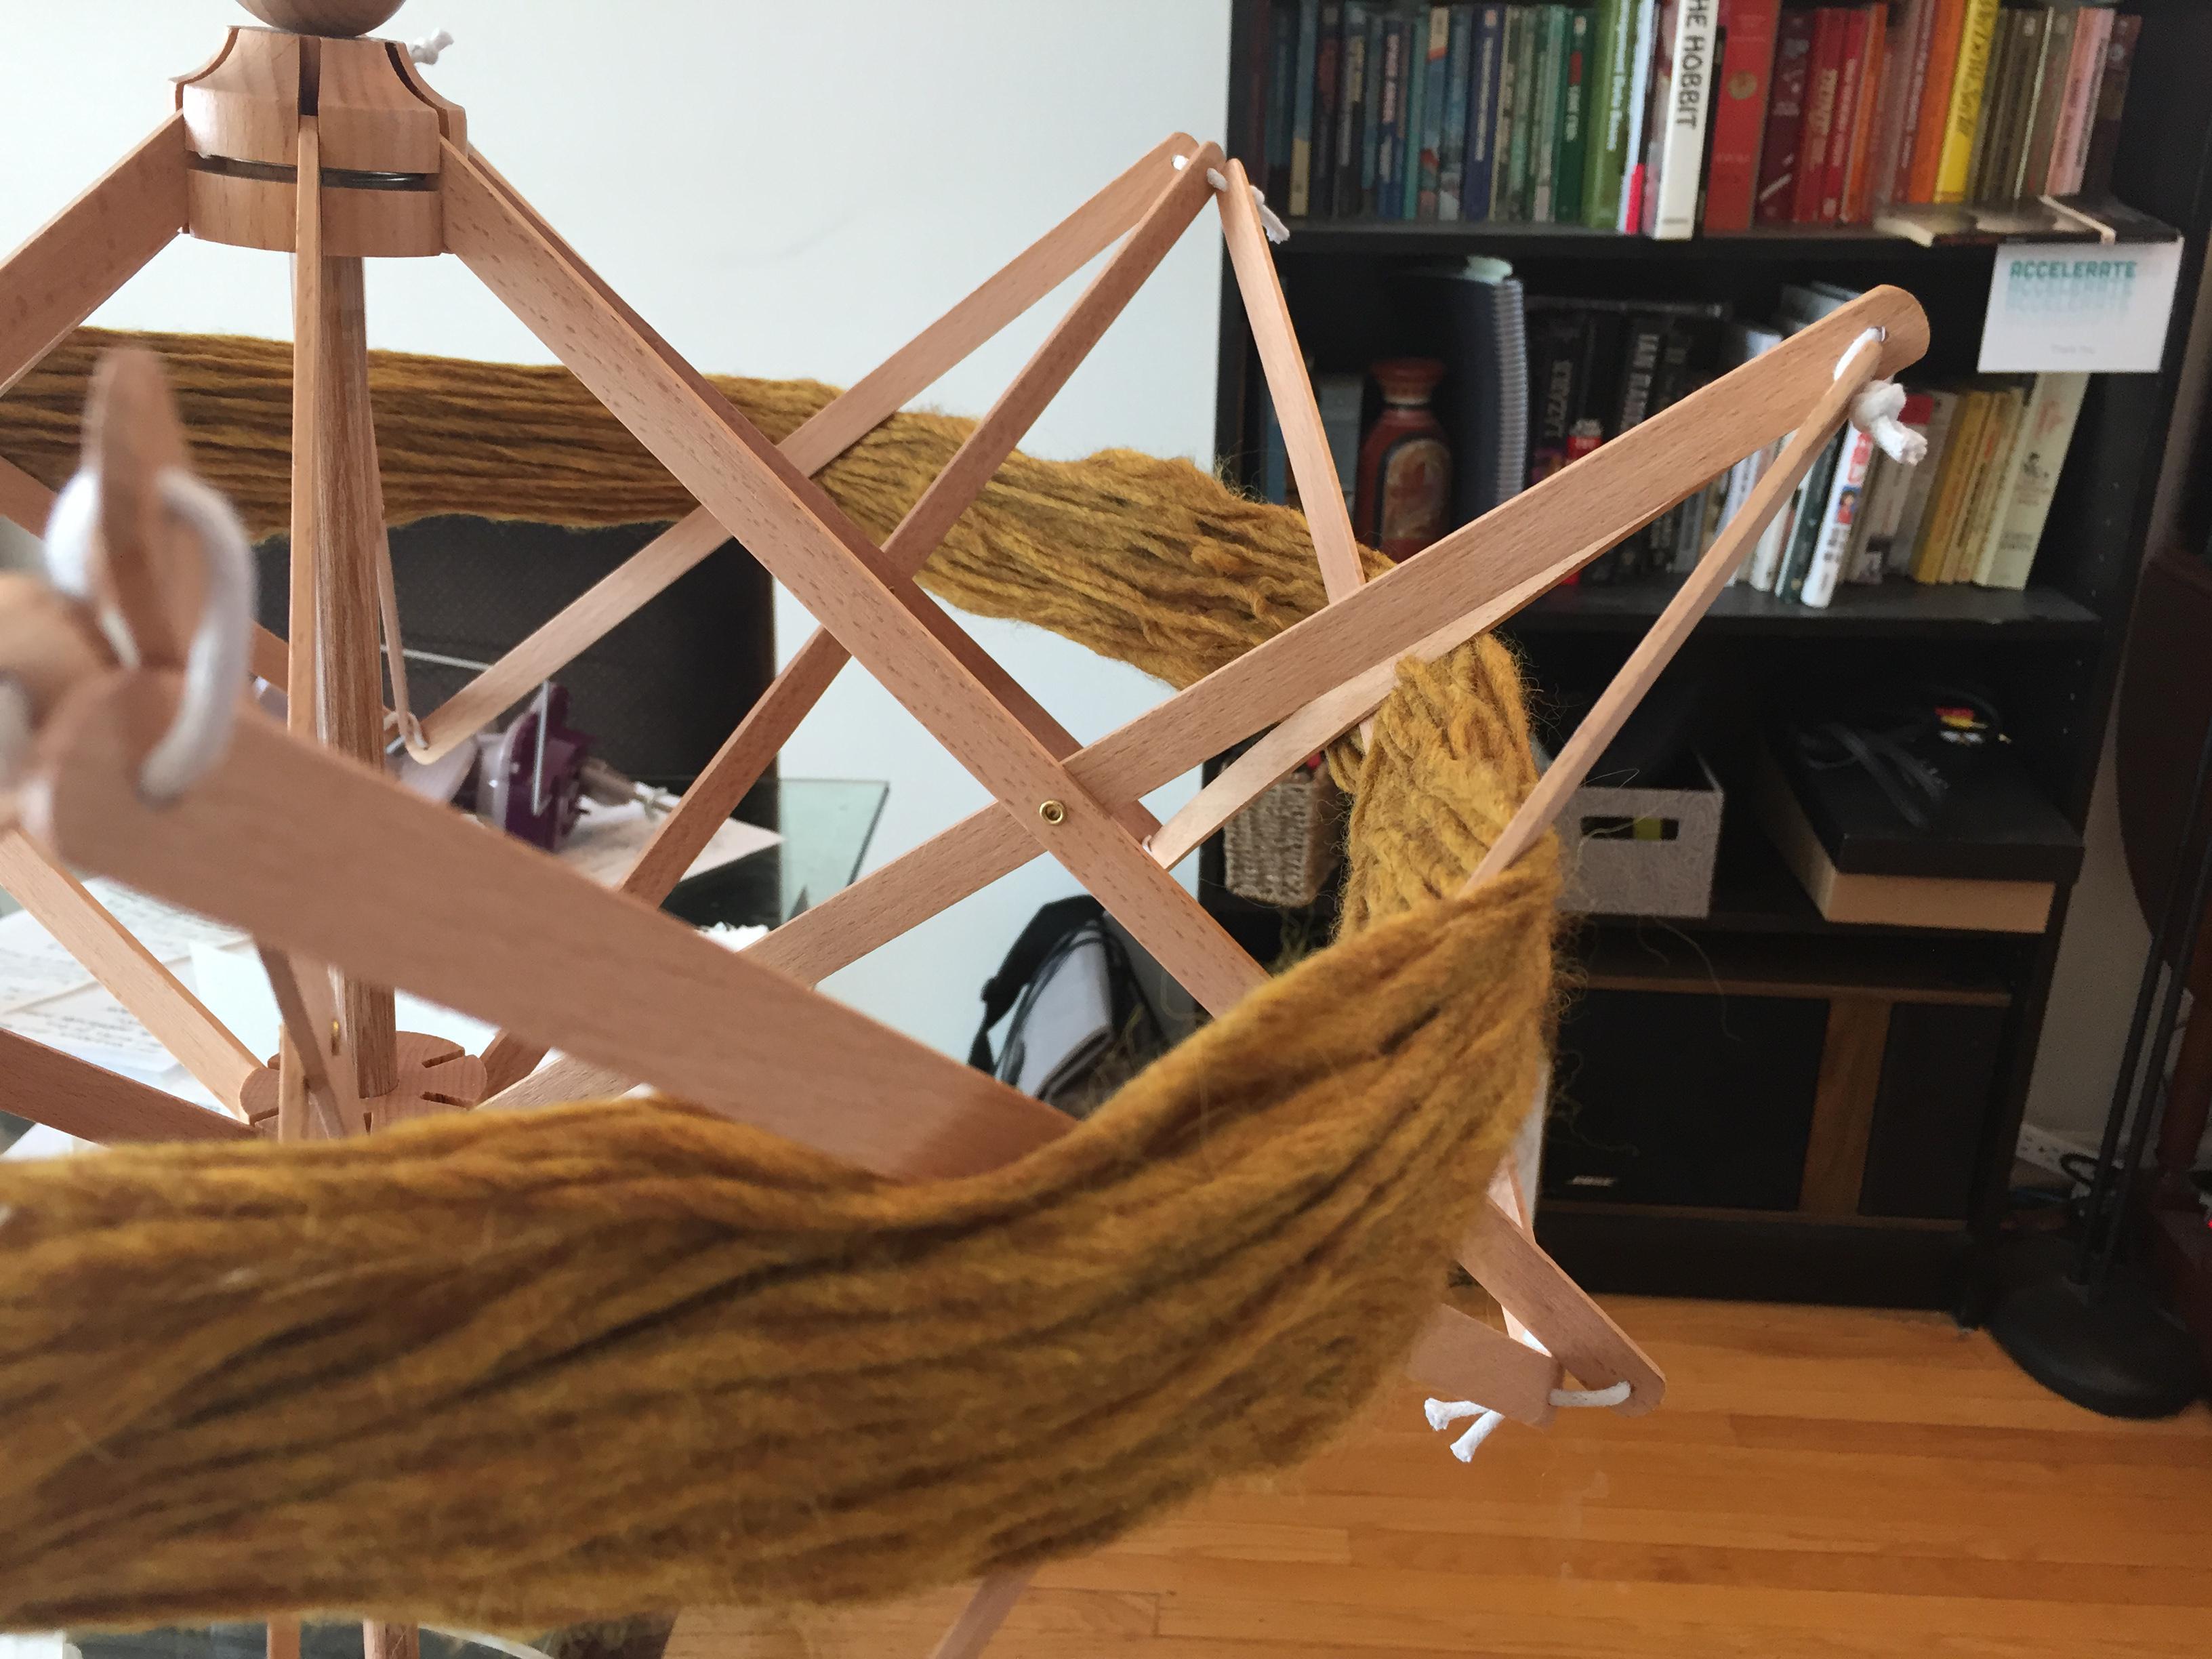
The pattern I ended up using was a free japanese pattern. I wasn't quite sure how to read the ribbing section, so I used a slip-stick to give it a slightly elongated stitch to match the faux cabling.

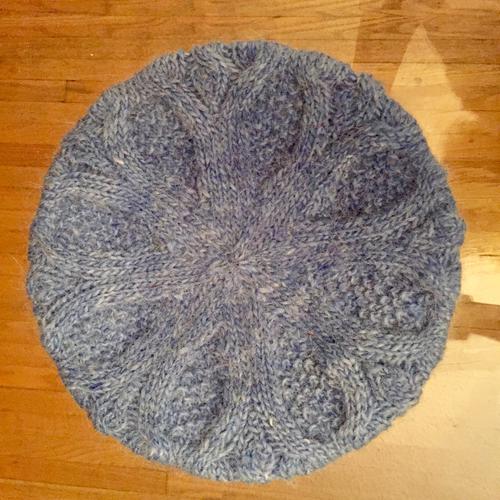
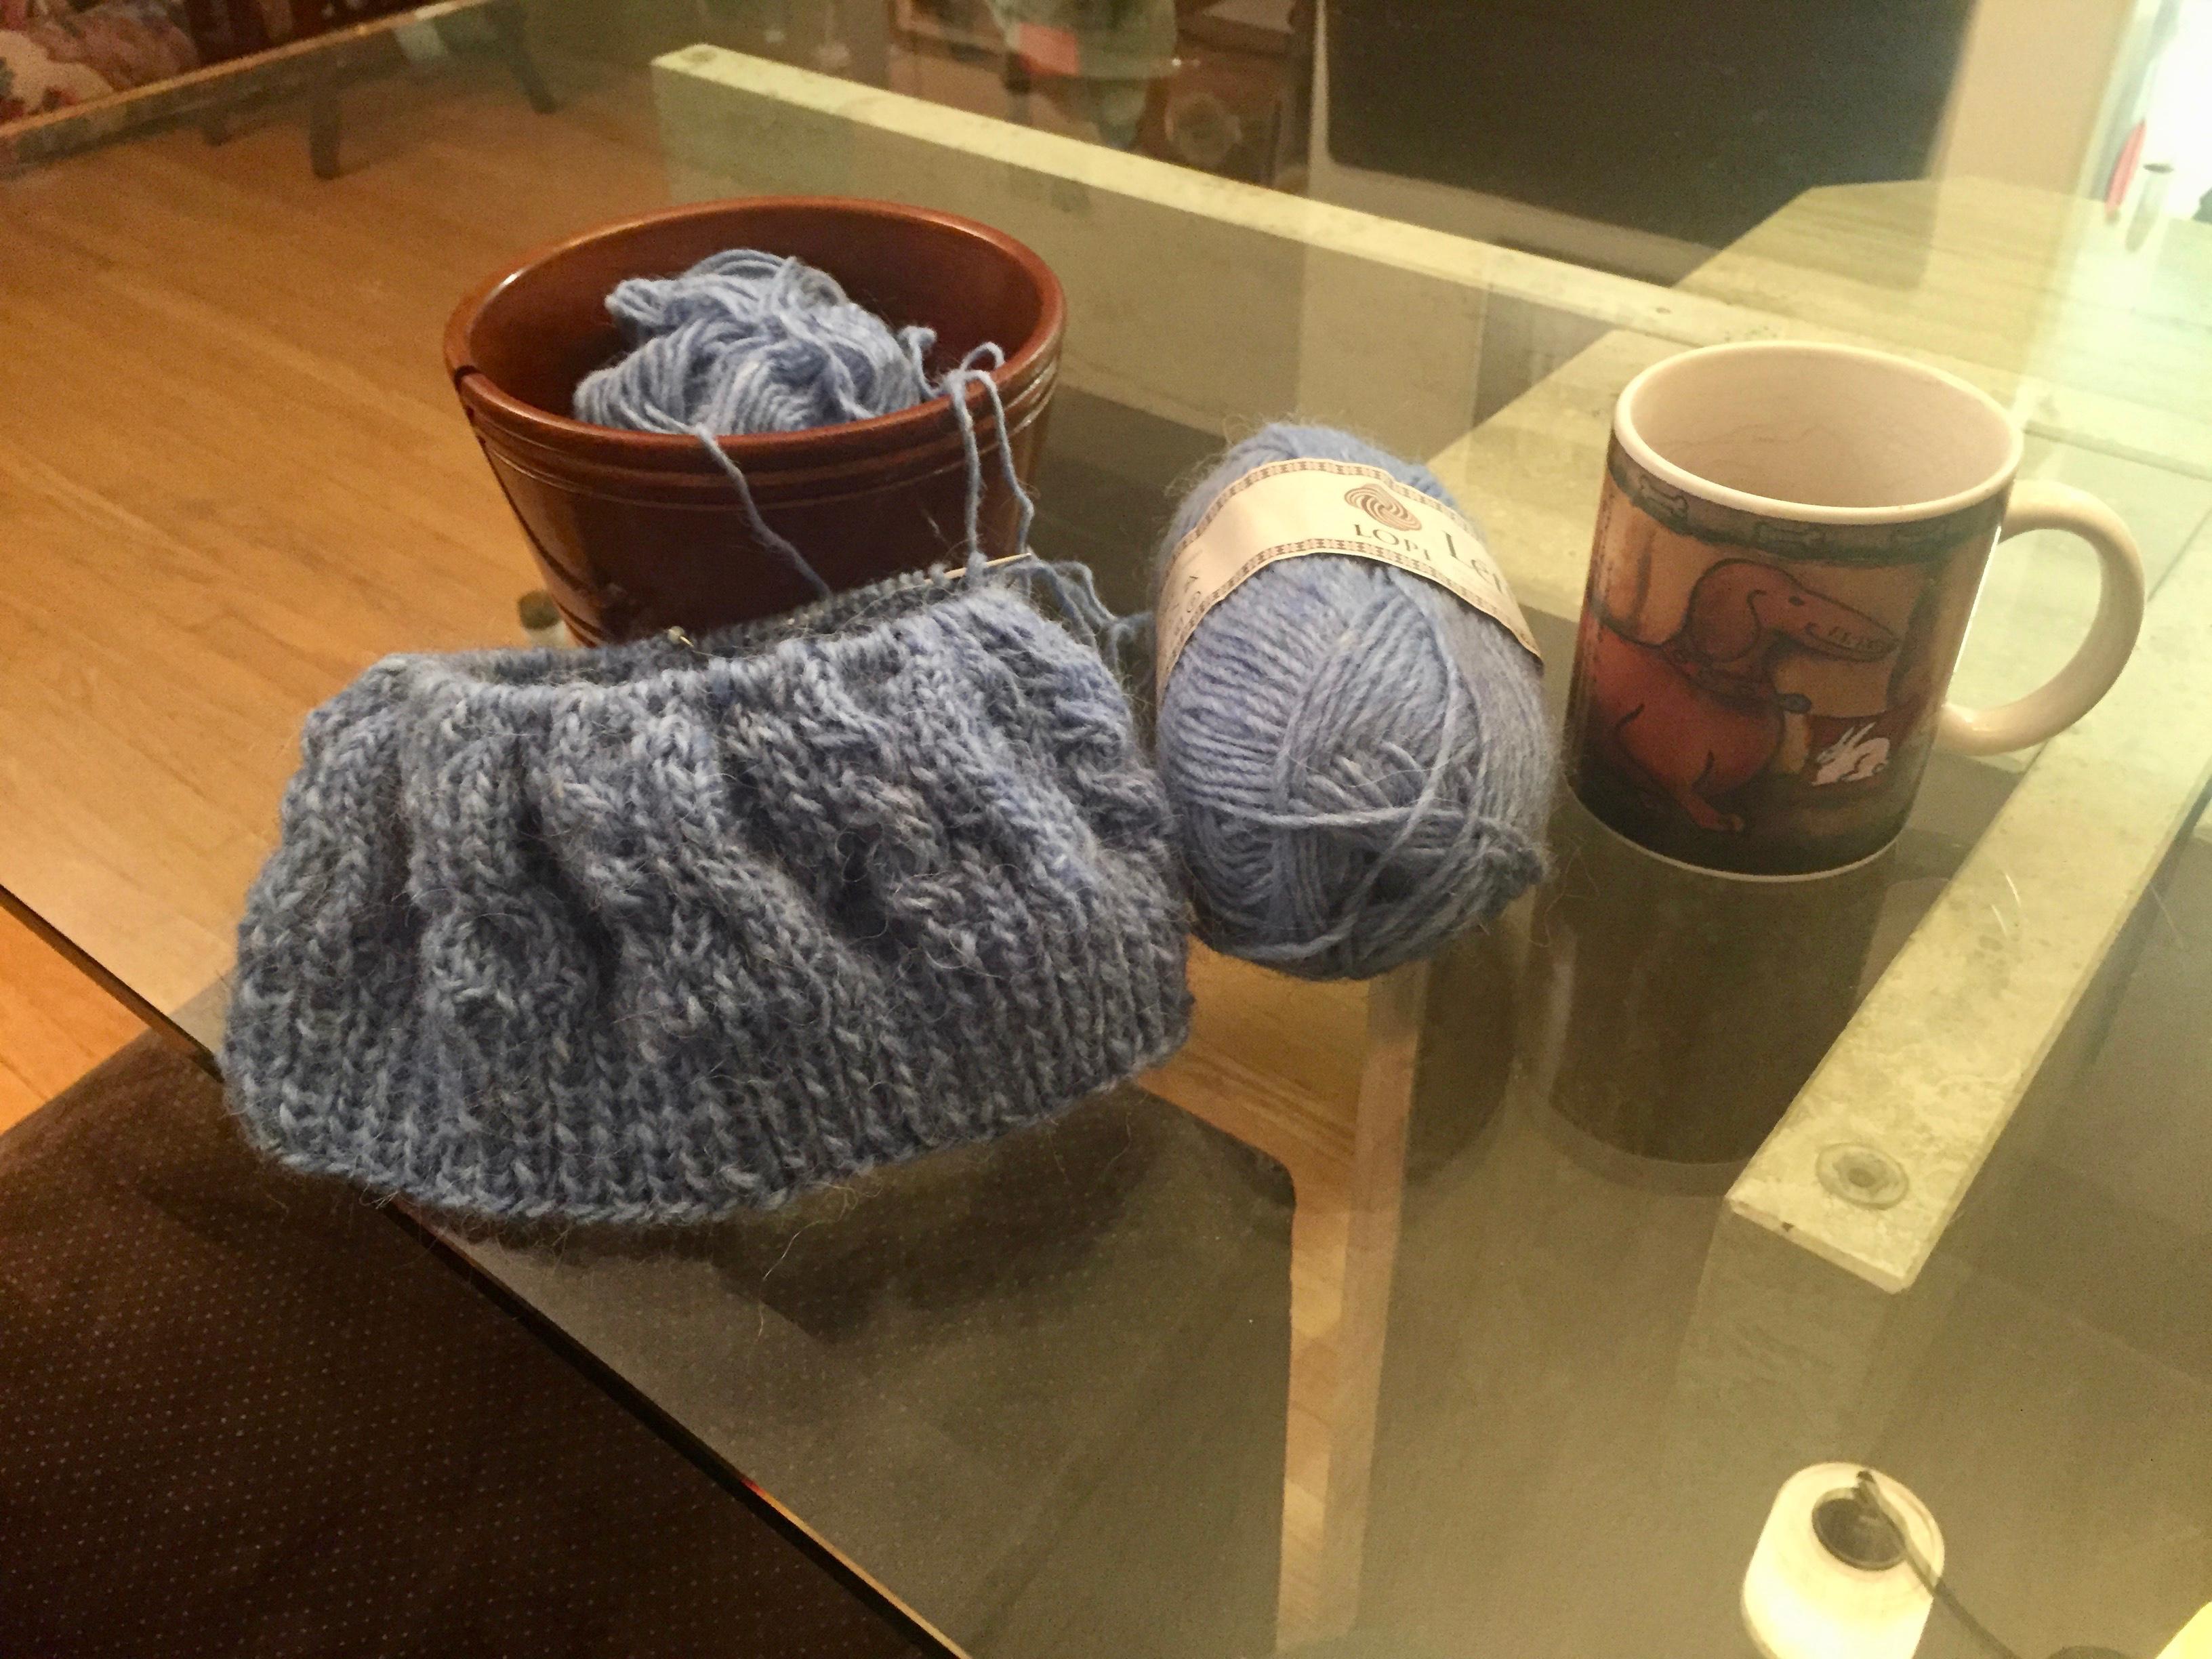
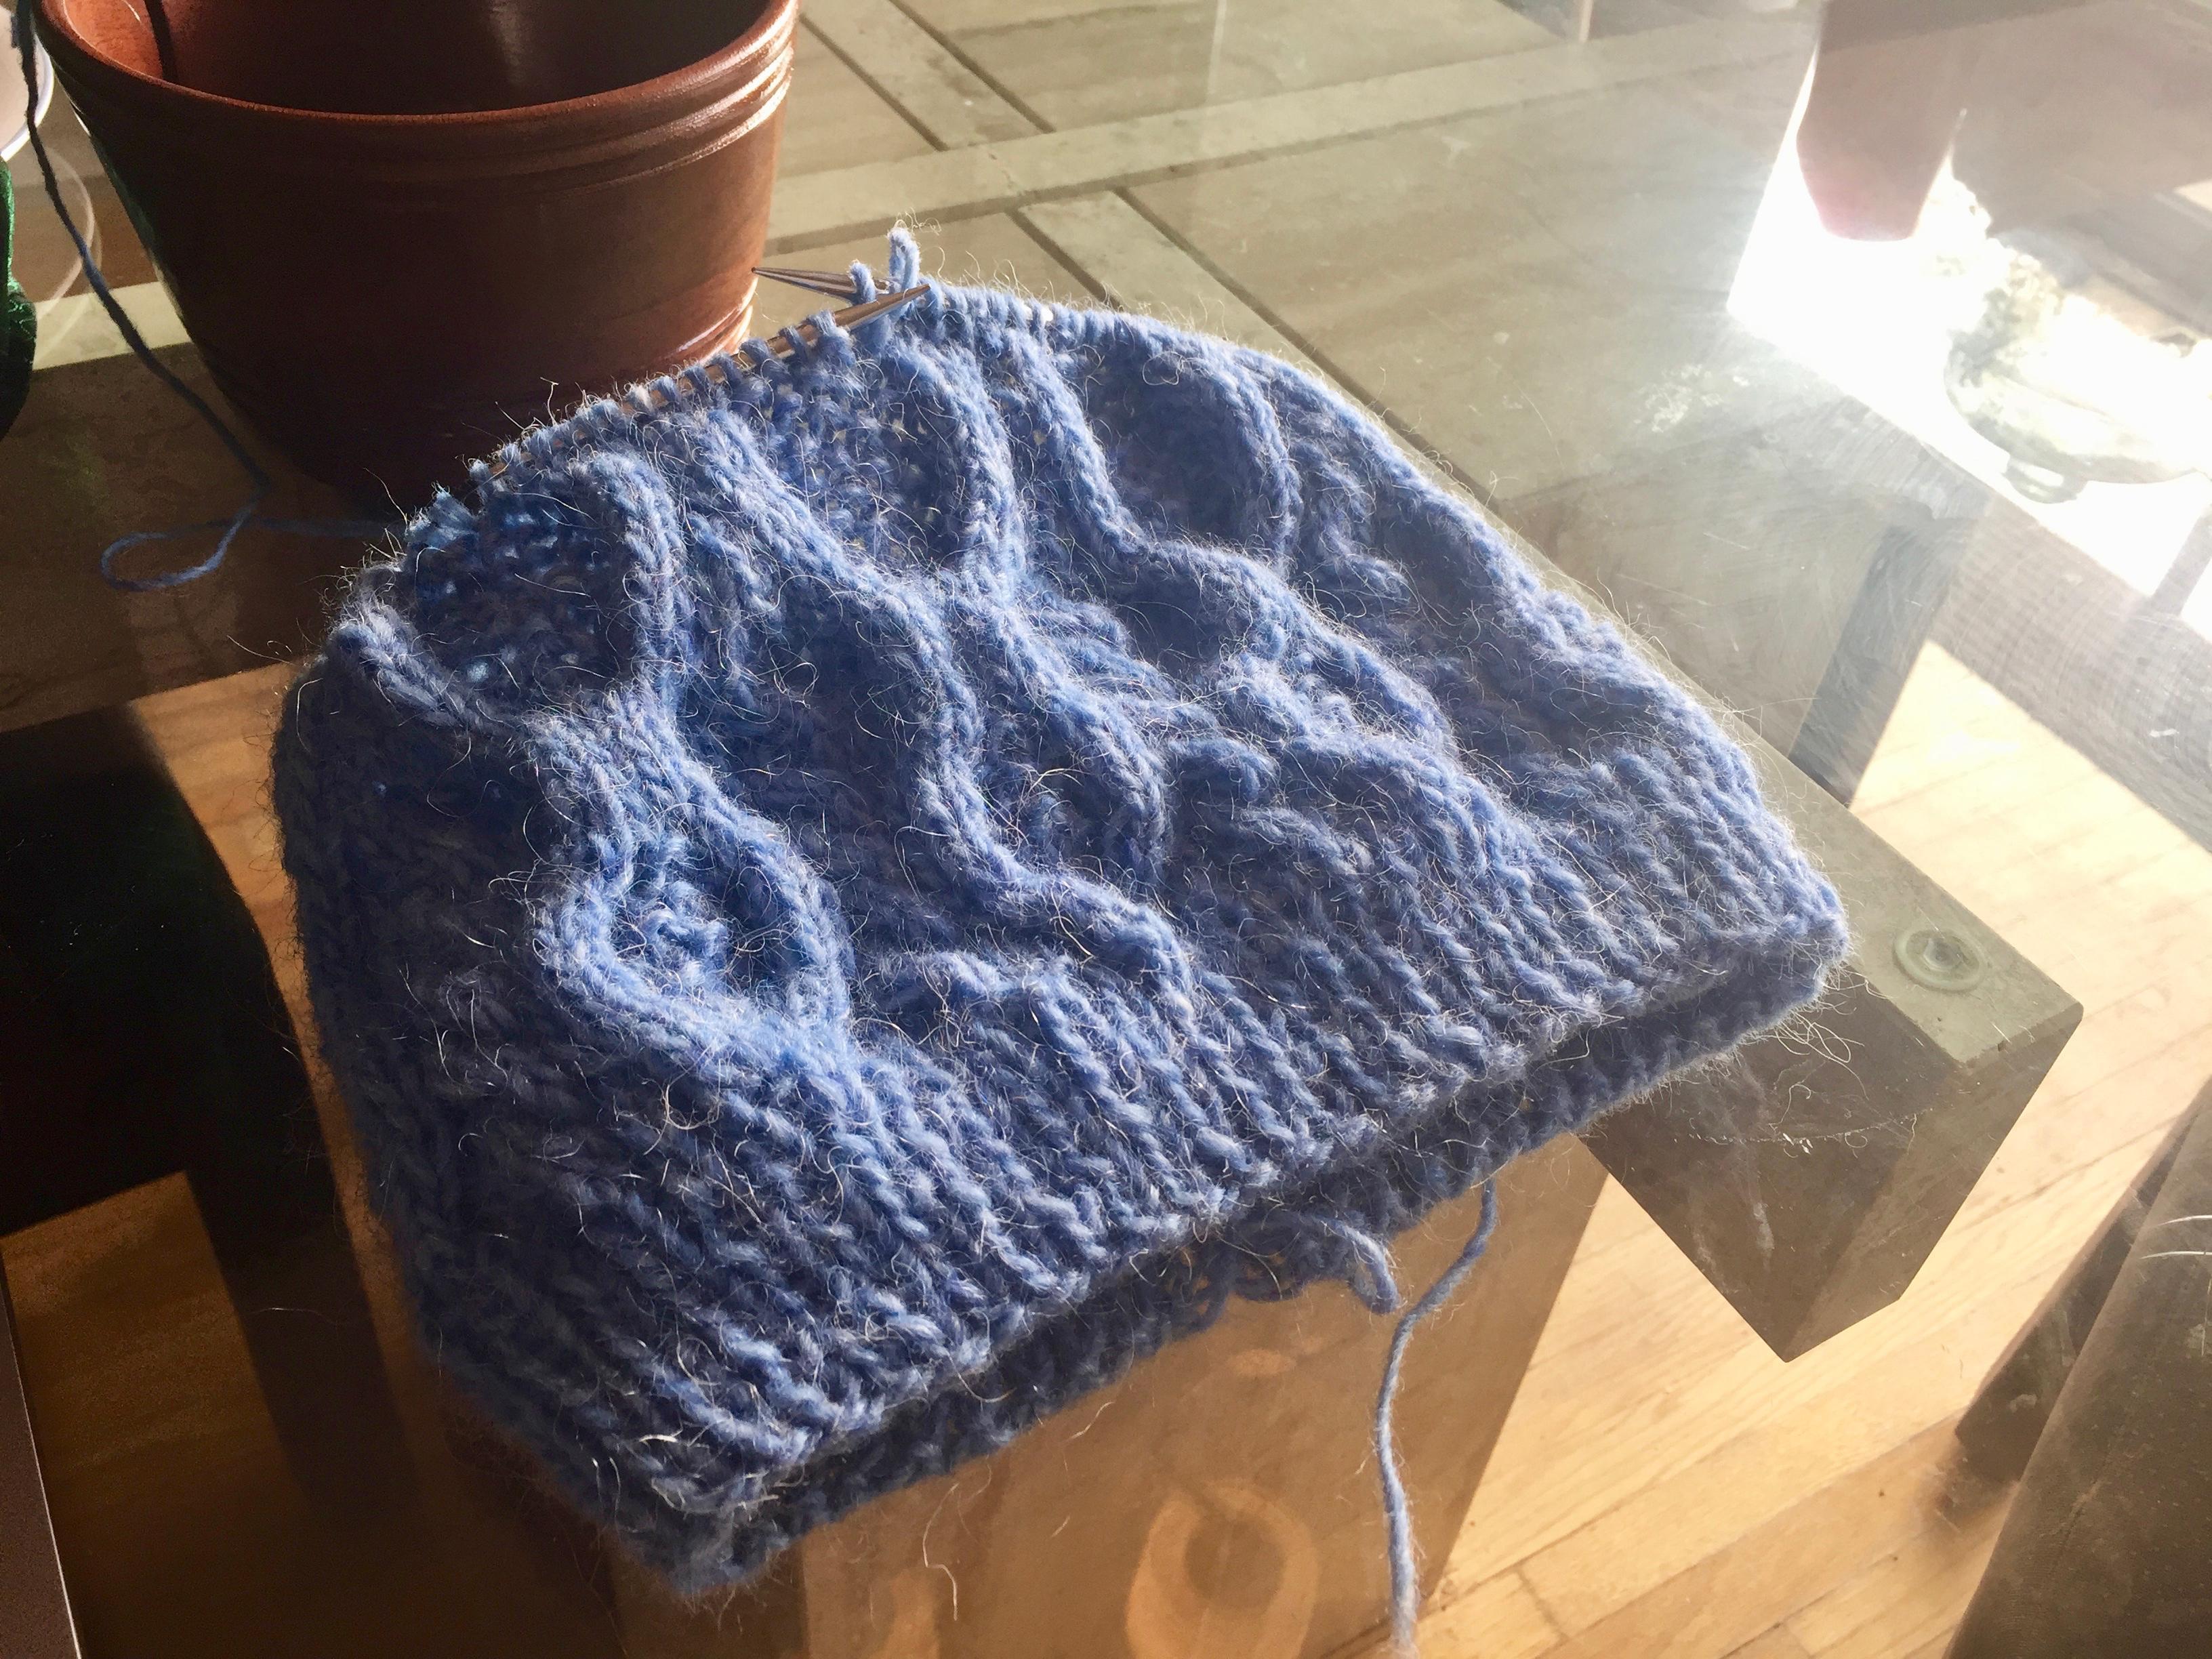
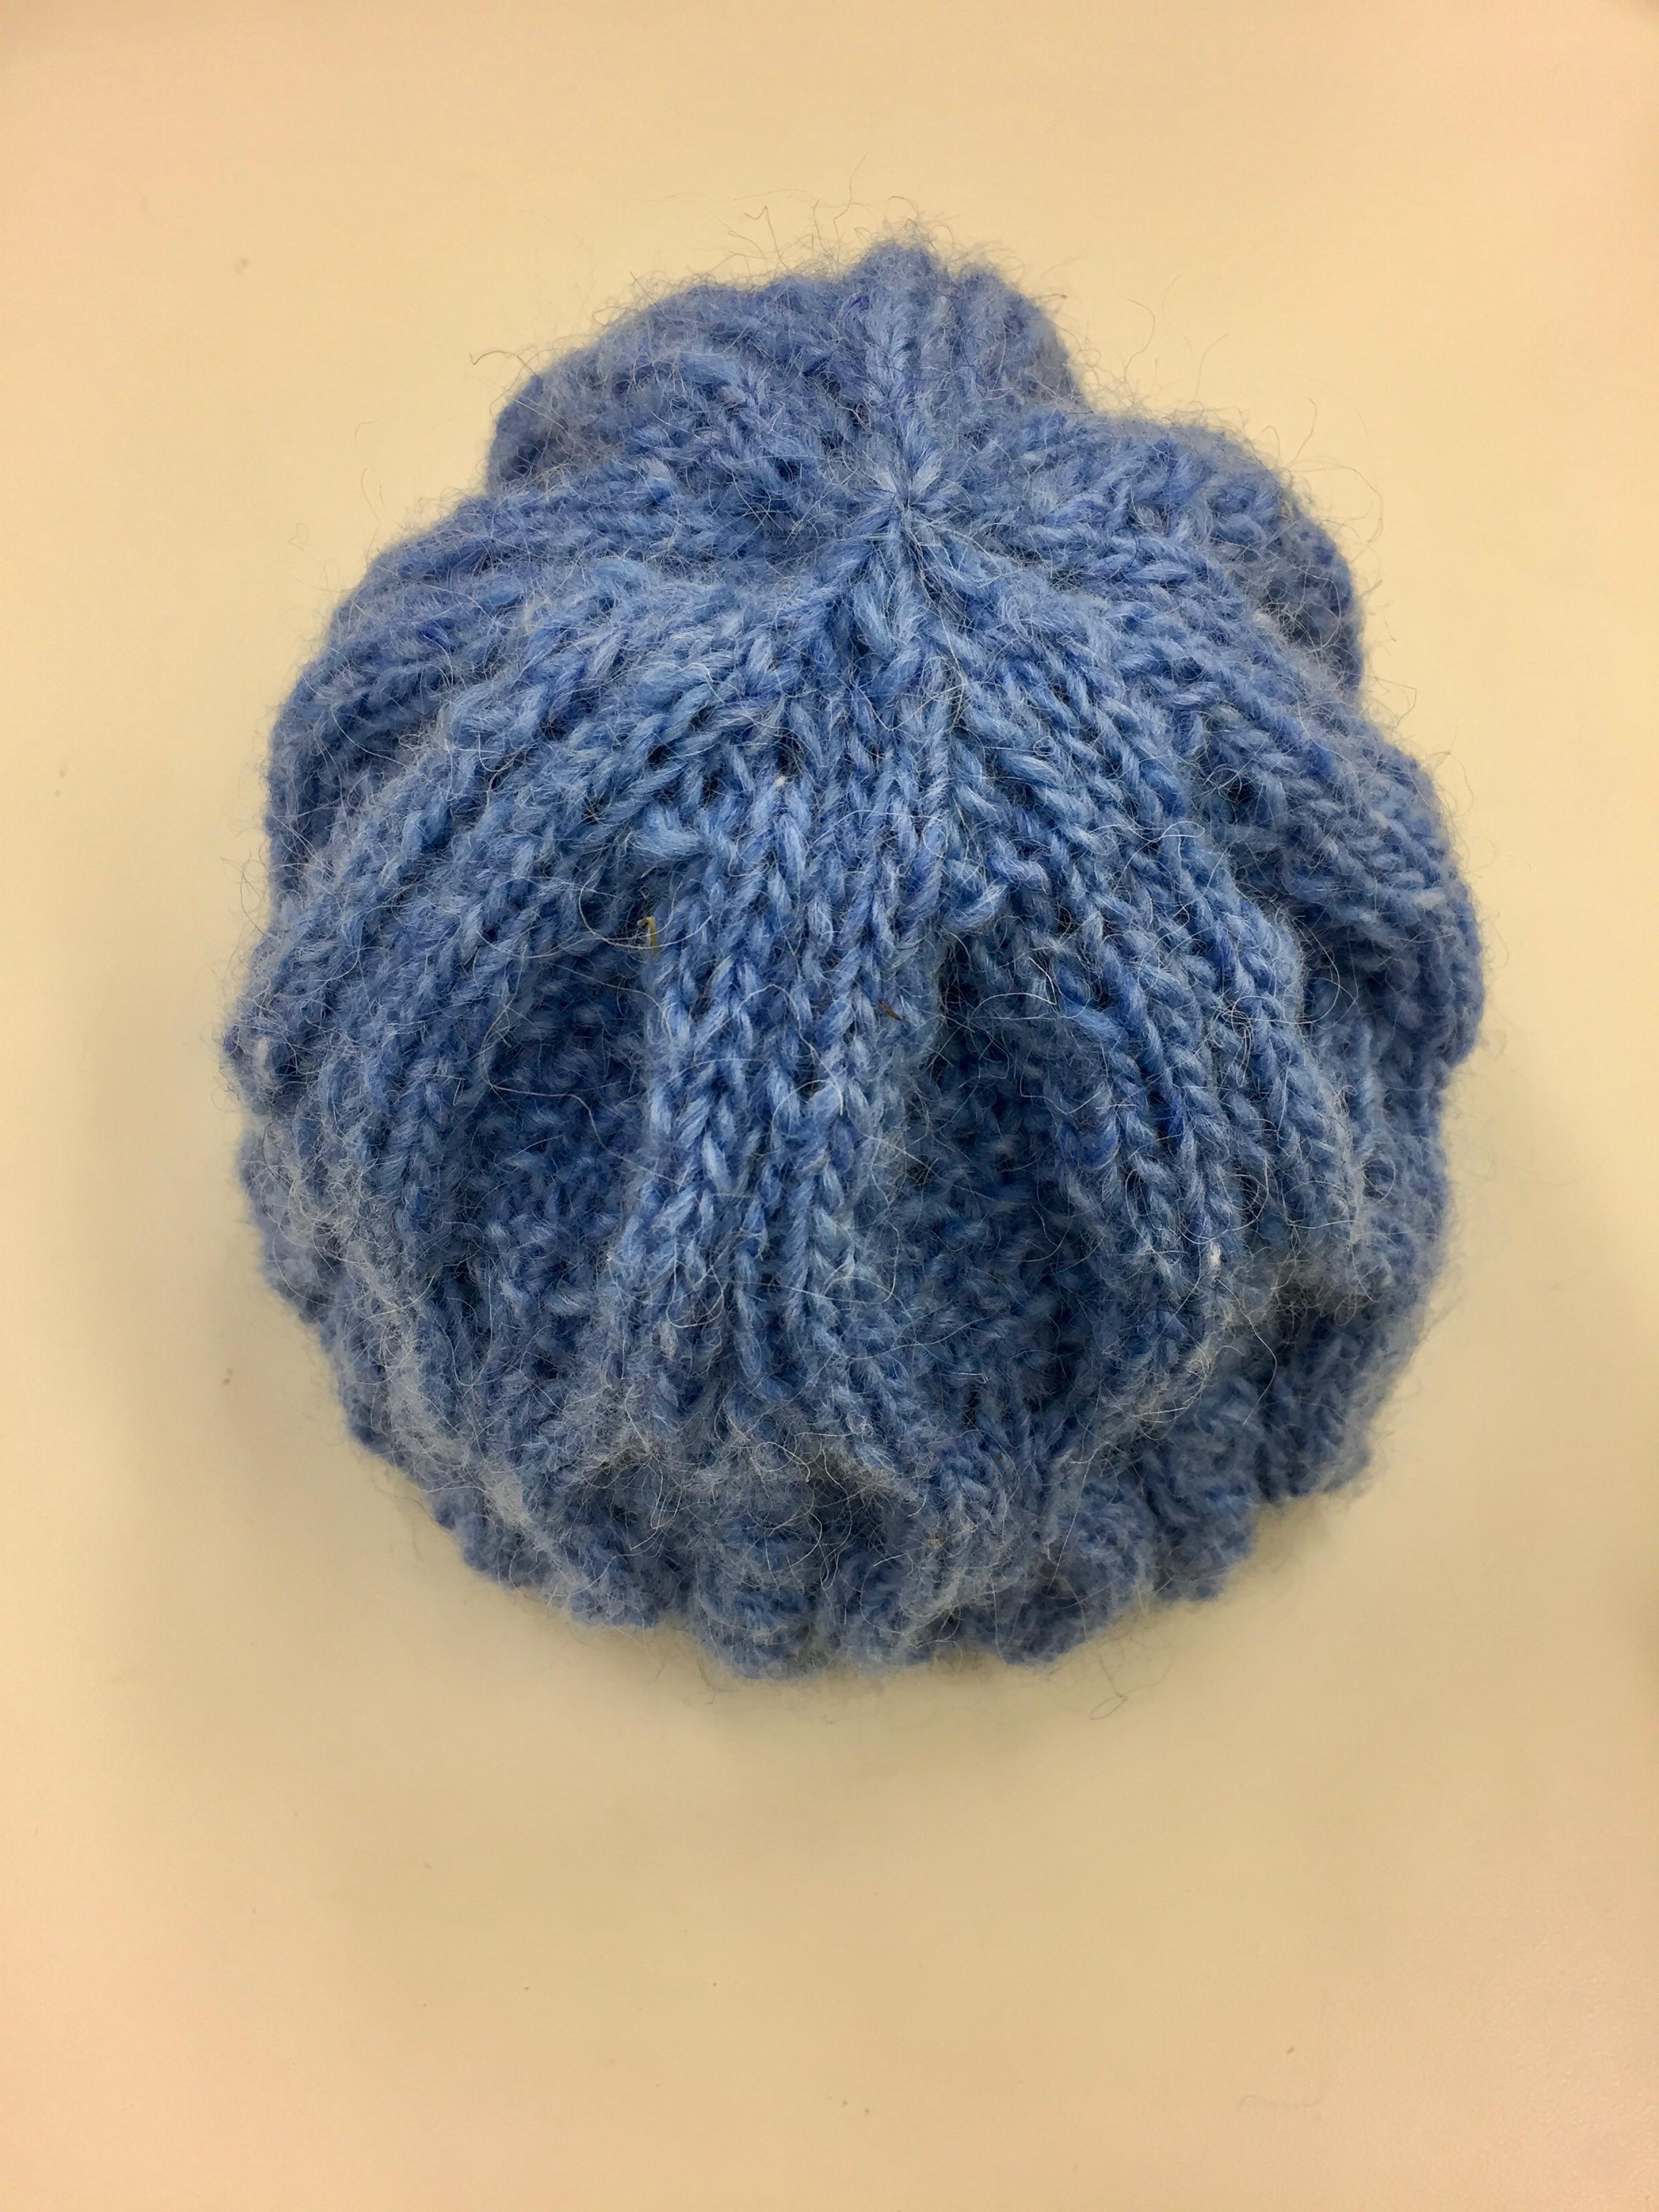
My aunt took me out to Stoney Plain to hit up Jo's Yarn Garden: one of the best yarn stores in Alberta. As a thank-you I decided to make her a cabled tam.
I used some ice-blue yarn with a white heather that my cousin got for me from Iceland. I was looking for something simple, but with cabling to add some visual interest. I opted for the Bramble Beret, which felt appropriately Scottish.

I knit a toque because spring wouldn’t come 🌱
I knit a toque because spring wouldn’t come 🌱
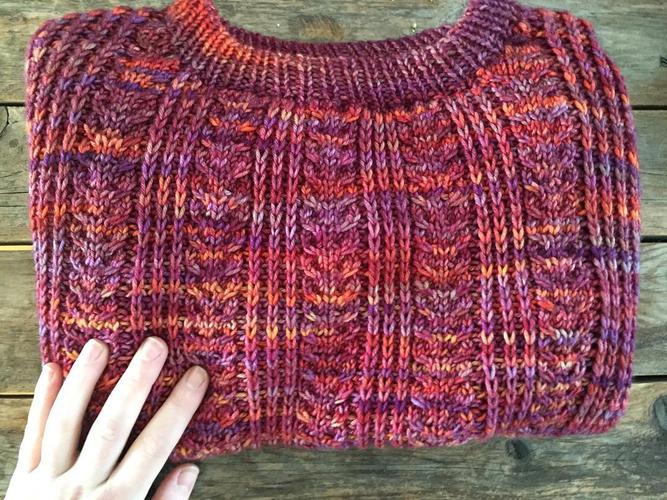
All done. Finished just in time for some spring strolls. 🍃 . . . #diy #knittersofinstagram #knitting #yarn #craft #fashion #diyfashion #sweaterweather
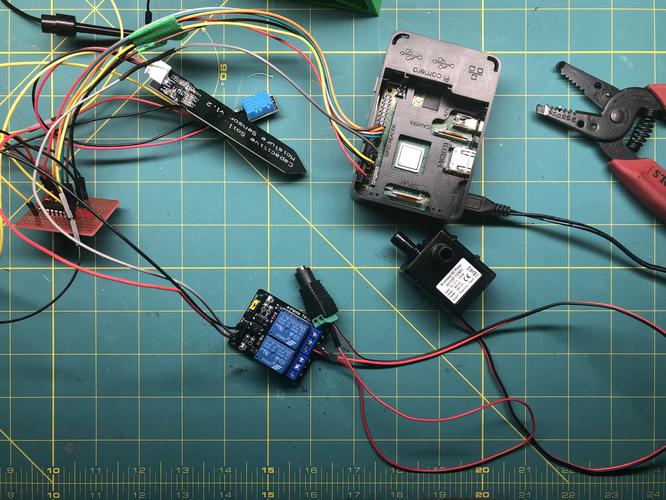
building a robot kit